Easy Classic Scone Recipe: A Cozy Baking Tradition
When it comes to comfort food, nothing beats a warm scone fresh from the oven, especially when it’s slathered in butter or topped with clotted cream and jam. There’s just something inherently cozy about baking scones. For me, the memory of my first attempt at making them evokes an amusing blend of pride and absolute chaos. Picture this: a kitchen filled with flour clouds, an angry cat diving into the pile of dough, and me, standing there, flour smeared on my face, questioning my life choices. Yeah, that was me!
It was a rainy afternoon, the sort that begs for a steaming cup of tea, a baked good, and a good book. I wanted to create something reminiscent of my grandmother’s kitchen, where the intoxicating smell of baking would draw me in from outside. As I pulled out the mixing bowl and began gathering ingredients, my heart danced between anticipation and that familiar touch of panic. Would my scones turn out as fluffy and perfectly golden as hers? Or was I destined for a dense, biscuit-like disappointment?
Now, several batches later (with only a few more kitchen disasters along the way), I’ve nailed down a Classic Scone Recipe that not only yields perfectly fluffy and buttery scones but also brings back all those warm memories. This recipe feels like a hug for your taste buds—honestly, it’s homey and comforting all at once, no matter what kind of day you’re having.
Why You’ll Love This Recipe
-
Easy On Your Time: With simple steps and just a few ingredients, you can whip these up in under 30 minutes. Perfect for those quick family meals.
-
No Fancy Equipment Needed: If you can wield a mixing bowl and spatula, you’re good to go. Say goodbye to complicated gadgets—this is as straightforward as it gets!
-
Versatile and Adaptable: Add in whatever you’re craving—chocolate chips, dried fruit, or even nuts. Seriously, tailor it to your tastes and whims.
-
Leftover Magic: They taste amazing the next day too (if there are any left!). Just pop them in the oven to reheat and you’ve got a delicious breakfast in minutes.
-
Picky Eater Approved: Kids (and adults) go wild for these babies. I mean, what’s not to love about a buttery scone with a hint of sweetness?
-
Perfect for Any Occasion: Whether it’s a cozy brunch or an afternoon tea, these scones fit right in. Plus, they pair beautifully with a full English breakfast or any lovely cup of tea!
What Makes This Recipe Special?
The beauty of this Classic Scone Recipe isn’t just in how it tastes; it’s in the memories that come along with it. I especially love that it’s a forgiving recipe. I’ve experimented with different flavorings over the years—lavender, lemon zest, and even a spicy hint of cardamom. Each time, the scones turn out beautifully, reminding me how the kitchen is all about exploration and fun.
And let’s not skip the feather-light texture, thanks to the well-cubed cold butter that creates those heavenly flaky layers. Wickedly rich, buttery goodness is what makes every bite blissful. You know that sound of crusty scones breaking apart? It’s like music to my ears!
Ingredients
-
2 cups all-purpose flour: All-purpose flour is the backbone of this recipe. It provides the right amount of structure while keeping the scones tender.
-
1/4 cup granulated sugar: This adds just the right touch of sweetness without overwhelming the buttery flavor.
-
1 tablespoon baking powder: This is your magical ingredient that helps the scones rise—don’t skimp on it!
-
1/2 teaspoon salt: A pinch of salt balances out the sweetness and enhances all the flavors.
-
1/2 cup (1 stick) cold unsalted butter, cut into small cubes: Essential for that flaky texture! Make sure it’s super cold—don’t let it soften!
-
1/2 cup heavy cream or buttermilk (plus more for brushing the tops): Cream provides richness, and buttermilk adds fascinating tanginess. You choose!
-
1 large egg: It helps bind everything together and adds a lovely richness.
-
1 teaspoon vanilla extract (optional): A little kick of flavor, but you can totally skip it if you want a classic taste.
-
Optional mix-ins (1/2 cup of dried fruit, chocolate chips, or nuts): Feel free to get creative!
Pro Tips:
- Make sure your butter is icy cold when you cut it into the flour. Warm butter = sad, greasy scones.
- If using add-ins, toss them in a bit of flour before mixing into the wet ingredients. This helps them distribute evenly.
How to Make It Step-by-Step
Grab your apron and let’s dive into the delightful chaos that is making classic scones!
Step 1: Preheat and Prep
First off, preheat your oven to 400°F (200°C). I like to line my baking sheet with parchment paper for easy cleanup. Honestly, it saves the headache of scrubbing off any burnt bits later!
Step 2: The Dry Mix
In a large bowl, whisk together the flour, sugar, baking powder, and salt until combined. This is your dry mixture and is crucial for scone success. If you want to feel fancy, sift it, but whisking works just fine.
Okay, ready? Let’s get our hands messy…
Step 3: Cut in the Butter
Now, toss those cold butter cubes into the flour mixture. Using a pastry cutter—or your fingers if you’re feeling brave—work the butter in until the mixture resembles coarse crumbs. You know those pea-sized pieces I mentioned? They’re your friends! This part is super satisfying.
As you mix, you’ll feel the cold from the butter. The smell might start to remind you of a bakery—but resist the urge to eat the raw crumble!
Step 4: The Wet Mix
In a separate bowl, whisk together your cream (or buttermilk), egg, and vanilla extract (if using). The mixture should be a bit thick but not chunky.
Step 5: Combine
Okay, slowly pour this magical wet mixture into your dry ingredients. Gently stir everything together using a spatula or wooden spoon. Be gentle; you want to avoid overworking the dough!
If you’re adding goodies like chocolate chips or berries, toss them in now. Keep folding until the dough just begins to come together. It might look a bit shaggy, but that’s okay—embrace the mess!
Step 6: Form the Scones
Turn the dough out onto a lightly floured surface. Pat it into a generous 1-inch thick disc. Then, you can cut it into 8 wedges, or I like using a round cookie cutter for traditional shapes. It’s like scone shapes add a touch of class, you know? Just promise me you won’t judge my uneven cutting!
Step 7: Brush and Bake
Transfer your scones to the lined baking sheet. Brush the tops with a sprinkle of cream to help them brown beautifully. Pop them in the oven and bake for about 12-15 minutes until they’re golden around the edges.
The scent will fill your home like an enchanted bakery; I’m telling you!
Step 8: Cool and Serve
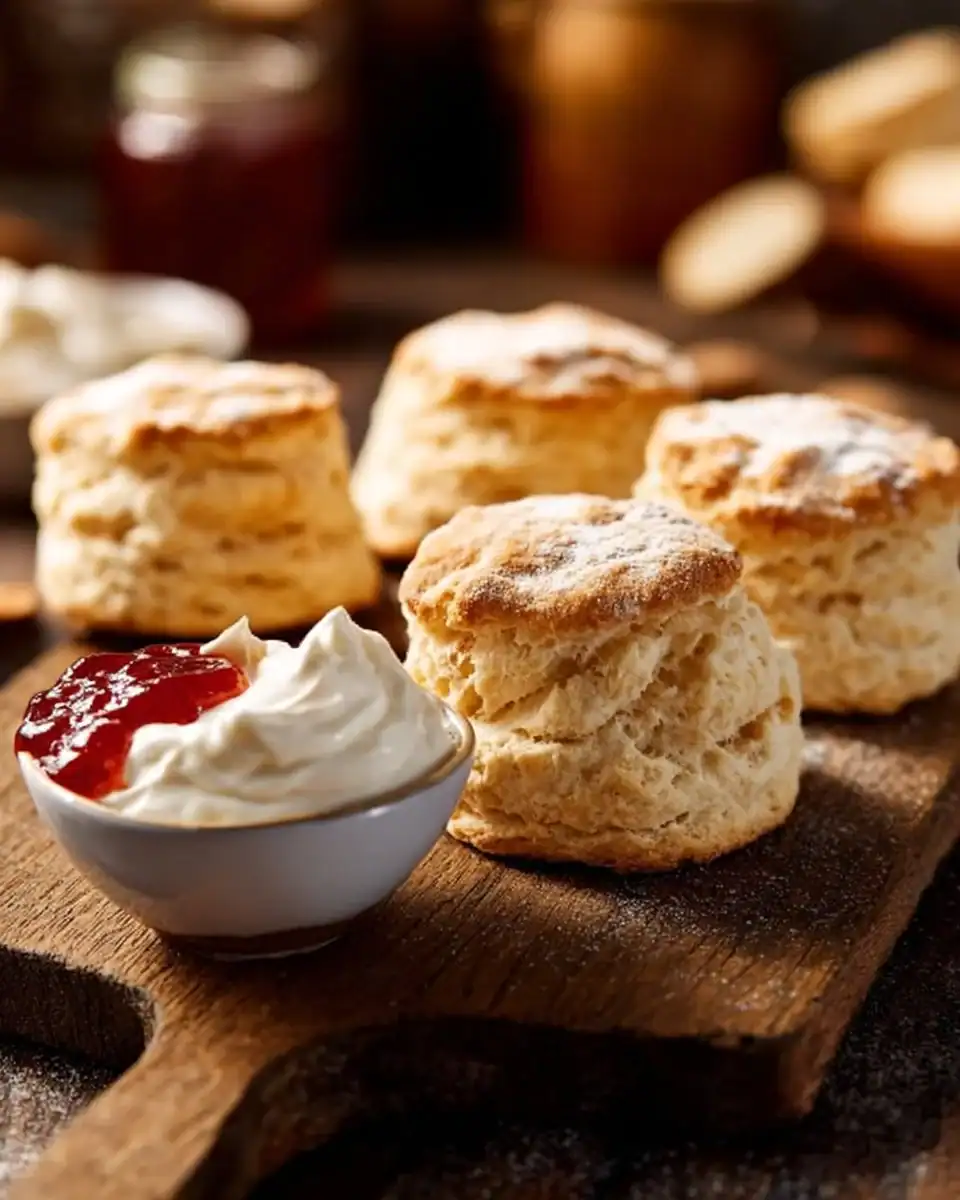
Once they’re out of the oven, let them cool on the baking sheet for a few minutes. Then, enjoy them with clotted cream, jam, or plain butter if you’re feeling simplistic. Life is all about those choices, right?
The first bite? Pure bliss, my friend. The flaky layers breaking apart, the rich buttery flavor—it’s an experience that’s almost too good to put into words!
Tips for Best Results
-
Cold Ingredients Are Key: Using very cold butter and cream will help you achieve that flaky texture you want in a scone.
-
Don’t Overmix: This will lead to tough scones. A little shagginess in the dough is perfectly fine!
-
Check Your Oven’s Temperature: Oven temps can vary. Keep an eye on your scones as they bake. When they look golden, they’re usually done.
Ingredient Substitutions & Variations
Here’s where you can let your imagination run wild:
-
Gluten-Free: Substitute a 1-to-1 gluten-free baking flour to make a gluten-free version. Just ensure your baking powder is also gluten-free!
-
Vegan: Swap in vegan butter and use a flaxseed egg (1 tablespoon of ground flax mixed with 2.5 tablespoons of water).
-
Flavor Twists: Add in a tablespoon of lemon zest or switch vanilla for almond extract. Spice lovers can throw in cinnamon too.
Serving Suggestions
Now for the fun part—pairing your delightful scones!
Enjoy them with a lovely cup of tea, perhaps a chai latte, or a refreshing iced coffee. These scones also pair beautifully with a fruit compote or a simple homemade jam. Picture this: you sink into your favorite chair, scone in hand, with your favorite rom-com playing in the background. Pure bliss!
How to Store and Reheat Leftovers
So, let’s be real—there may not be leftovers because they’re that good, but if there are, here’s what to do!
Store them in an airtight container at room temperature for 1-2 days. For longer storage, freeze them once they’ve cooled completely; they freeze beautifully!
To reheat, just pop them in a warm oven for about 5-10 minutes until they’re warm. And that buttery goodness always comes back!
Make-Ahead and Freezer Tips
You can prepare the dough ahead of time. Simply pattern the formed scones, freeze them on a baking sheet, and once frozen, transfer them to a sealable bag. When you have a craving, just pop them directly into the oven from frozen (add an extra few minutes to the baking time).
Common Mistakes to Avoid
-
Ignoring the Butter Temperature: Warm butter makes scones sad. Trust me on this one.
-
Overworking the Dough: This leads to tough scones, and nobody wants that soggy fate!
-
Not Preheating the Oven: A hot oven helps create that dreamy fluffy texture—don’t skip this step!
Frequently Asked Questions (FAQ)
Q: Can I make these scones without the egg?
A: Yes! Just substitute with 1 tablespoon of ground flaxseed mixed with 2.5 tablespoons of water for a vegan version.
Q: Can I use whole wheat flour?
A: Absolutely! Just know that your scones may be a bit denser; I’d recommend mixing half whole wheat with half all-purpose flour.
Q: How can I keep my scones from browning too quickly?
A: If you notice they’re browning too fast, you can tent them with foil during baking.
Cooking Tools You’ll Need
- Mixing bowls
- Whisk
- Pastry cutter (or your hands)
- Baking sheet
- Parchment paper
- Spatula or wooden spoon
- Rolling pin if needed (though not mandatory)
Final Thoughts
Baking this Classic Scone Recipe is more than just making a delicious treat; it’s about rekindling memories, savoring the moment, and finding joy in the little things. Each bite brings a comforting embrace, a delightful crunch, and warmth that hums right in your soul.
So, go ahead and dive into this lovely adventure of baking. I promise you—whether you enjoy them alone with a warm cup of tea or share them with loved ones during afternoon gatherings, these scones will take you on a cozy ride down memory lane.
If you enjoyed this recipe, don’t forget to save it on Pinterest or share it with a friend! Happy baking!

Classic Scones
Ingredients
Dry Ingredients
- 2 cups all-purpose flour The backbone of this recipe for structure.
- 1/4 cup granulated sugar Adds sweetness.
- 1 tablespoon baking powder Helps the scones rise.
- 1/2 teaspoon salt Balances sweetness.
Wet Ingredients
- 1/2 cup cold unsalted butter, cut into small cubes Essential for flaky texture.
- 1/2 cup heavy cream or buttermilk Provides richness.
- 1 large egg Binds the mixture.
- 1 teaspoon vanilla extract (optional) Adds flavor.
Optional Mix-Ins
- 1/2 cup dried fruit, chocolate chips, or nuts Feel free to get creative!
Instructions
Preparation
- Preheat your oven to 400°F (200°C) and line a baking sheet with parchment paper.
- In a large bowl, whisk together the flour, sugar, baking powder, and salt.
- Cut in the cold butter until the mixture resembles coarse crumbs.
- In a separate bowl, whisk together cream (or buttermilk), egg, and vanilla extract.
- Pour the wet mixture into the dry ingredients and stir until just combined.
- Turn the dough onto a lightly floured surface and pat into a 1-inch thick disc.
- Cut into 8 wedges or use a round cookie cutter.
- Transfer to the baking sheet and brush with additional cream.
- Bake for 12-15 minutes until golden.
- Cool on the baking sheet for a few minutes before serving.