Easy Ham and Cheese Sticks: A Warm Family Delight
I’ll admit it. The first time I tried to make Ham and Cheese Sticks, it was a hot mess in the kitchen. Picture me, a wide-eyed novice, wrestling with an unruly tube of crescent dough, flour dust flying everywhere like confetti. I had my heart set on creating something that would feel like a hug in food form, but it felt more like an epic kitchen disaster. The dough broke apart, ham slipped and slid across the countertop, and by the time I was done, I looked like I’d lost a battle to a baking sheet.
But there’s something magic about those crescent rolls, wrapped snugly around deli ham and gooey cheese, that calls out to me every time. Each bite is a reminder of cozy family nights, warm kitchens, and the delightful smell of butter baking in the oven. Fast forward to today, and I now whip up Ham and Cheese Sticks like a pro – well, mostly!
These sticks have become a beloved staple in my home. They’re perfect for an easy weeknight dinner, and they also check all the boxes for healthy comfort food – packed with protein and just chewy enough to satisfy. Honestly, if my kid asks for "something fun" for dinner, we’re definitely making these!
The key is in the simplicity. When you roll those cheese sticks in with the ham and dough, you don’t just create a meal; you craft magical little parcels of joy. Add a drizzle of melted butter mixed with Worcestershire and mustard for that extra flavor kick, and I promise you’ll be grinning like a Cheshire cat by the end of it.
So grab your crescent dough, and let’s dive into this mouthwatering recipe that has a special place in my heart. You might even find a quirky story or two along the way!
Why You’ll Love This Recipe
- Quick and Easy: This is one of those recipes that really gets you in and out of the kitchen in no time – perfect for when life is busy but you still want something delicious.
- Picky-Eater Approved: Kids and adults alike can’t resist the charm of gooey cheese and savory ham wrapped in buttery dough. Seriously, it’s like a mini party in your mouth!
- Leftover Magic: These stick wonders store beautifully. They make excellent snacks or lunches the next day – if there are any leftovers, that is!
- Impress Your Guests: Whip these up for friends or family gatherings, and watch them disappear in a flash. It’s like small bites of comfort food heaven.
- Customization Potential: Feel free to play around with different fillings or spices. I once tried adding some leftover roasted vegetables, and wow, that was a tasty surprise!
- Perfect for Meal Prep: If you’re planning for the week ahead, these sticks are a wonderful addition. With their high protein content, they keep you satisfied and full for longer.
What Makes This Recipe Special?
I love the nostalgia behind a dish like Ham and Cheese Sticks. It takes me back to family get-togethers, where laughter mixes with the smell of something delicious baking in the oven. Each stick is a reminder of how food can bring people together.
And let’s talk about those ingredients! The layers of flavor are incredible – the savory ham, the rich, melty cheese, and the delicate hints of Worcestershire and Dijon mustard blend together wonderfully. Sometimes, I sneak a few crushed red pepper flakes into the butter mix because, to be real, I love a little kick in my life!
With Ham and Cheese Sticks, you get a warm, personal touch wrapped up in something easy and delightful. It feels like bringing comfort food to the next level while keeping it simple.
Ingredients
-
2 tubes crescent dough sheets: This is the base of our dish. Pre-made crescent dough makes this recipe not only easy but also surprisingly quick. You could sub with puff pastry if you want a flakier texture, but keep an eye on the baking time!
-
1 pound deli-sliced ham: Choose a great-quality, flavorful ham. It’s the star that will really shine through in every bite. If you aren’t a ham fan or want a change, turkey or chicken slices make fantastic alternatives.
-
8 cheddar cheese sticks: These are the gooey joy within each bite! If you want to mix things up, try different cheeses or even plant-based cheese sticks for a vegan twist.
-
¼ cup melted butter: Because butter makes everything better, right? It adds a rich flavor, and the golden color it lends to the crescent dough is irresistible.
-
1 teaspoon Worcestershire sauce: Adds a savory depth that takes your flavors to the next level and balances the richness of the cheese and butter.
-
½ tablespoon Dijon mustard: Just enough tang to wake up your taste buds and elevate this dish from basic to glorious.
-
½ tablespoon dried minced onion or onion powder: This adds just the right amount of onion flavor without being overpowering. Don’t skip this — it adds a delightful touch.
-
½ tablespoon poppy seeds: These little seeds not only add texture but also a pop of visual appeal to your sticks. They’re optional, but who doesn’t like a little extra crunch?
When preparing this family-friendly dish, play around! If you don’t have poppy seeds, skip them; if you love a specific spice, throw it in! Cooking is about joy and discovery, so don’t stress too much about following the rules.
How to Make It Step-by-Step
Let’s get cooking! Honestly, this is where the magic really happens. You’re going to want to preheat your oven to 350°F (175°C) right away because, trust me, you want these babies in your mouth as soon as possible.
1. Prepare Your Baking Sheet
Grab a baking sheet, and grease it or line it with parchment paper. This is super important. I once forgot to grease the pan, and let’s just say I had a sticky situation on my hands – literally!
2. Roll Out Your Dough
Open your crescent dough tubes and roll out the sheets on a clean surface. You’ll want to cut each sheet into 4 equal pieces, which gives you 8 pieces in total. I suggest using a pizza cutter for this; it makes it so much easier and quicker.
3. Assemble
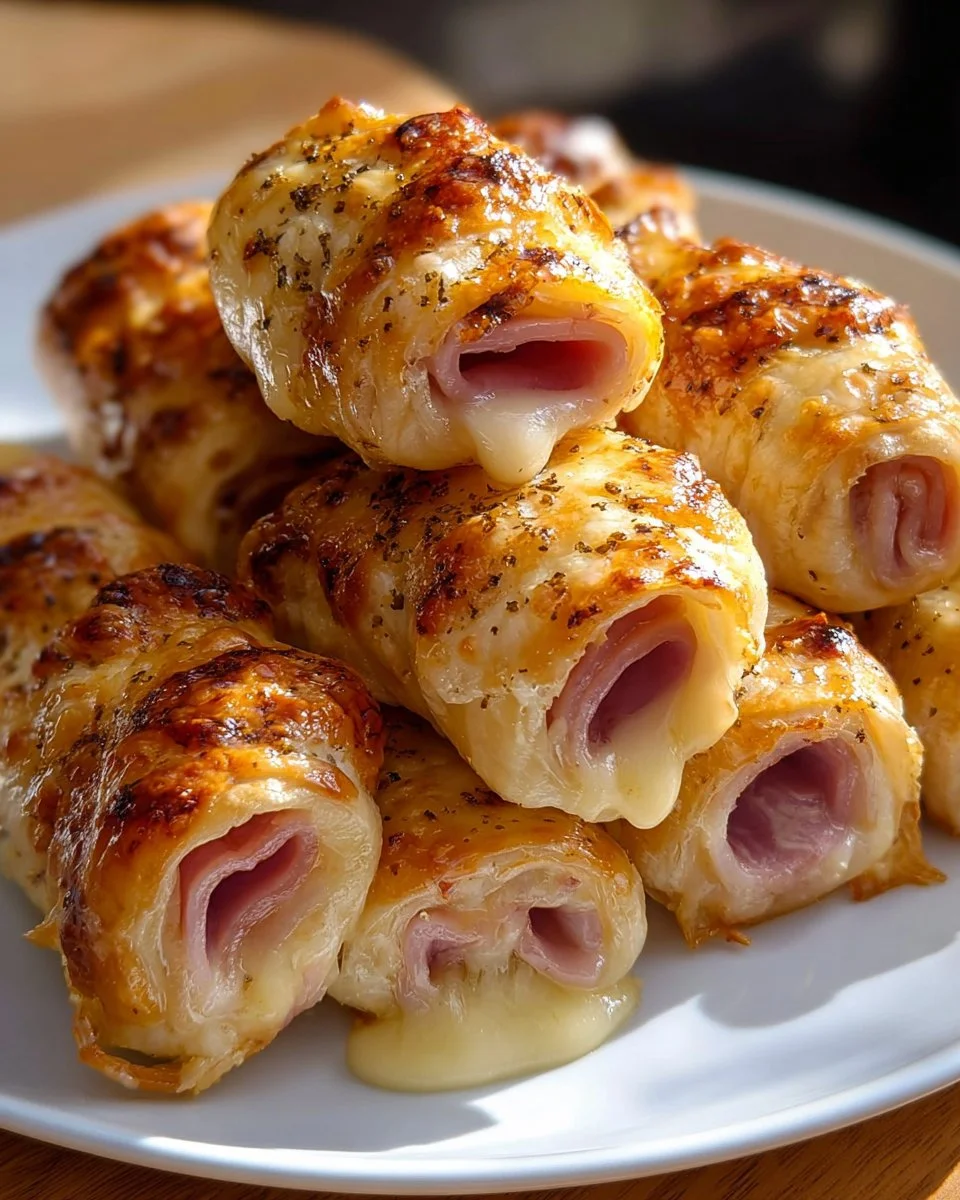
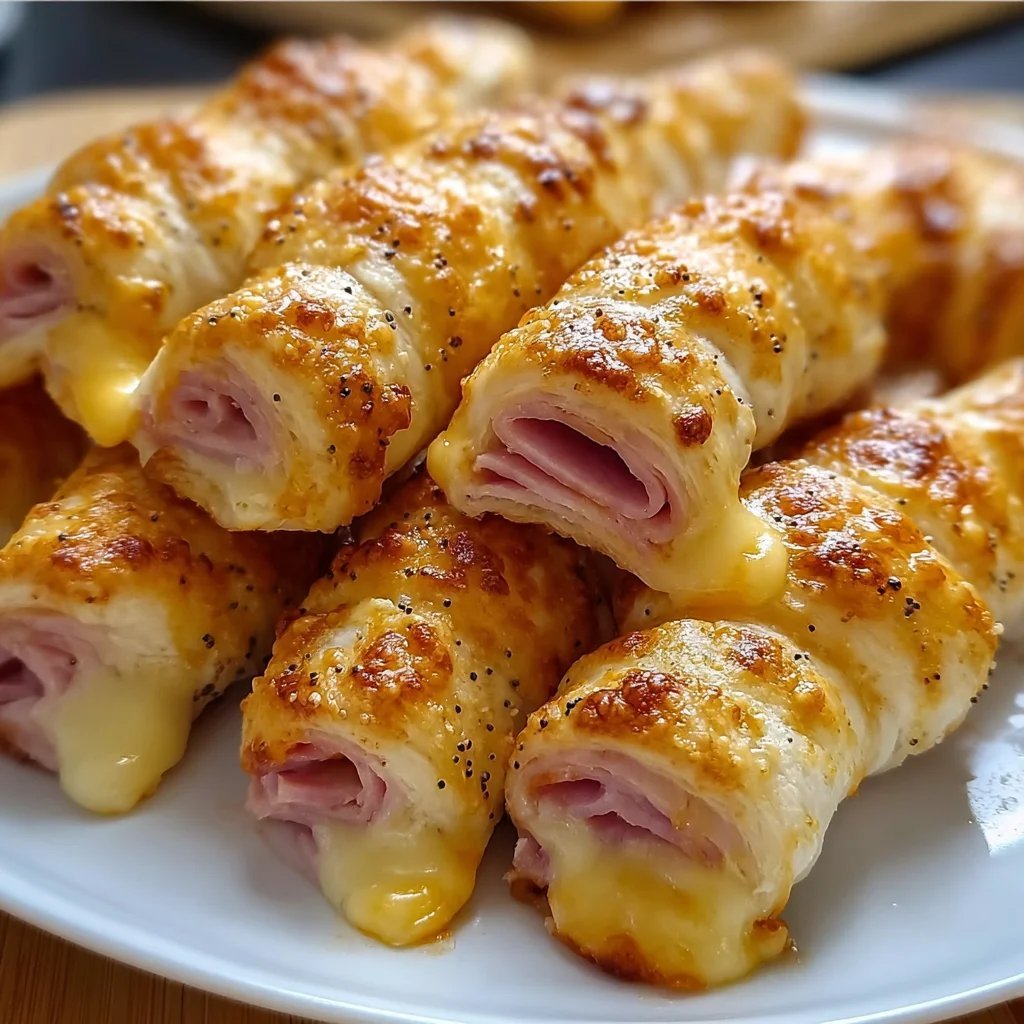
Now it gets exciting! Take a piece of dough, place a slice of ham on top, and then add a cheese stick. This step should feel therapeutic. Fold in the ends of each dough piece and then roll it up neatly to seal those flavors inside. This is a great moment to channel your inner pastry chef!
4. Arrange on the Baking Sheet
Place those assembled sticks onto your prepared baking sheet. At this point, they might look a little ragged, but oops, don’t worry! Just get them all snuggled together.
5. Make the Butter Mixture
In a small bowl, mix the melted butter, Worcestershire sauce, Dijon mustard, and onion. Give it a nice whisk until combined. You’ll start to smell that lovely, savory aroma. Don’t be afraid to sneak a taste – I might have done that once or twice!
6. Brush the Butter Mixture
Now, here’s where you’re truly going to elevate your sticks. Brush the butter mixture generously over each stick. It’ll help them crisp up beautifully and add such a glorious flavor to the buttery dough.
7. Sprinkle the Poppy Seeds
If you’re using poppy seeds, sprinkle them on top now. Feel free to get fancy with it – you’re a chef now!
8. Bake
Pop the baking sheet into the oven and let that golden magic happen! In 12-15 minutes, those sticks will be bubbling away and turning a lovely shade of golden brown. Trust me, the moment they come out of the oven, you’ll want to eat them all straight away.
9. Enjoy!
Allow them to cool for a couple of minutes because they’re going to be hot. Then take a bite and savor that cheesy, salty bliss. Honestly, every bite feels like comfort wrapped in a warm hug.
Tips for Best Results
-
Don’t rush the cooling: Let your Ham and Cheese Sticks cool slightly before diving in. This helps prevent burnt tongues and allows the flavors to marry beautifully.
-
Experiment with fillings: Try adding veggies like roasted peppers or spinach for an unexpected and delicious twist. Who knew that these handy little pockets could be so versatile?
-
Watch the bake time: Every oven is different. As soon as they are golden brown, take them out to avoid overcooking.
-
Be generous with the butter mixture: It honestly makes the world of difference in flavor and texture!
Ingredient Substitutions & Variations
Looking to shake things up?
- Meat: Swap out deli ham for turkey, chicken, or even cheesy pepperoni for a fun twist.
- Cheese: Cheddar is classic, but provolone, mozzarella, or a spicy pepper jack can bring different flavor profiles to your sticks.
- Seasonings: Fresh herbs like thyme or rosemary can elevate the flavor even more, adding layers of deliciousness.
- Veggie Packs: For a vegetarian take, skip the meat and load these sticks up with sautéed vegetables instead! Zucchini and bell peppers work particularly well.
Directions
Preheat your oven to 350°F (175°C). Prepare a baking sheet by greasing it or lining it with parchment paper. Roll out your crescent dough sheets and cut each one into 4 pieces for a total of 8 pieces. Distribute the ham evenly among the dough pieces and add a cheddar cheese stick on top of the ham. Fold in the ends and roll to seal. Arrange the sticks on the baking sheet. In a small bowl, combine melted butter, Worcestershire sauce, Dijon mustard, onion, and poppy seeds. Brush the mixture over each stick and bake for 12-15 minutes until golden brown. Enjoy your Ham and Cheese Sticks hot and fresh from the oven!
Pairing Ideas (Drinks, Sides, etc.)
These Ham and Cheese Sticks are fantastic on their own, but here are some ideas to elevate your meal:
- Drinks: A chilled lemonade or an apple cider pairs beautifully with the richness of the sticks. If you want something warm, a nice cup of tomato soup will complement them perfectly.
- Sides: Serve alongside a green salad topped with your favorite dressing or some crunchy veggies.
Combine these elements, and you’ve got a dinner that feels special yet so casual – snuggling up with a rom-com and a plate of these sticks is the ultimate cozy night!
How to Store and Reheat Leftovers
If you happen to have any leftovers (which is rare in my household), you can store them in an airtight container in the fridge for up to 3 days.
When it’s time to reheat, pop them in the oven at 350°F for about 10 minutes or until warmed through. You could also microwave them for about 30 seconds, but I find that the oven keeps them crispier.
Make-Ahead and Freezer Tips
Feeling super organized? Make these Ham and Cheese Sticks ahead of time! Assemble them according to the recipe, placing them on your baking sheet, and then freeze them before baking. Once frozen solid, transfer them to a freezer-safe container. When you’re craving them, no need to thaw – just bake straight from frozen, adding a few extra minutes to the cooking time. Perfect for those nights when dinner prep feels daunting!
Common Mistakes to Avoid
- Don’t overfill: It can be tempting to pack in extra ham or cheese, but this can lead to exploded sticks in the oven. Keep the fillings modest, and you’ll be golden!
- Keep an eye on the baking time: I’ve learned that a distracted cook leads to burnt food! Set a timer and check on them a minute or two before they’re supposed to be done.
Frequently Asked Questions (FAQ)
Can I use another type of dough?
Absolutely! Puff pastry works well if you want a flakier texture.
Can I make it vegetarian?
Definitely! Just replace the ham with your favorite veggies, and maybe add some black beans or cooked lentils for protein.
Can these sticks be made ahead of time?
Yes, you can prepare them ahead and bake them later. Just follow the instructions, freeze them, and when you’re ready, bake straight from the freezer!
Can I double this recipe?
You sure can! Just make sure you have enough baking space available.
Cooking Tools You’ll Need
- Baking sheet
- Parchment paper or cooking spray for greasing
- Pizza cutter or knife
- Mixing bowl for the butter mix
- Brush for applying the butter mixture
Final Thoughts
Making Ham and Cheese Sticks isn’t just about creating a delicious snack; it’s about the joy and warmth it brings to the table. Each time I whip up a batch, I’m reminded of lazy Saturday afternoons and cozy family dinners.
So next time you’re in search of easy weeknight dinners or quick family meals, give these cheesy delights a try. Use them as a canvas for your creativity – your kitchen could use a little love, and I promise, your taste buds will thank you!
If you enjoyed this recipe, don’t forget to save it on Pinterest or share it with a friend! Cooking is always more fun with company!

Ham and Cheese Sticks
Ingredients
For the main filling
- 2 tubes crescent dough sheets Can substitute with puff pastry for a flakier texture.
- 1 pound deli-sliced ham Choose a great-quality ham, or substitute with turkey or chicken.
- 8 pieces cheddar cheese sticks Feel free to use different cheese types or plant-based options.
For the butter mixture
- ¼ cup melted butter Adds rich flavor and golden color.
- 1 teaspoon Worcestershire sauce Enhances savory depth of flavor.
- ½ tablespoon Dijon mustard Adds tanginess to the dish.
- ½ tablespoon dried minced onion or onion powder Enhances the overall flavor.
- ½ tablespoon poppy seeds Optional, for added texture and visual appeal.
Instructions
Preparation
- Preheat your oven to 350°F (175°C). Prepare a baking sheet by greasing it or lining it with parchment paper.
- Roll out the crescent dough sheets and cut each one into 4 pieces for a total of 8 pieces.
- Distribute the ham evenly among the dough pieces and place a cheddar cheese stick on top of the ham.
- Fold in the ends of each dough piece and roll it up to seal the filling inside.
- Place the assembled sticks onto your prepared baking sheet.
Assembly and Baking
- In a small bowl, combine melted butter, Worcestershire sauce, Dijon mustard, onion, and poppy seeds.
- Brush the mixture generously over each stick.
- Bake in the preheated oven for 12-15 minutes until golden brown.
- Allow to cool for a couple of minutes before serving.