Easy Liquid Dough Chilli Garlic Paratha That Feels Like a Hug
Cooking can feel like a delightful mess sometimes, can’t it? I mean, picture this: it’s a cozy evening, the light is softly glowing in my kitchen, and I’m rummaging through my pantry for something that screams comfort. This is where the Liquid Dough Chilli Garlic Paratha sneaks in — a dish that has become a staple in my home, not just for its ease, but for the warm memories attached to it. I’ll never forget the first time I tried to make these. I was so excited that I may have gotten a bit overzealous with the garlic; let’s just say, a neighbor knocked on the door thinking I’d summoned the garlic gods! Oops!
What’s so fantastic about these easy weeknight dinners is that they stretch beyond just a meal; they’re an experience. The process itself can be a spectacle of flour flying through the air as you create your own little culinary masterpiece. Honestly, there’s something special about gathering the ingredients and prepping on a quiet evening. The heady aroma of turmeric and garlic wafting through the air? Absolutely magical.
So, what’s the secret sauce here? It’s the combination of flavors — spicy, fragrant, and comforting all at once. Ready to dive into this buttery, garlicky experience? Let’s gingerly tread into my little world of healthy comfort food, where I share my failed attempts and delicious triumphs of making the Liquid Dough Chilli Garlic Parathas!
Why You’ll Love This Recipe
- Simple Prep: You won’t need a culinary degree or hours to whip this up; it’s perfect for those quick family meals!
- Leftover Bliss: Trust me, they taste even better the next day — if there are any left!
- Kid Approved: My tiny critics absolutely love these little delights. Score!
- Versatile Pairing: Pair them with yogurt or a tangy chutney, and you’ve got a feast on your hands.
- Guilt-Free Indulgence: Can we talk about how it’s a healthy meal plan option? Full of flavor, light on guilt.
- The Comfort Factor: Every bite feels like a warm hug from the inside out; perfect for chilly nights!
What Makes This Recipe Special?
This isn’t just any paratha. The liquid dough concept makes it quite unique! Rather than the usual kneading and rolling (which can feel like an Olympic sport sometimes), you’ll combine everything into a pourable mixture. This method gives the paratha a light, crisp texture with an inner layer that’s both chewy and deliciously flavorful.
The incorporation of garlic speaks volumes, imparting a fragrant hit that dances with the spiciness of red chili powder. Yes, please! Each bite is like a repast of warm memories, like those cozy nights spent at home, the laughter of family echoing through the air. And the best part? The joy of cooking it is as delightful as eating it.
Ingredients
- 2 cups all-purpose flour: The base of our paratha; feel free to use whole wheat flour for a healthier twist.
- 1/2 teaspoon salt: To elevate the flavors.
- 2 tablespoons oil: I prefer olive oil, but vegetable oil works just fine too.
- 1 teaspoon red chili powder: For that kick! Adjust according to your spice tolerance.
- 1/2 teaspoon turmeric powder: For its lovely color and antioxidant properties.
- 2-3 cloves garlic, minced: My beloved ingredient; adjust based on your love for garlic (trust me, you can never go wrong here!).
- Water as needed: To achieve the right consistency for the liquid dough.
- Additional oil for cooking: To make sure your parathas don’t stick and get that lovely golden color.
Don’t forget — if you start throwing in too many spices, it may end up being more of a flavor explosion than a paratha. So keep it in check!
How to Make It Step-by-Step
Making Liquid Dough Chilli Garlic Paratha is like conducting your own little food symphony. Let’s take it from the top, shall we? Here’s how to get that paratha from fantasy to reality.
-
Mix the Dry Ingredients: In a large bowl, throw in your 2 cups of all-purpose flour, salt, red chili powder, and turmeric. Give it a good whisk to ensure everything is combined evenly. The colors blending together is such a satisfying sight. Honestly, at this stage, it’s just a bowl of beige, but stick with me here!
-
Add the Good Stuff: Next, let’s toss in the minced garlic and 2 tablespoons of oil. I don’t know about you, but this is where I get a little giddy — that garlic aroma begins its charming dance with the spices, and it’s hard not to steal a pinch of the mixture for a sneaky taste. Don’t be alarmed if you nibble a bit — it’s all part of the process!
-
Create Liquid Dough: Gradually add water as you mix. Here’s where things get a little messy (but that’s the fun part of cooking, right?). Start with a little water, mix, and add until you reach a pourable consistency. Remember, we’re going for a liquid dough, not a thick batter. Oops! If it gets too thick, add a little more water, and if it’s too runny, just add a bit more flour — you’ve got this.
-
Rest the Dough: Once you have the consistency down, let your dough rest for about 15-30 minutes. I like to call this “letting the flavors mingle.” During this time, prep your cooking area, and maybe, just maybe, have a little dance break in the kitchen. You’ve earned it!
-
Heat Up the Pan: Grab your favorite non-stick pan and heat it on medium heat. You don’t want it too hot — we’re not trying to create a paratha stick to the pan tragedy. Pour a ladle of your liquid dough onto the hot pan and spread it out slightly. You’ll know it’s the right temperature when you hear that satisfying sizzle.
-
Watch for Bubbles: Keep an eye on your paratha. You’ll start to notice bubbles forming on the surface, which means it’s ready to flip. Grab your spatula and do your thang! Flip it, and cook the other side until it’s golden brown and lovely.
-
Drizzle a Little Love: While it’s cooking, drizzle a bit of oil around the edges. This gives it that crispy finish we all adore. The sounds of sizzling are like music to my ears; it’s pure kitchen magic.
-
Serve It Up: Once it’s piping hot, serve it with your favorite chutney or a dollop of yogurt. And voilà, a delicious meal ready in no time!
Tips for Best Results
- Pay attention to heat: Too high, and you’ll scorch the paratha; too low, and it’ll turn into a sad, floppy pancake.
- Experiment with spices: I like adding cumin or coriander powder sometimes for a twist. Explore what your taste buds fancy.
- Thickness matters: If it’s too thick, it won’t cook evenly. Aim for a consistency that’s like pancake batter but just a tad thinner.
Ingredient Substitutions & Variations
While I totally stand by the original recipe, there’s always room for a bit of flair! Want a gluten-free option? Parker down some gluten-free flour for the base. As for the spices, switch up the chili powder with paprika for a smoky flavor or add basil for a touch of herbaceous goodness.
Feeling a bit adventurous? Add some shredded cheese or finely chopped spinach to the dough for an added nutritional punch. Experimentation is key here!
Serving Suggestions
These parathas work beautifully with a side of tangy mint chutney, cooling yogurt, or even a spicy pickle! If you’re feeling a little fancy, a side salad adds a refreshing crunch. And let’s be honest, these parathas paired with a cozy rom-com is the dinner of dreams — trust me on that.

How to Store and Reheat Leftovers
If you manage to have leftovers (which is a stretch because these are quite addictive), let them cool completely before storing them in an airtight container. They will keep for about 2-3 days in the fridge. To reheat, just pop them in a pan with a drizzle of oil, and they’ll crisp back up beautifully. Alternatively, a quick few seconds in the microwave works, but fair warning — they may come out a bit softer.
Make-Ahead and Freezer Tips
Want to prep ahead? You can make and store the liquid dough in the fridge for up to 2 days. Just give it a good stir before using. Freezing is also an option. Pour the mixture into portion-sized containers, and it’ll be ready when you are for those busy nights. Just defrost it in the fridge overnight, and you’re in business!
Common Mistakes to Avoid
- Overmixing: Once you add water, be gentle! You want it mixed but not overdone.
- Neglecting resting time: It’s vital. Letting it rest helps develop flavor and texture.
- Not testing the pan first: Always check the temperature before pouring the first ladle of dough. That’ll save you from a paratha disaster!
Frequently Asked Questions (FAQ)
-
Can I make these ahead of time?
Absolutely! You can prepare the liquid dough and refrigerate it for a couple of days. Just give it a stir before you’re ready to cook. -
How do I store leftovers?
Let them cool down completely, then store them in an airtight container in the fridge for 2-3 days. -
Can I use whole wheat flour?
For sure! Whole wheat flour is a fantastic alternative if you desire a healthier option. -
What can I serve with this?
Tasty yogurt or chutney make great companions, or you can throw together a salad for a complete meal. -
What if I mess up the dough?
Do not worry! Cooking is all about experimenting. If it’s too thick, add more water; too runny, add flour. Just have fun with it!
Cooking Tools You’ll Need
- Mixing Bowl: For combining all your ingredients.
- Whisk or Spoon: For mixing and incorporating air into the wilful dough.
- Non-Stick Pan: Significantly helps in achieving the golden-brown color without sticking.
- Ladle: For pouring and spreading that lovely liquid dough.
- Spatula: To flip the parathas with confidence and elegance!
Final Thoughts
As I sit here savoring the last morsels of my Liquid Dough Chilli Garlic Paratha while listening to the chuckles of a sitcom in the background, I can’t help but reflect on how magical cooking can be. It’s about connection, learning, and creating memories in the kitchen.
I encourage you to try this out, share it with friends, and put your own spin on things. If you enjoyed this recipe, don’t forget to save it on Pinterest or share it with a friend! Let’s spread the warm hug of delicious food and stories that keep us close, one paratha at a time. Happy cooking!
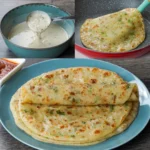
Liquid Dough Chilli Garlic Paratha
Ingredients
Dough Ingredients
- 2 cups all-purpose flour Feel free to use whole wheat flour for a healthier twist.
- 1/2 teaspoon salt To elevate the flavors.
- 2 tablespoons oil Olive oil is preferred, but vegetable oil works too.
- 1 teaspoon red chili powder Adjust according to spice tolerance.
- 1/2 teaspoon turmeric powder For color and antioxidant properties.
- 2-3 cloves garlic, minced Adjust based on garlic preference.
- As needed water water To achieve the right consistency for the liquid dough.
- As needed oil additional oil for cooking To ensure parathas don’t stick and achieve a golden color.
Instructions
Preparation
- In a large bowl, whisk together 2 cups of all-purpose flour, salt, red chili powder, and turmeric.
- Add the minced garlic and 2 tablespoons of oil to the dry ingredients and mix.
- Gradually add water while mixing until you reach a pourable consistency for the liquid dough.
- Let the dough rest for about 15-30 minutes.
Cooking
- Heat your non-stick pan on medium heat.
- Pour a ladle of liquid dough onto the hot pan, spreading it out slightly.
- Watch for bubbles forming on the surface, then flip and cook the other side until golden brown.
- Drizzle a bit of oil around the edges while it's cooking for a crispy finish.
- Serve hot with your favorite chutney or a dollop of yogurt.