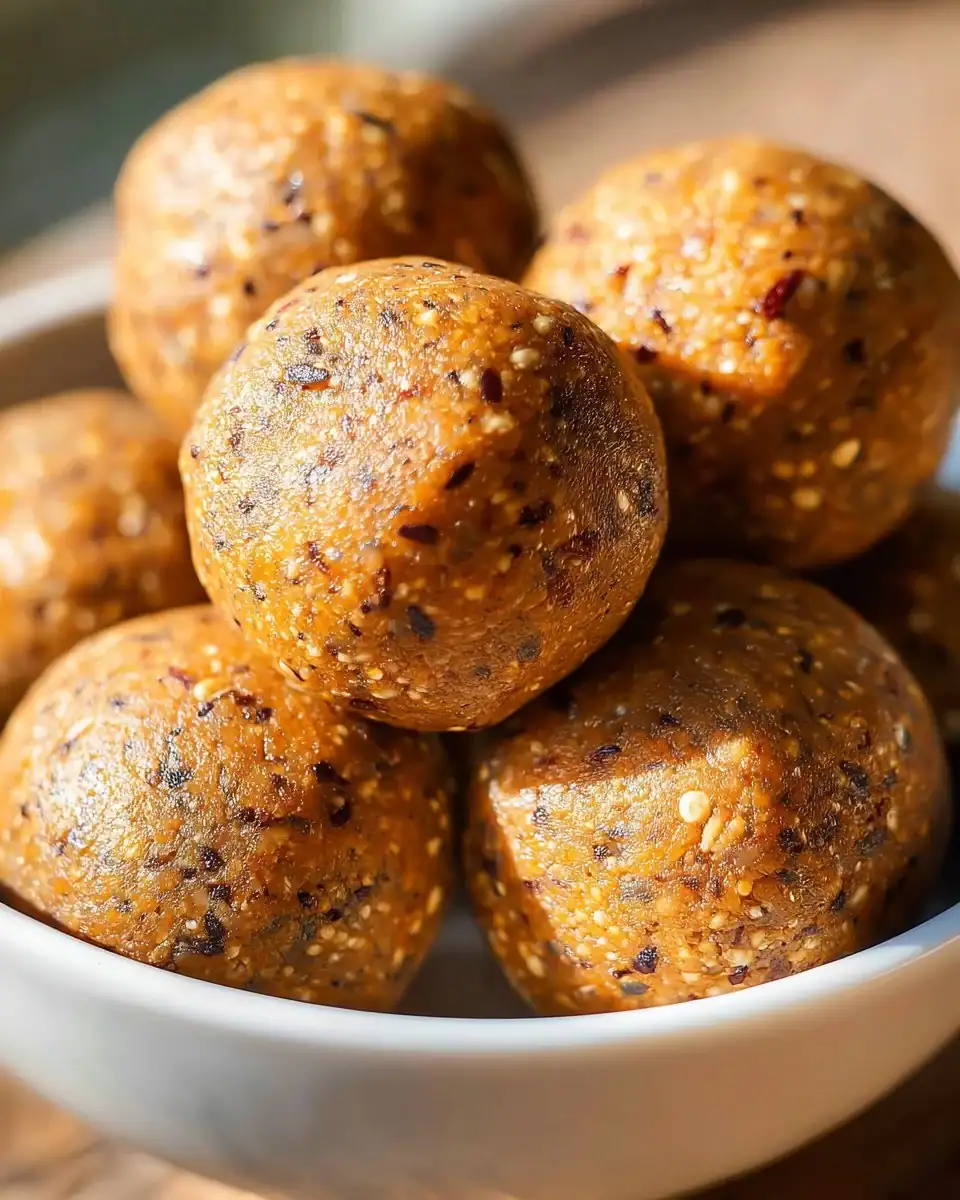
Easy No-Bake Healthy Pumpkin Pie Energy Balls
I’ll be honest — the fall season is my absolute favorite time of year. As the leaves change, I can’t help but get a little giddy thinking about all the delicious pumpkin recipes I can whip up! But let’s be real: sometimes life gets busy. The thought of baking a pie from scratch with all the measuring, mixing, and potential kitchen chaos can send even the most ambitious home cook running for the exit. That’s where these No-Bake Healthy Pumpkin Pie Energy Balls come to the rescue! Imagine cozying up on a cool fall evening, cooking a hearty meal, and nibbling on these delightful little morsels that capture the essence of pumpkin pie but take a fraction of the time to make — now, doesn’t that sound like a scene from a perfect fall movie?
This recipe holds a special place in my heart, as it was born out of a particularly chaotic afternoon where I had a craving for pumpkin pie but absolutely zero time to bake one. My son had just come home from school with friends in tow, and let’s just say trying to bake while managing giggly 10-year-olds is an adventure on its own! So, in the midst of flour flying and snack demands, I turned to my trusty cupboard. A few minutes later, we were rolling these little energy balls together, and honestly, nothing could lift my spirits like the delightful aroma of pumpkin and spice wafting through the kitchen.
These energy balls have become our go-to fall snack, or really, any time of year snack! They’re healthy, naturally sweetened, packed with protein, and, let’s be real, they taste just like fall magic. Plus, there’s something incredibly satisfying about rolling them into little balls and watching everyone gobble them up. You can even have fun by letting the kids help in the kitchen — it’s a fantastic way to spend time together without the stress of whipping up a full meal.
So grab those comfy socks, maybe a flannel shirt, and let’s dive into making the most scrumptious no-bake treat that feels like a hug in your hand!
Why You’ll Love This Recipe
- Quick and Easy: These energy balls are ready in just about 30 minutes — no baking required. Perfect for busy weeknights!
- Healthy Comfort Food: With wholesome ingredients, they hit that comforting sweet spot without the guilt.
- Perfect for Meal Prep: Make a big batch at the beginning of the week for quick snacks or a post-workout treat.
- Picky Eater Approval: Kids and adults alike will love the pumpkin pie flavors. (Bonus points for stealthily sneaking in some extra nutrition!)
- Goodbye Kitchen Disasters: No complicated steps or messy flour explosions—just a straightforward, fun, and clean process.
- Versatile and Customizable: You can easily adapt the flavors or ingredients to cater to your cravings or dietary needs.
What Makes This Recipe Special?
The magic of No-Bake Healthy Pumpkin Pie Energy Balls lies in the delightful combination of flavors and textures. You get that smooth and creamy goodness from the cashew butter, which balances beautifully with the warmth of the pumpkin pie spice. Each bite is packed with nutrition thanks to the protein powder, and who wouldn’t love a little hit of maple syrup drizzled in there? What makes it even better is that there’s just enough texture from the paleo flour, making each energy ball satisfying and delicious. They’re not just a snack; they’re comfort food you can feel good about!
Ingredients
The beauty of these No-Bake Healthy Pumpkin Pie Energy Balls lies in their simplicity. Here’s what you’ll need:
-
2 tablespoons paleo flour: A gluten-free alternative, paleo flour gives these energy balls a lovely texture without sacrificing taste. You could use almond or coconut flour if you prefer, but you might need to adjust the amount used to avoid making the mixture too dry.
-
1 tablespoon vanilla protein powder: This adds nutritional power. It also enhances the flavor, making each bite feel decadent. I’m partial to brands with minimal additives; check labels to find a protein powder that aligns with your dietary preferences!
-
1 cup cashew butter: Creamy and rich, cashew butter is a nutty delight and is excellent for giving these balls a smooth consistency. If you’re allergic to nuts or are looking for alternatives, sunflower seed butter works like a charm — just keep an eye on any nut-free needs (especially if you’re packing them for school).
-
1 tablespoon maple syrup: Ah, the sweet nectar! Maple syrup not only sweetens but also adds a hint of fall flavor. Don’t skimp on the quality; real maple syrup has a depth of flavor that much cheaper syrups can’t touch.
-
2 tablespoons pumpkin puree: This gives the energy balls that signature pumpkin flavor and provides moisture without making them soggy. Make sure you use pumpkin puree, not pumpkin pie filling, which is pre-sweetened and spiced (oops, trust me, I learned this the hard way).
-
1 tablespoon pumpkin pie spice: Should I even need to say more? The aromatic blend brings the warmth of fall into every bite! If you’re feeling adventurous, you can make your own spice blend at home with cinnamon, nutmeg, and ginger.
Collect these ingredients, and you’ll be on your way to putting smiles on faces (including yours!).
How to Make It Step-by-Step
Alright, let’s roll up our sleeves and get into the fun part, shall we? Here’s a detailed guide on how to whip up these delightful bites of joy.
1. Prep Your Mixing Bowl
Find a large mixing bowl and measure out your paleo flour, vanilla protein powder, and pumpkin pie spice. Mix these dry ingredients together with a whisk or a fork until it’s well combined. Honestly, this part smells so good, you’ll feel like you’re ready to conquer the kitchen.
2. Melt the Goodness
Grab a microwave-safe bowl (don’t be like me and forget this step), and measure your cashew butter, maple syrup, and pumpkin puree. Heat them up in the microwave for about 30 seconds to 1 minute. I can’t stress enough how satisfying it is to watch that gooey goodness blend together!
3. Combine and Mix
Once the mixture is all melted and smooth, fold it into your dry ingredients. Be prepared; you have a bit of mixing ahead, and I remember my arm getting a little tired, but it’s totally worth it. Use a spatula or your hands (if you’re feeling sassy) to combine everything until it’s evenly mixed.
4. Chill Out
Now, here comes the waiting game. We want to chill the dough in the freezer for about 10 minutes. This step helps the balls hold their shape, so try not to sneak any bites yet! (Although, if you do, I won’t tell a soul…)
5. Roll ‘Em Up
Once the dough has chilled, take a small piece (I usually go for about a tablespoon-sized amount) and roll it into a ball. Keep rolling until you’ve formed around 20 of these beauties! It’s oddly therapeutic, and I have to admit, I might’ve gotten a little carried away making the last couple look extra pretty.
6. Set and Chill Again
Place the rolled balls on a parchment-lined baking sheet, and pop them in the fridge until fully set (about an hour). This is perfect for when I find myself cleaning up the kitchen after my mini baking adventure.
7. Enjoy Them!
Once they’re set, you’ve got yourself the perfect little energy boost! Your pumpkin pie cravings are at bay, and you can feel good about what you’re snacking on!
Tips for Best Results
Here are some little nuggets of wisdom I’ve gathered during my own trial-and-error journey:
-
Consistency is Key: Make sure your cashew butter is creamy and not too dry. The moistness is essential for the energy balls to hold together.
-
Go Easy on the Pumpkin: If you find the mixture is a bit too sticky, sprinkle in some extra paleo flour until you achieve a good texture.
-
Storage: Store these in an airtight container in the fridge. They’ll last about a week, but I’m sure you’ll devour them long before that!
-
Customization: Feel free to add in extras like chia seeds or a handful of chocolate chips if you’re feeling a bit naughty. I mean, who says you can’t shake things up a bit?
Ingredient Substitutions & Variations
With a little creativity, you can put your own spin on these energy balls:
-
Nuts & Seeds: If cashew butter isn’t your thing, substitute with almond butter or sunflower seed butter for a nut-free version.
-
Sweetener Swaps: You could replace maple syrup with honey or agave syrup if that’s more your jam. A note of caution, though: honey is not vegan!
-
Flavors: To mix it up, try adding some dark chocolate chips, cocoa powder for a chocolatey spin, or even a dash of sea salt to balance the sweetness.
Serving Suggestions
Pair these energizing bites with a warm mug of chai or a cozy herbal tea, and I promise you’ll feel like autumn has wrapped its arms around you. They’re perfect for on-the-go, an after-lunch treat, or a quick post-workout snack. And if you’re cozying up on the couch with a rom-com, trust me, these little guys are the perfect munchies to accompany your movie night.
How to Store and Reheat Leftovers
Despite my best intentions, it always surprises me how fast these energy balls disappear! However, I’ve learned a few best practices for storage:
-
Refrigerator: Keep them in an airtight container in the fridge where they should last about 7 days. I also recommend keeping them separated by layers of parchment paper if you’re making a big batch.
-
Freezing: If you want to extend their shelf life, pop them in the freezer. Just be sure to thaw them out in the fridge before snacking. Trust me; there’s nothing quite like a bit of fresh-from-the-fridge snack magic!
Make-Ahead and Freezer Tips
These little energy balls are the perfect make-ahead snack! Whip up a batch at the start of the week, and you’ll always have a healthy nibble ready to grab and go. Just remember: if you’re freezing them, it’s best to lay them out on a baking sheet initially so that they freeze individually. Once solid, transfer them into a freezer bag for easy storage.
Common Mistakes to Avoid
Here are some mistakes I’ve made (so you don’t have to):
-
Over-Heating: Be wary of overheating your liquids; they should be warm and blend nicely but not scalding hot. Pro tip: let them sit for about a minute before combining with the dry mix to get the perfect warm consistency.
-
Not Mixing Enough: It’s easy to skimp out on mixing time — don’t! The goal is a well-combined dough that won’t fall apart during rolling.
-
Too Sticky: If your dough is too sticky, you’ll have a messy time rolling the energy balls. Add a bit more of your paleo flour as needed.
Frequently Asked Questions (FAQ)
1. Can I use normal flour instead of paleo flour?
Yes, but the texture and health aspects will change! Paleo flour is gluten-free, and it gives these energy balls a nice texture.
2. How do you make these vegan?
Simply replace honey or maple syrup with agave syrup!
3. Can I add nuts?
Absolutely! Chopped nuts can be a fantastic addition for some crunch.
4. What’s the best way to enjoy them?
As a snack, dessert, or even breakfast on-the-go.
5. Are they kid-friendly?
Yes! They’re packed with nutrients and taste like dessert. Your kids will love you for these!
Cooking Tools You’ll Need
- Mixing bowl: For all the mixing goodness.
- Microwave-safe bowl: Essential for melting your ingredients.
- Spatula: You’ll need it to mix things up!
- Parchment paper: Trust me, it saves the day while rolling those little balls!
Final Thoughts
These No-Bake Healthy Pumpkin Pie Energy Balls have become a cherished part of my recipe collection, bringing a taste of fall into our lives year-round. The memories made while rolling these treats with my family are priceless, and I hope they bring as much joy to you and your loved ones as they bring to me.
I truly believe that the magic of cooking lies in the memories we create around the dining table; whether it’s a successful dish or a chaotic kitchen disaster, every moment counts. If you enjoyed this recipe, don’t forget to save it on Pinterest or share it with a friend! Happy snacking!

No-Bake Healthy Pumpkin Pie Energy Balls
Ingredients
Dry Ingredients
- 2 tablespoons paleo flour A gluten-free alternative; substitute with almond or coconut flour if preferred.
- 1 tablespoon vanilla protein powder Select a brand with minimal additives.
- 1 tablespoon pumpkin pie spice The aromatic blend brings warmth of fall.
Wet Ingredients
- 1 cup cashew butter Can substitute with sunflower seed butter for nut-free.
- 1 tablespoon maple syrup Use real maple syrup for the best flavor.
- 2 tablespoons pumpkin puree Use pure pumpkin puree, not pumpkin pie filling.
Instructions
Preparation
- In a large mixing bowl, combine paleo flour, vanilla protein powder, and pumpkin pie spice with a whisk.
- In a microwave-safe bowl, measure cashew butter, maple syrup, and pumpkin puree, then heat in the microwave for about 30 seconds to 1 minute until melted and smooth.
- Fold the melted mixture into the dry ingredients until everything is evenly mixed.
Chilling and Rolling
- Chill the dough in the freezer for about 10 minutes to help it hold its shape.
- Once chilled, take a tablespoon-sized amount of dough and roll it into a ball.
- Repeat until all dough is rolled into balls, making roughly 20.
- Place the rolled balls on a parchment-lined baking sheet and refrigerate until fully set, about 1 hour.
Serving
- Enjoy your energy balls as a snack or dessert!


