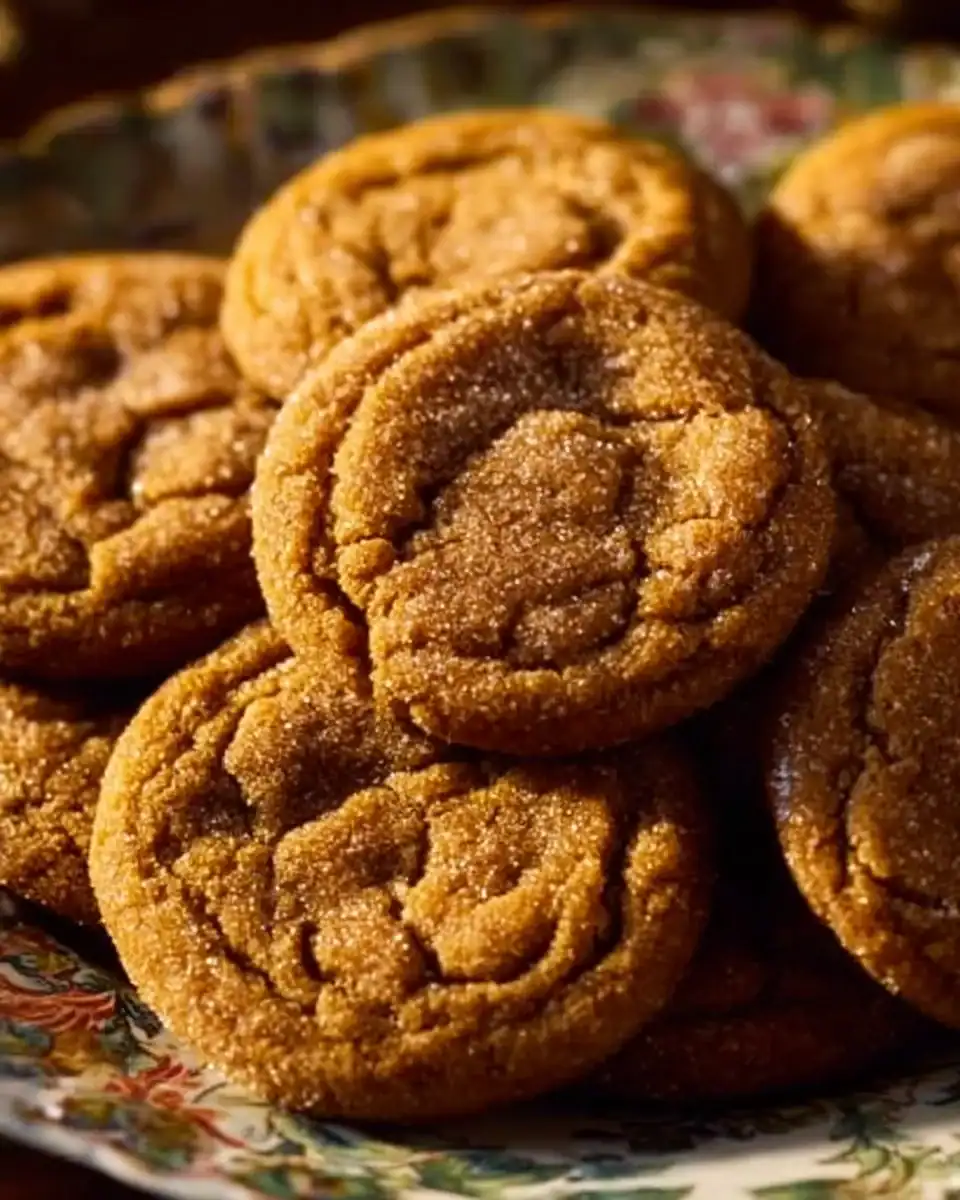
Easy Maple Pumpkin Cookies: Autumn in Every Bite
There comes a time in every autumn when the universe sends a signal. The leaves start to turn, the air turns crisp, and my pantry whispers sweet nothings about fall baking. Enter my cherished recipe for Maple Pumpkin Cookies. Each time I take a bite, it feels like a cozy hug from the universe itself. But let me tell you, my journey with these cookies has been anything but perfect.
It all started on a rainy Saturday afternoon. The light pouring through my kitchen window felt like it was saying, “Bake something delicious!” But, as you may have guessed, I wasn’t exactly the Martha Stewart of my neighborhood at that time. With flour flying everywhere and my cat attempting to “help” by tripping me every five seconds, it felt like an episode of a baking show gone wrong.
Now, let’s set the scene for what turned into my new favorite fall tradition. The scent of pumpkin and spices wafting through the house was intoxicating. It was the kind of smell that could make even the busiest adult stop and savor life. Honestly, when you mix in maple syrup and cinnamon, the result is magical. And when the golden edges of those cookies start to form and the entire house feels warm and inviting, it’s hard to resist.
These cookies are not just dessert; they’re a comforting piece of my heart, infused with memories of laughter and kitchen chaos. Each bite brings me back to that first time when it all went wrong—flour fought back, and eggs slipped through my fingers like a cartoon character. But if I can make these Maple Pumpkin Cookies, trust me, you can too. They’re my go-to for everything from lazy afternoons to cozy gatherings. Plus, they come together quite easily even if the kitchen gets a little unruly!
Why You’ll Love This Recipe
- Comfort Food: Honestly, there’s something about smashing your face into a cookie that feels like a warm hug from grandma. These cookies bring back all the cozy vibes of home.
- Fall Flavor: Who knew pumpkin and maple made such a fantastic pair? It’s like autumn on a platter!
- Easy to Make: Even if your oven decides to act finicky (like mine often does), this recipe remains forgiving.
- Picky-Eater Approved: I’ve chowed down on these cookies with family who just don’t do pumpkin, and to my surprise, they devoured them! “What’s the secret ingredient?” they kept asking. Well, it’s just love and maybe a bit of maple.
- Perfect for Meal Prep: If you’re in the self-care game (and we all should be), these cookies are great for making ahead. They freeze well, so you can enjoy a bite of hugs anytime.
- Kid-Friendly: These cookies make perfect bonding moments in the kitchen. Get the kiddos in on the fun and witness the chaos transform into laughter!
What Makes This Recipe Special?
This recipe harnesses the sweet flavors of pumpkin puree and maple syrup, both of which elevate regular cookies into something extraordinary. The big surprise is really in the texture—chewy on the outside yet soft and cakey on the inside. Just imagine breaking one in half, and the gooey center greets you with a pumpkin-spice embrace.
I especially love how versatile this recipe is. Want to throw in some chocolate chips for a different flair? Go for it! Feel like adding nuts for a crunchy surprise? Yep, do that too! Oops, I even once accidentally switched the flour with almond meal—I mean, not my best idea, but it turned out amusingly good.
Now, let’s dive into the heart of what you need.
Ingredients
- 1 cup pumpkin puree (not pumpkin pie filling)
- 1/2 cup maple syrup
- 1/2 cup softened butter
- 1/2 cup brown sugar
- 1 egg
- 2 cups all-purpose flour
- 1 teaspoon baking soda
- 1 teaspoon baking powder
- 1 teaspoon cinnamon
- 1/2 teaspoon nutmeg
- 1/2 teaspoon salt
- 1 teaspoon vanilla extract
Let’s break this down:
- Pumpkin Puree: Pure pumpkin is magic in these cookies. It keeps them moist and adds that delightful flavor that says “hello, fall!”
- Maple Syrup: We are using the real deal here, not the “pancake syrup.” It adds depth and a unique sweetness that sugar alone can’t provide.
- Butter: Because butter, that’s why. It adds that rich, creamy flavor that makes everything better.
- Brown Sugar: For that caramel-like richness. Regular sugar? Nah. Let’s not skimp when cookies are involved!
- Egg: Helps bind everything together. You could use a flax egg if you’re going vegan, but I haven’t tried that one yet.
- All-Purpose Flour: The standard, versatile choice. I swear it gets all the love along with a good routine stretching at the gym.
- Baking Soda & Baking Powder: A dynamic duo for that perfect rise! Don’t mix these up; that could spark a disaster in your cookie world!
- Cinnamon & Nutmeg: The spice champions of fall! Together, they create an aroma stronger than your grandma’s cozy sweater.
- Salt & Vanilla Extract: A pinch of salt to balance out the sweetness and a splash of vanilla for that comforting taste.
How to Make It Step-by-Step
Step 1: Preheat Your Oven
First things first—preheat your oven to 350°F (175°C). Get that heat cranked up while you whisk away in the kitchen.
Step 2: Cream the Wet Ingredients
Grab a large bowl and toss in your softened butter. Honestly, if it’s too cold, you might turn this step into an arm workout. So, let it sit out for a bit! Add the brown sugar and maple syrup, then cream them together until it’s smooth and fluffy. The mixture should look like a creamy dream at this point. I swear Michael Bublé would even be jealous of this smoothness.
Step 3: Add Pumpkin and Egg
Next, add the pumpkin puree and the egg. Here, you’ll want to mix until it’s all combined beautifully. The color will deepen, and you’ll start getting that heavenly smell. Remember to taste, because quality control is vital—even if your family said you can’t eat the dough (which, to be real, I often ignore).
Step 4: Mix the Dry Ingredients
In another bowl, whisk together the flour, baking soda, baking powder, cinnamon, nutmeg, and salt. The consistency should be like a fluffy cloud—well, at least that’s what I hope for!
Step 5: Combine the Mixtures
Now, gradually add the dry ingredients to the wet mixture in your larger bowl. Mix until everything just comes together—don’t overdo it, or you’ll end up with tough cookies. This is one moment where being gentle is key!
Step 6: Scoop and Space ‘Em Out
Using a spoon or a cookie scoop (if you want to be fancy), drop spoonfuls of dough onto your lined baking sheet. Space them about 2 inches apart, as these beauties will spread out a bit in the oven. Oops, I distinctly remember my first try looking like an unintentional cookie monster explosion. Messy, but fun!
Step 7: Bake!
Pop those lovelies in the oven and bake for 10 to 12 minutes. Keep an eye on them! When those edges turn lightly golden, they are ready. Don’t forget, they’ll continue to firm up a little bit after you take them out, so don’t overbake!
Step 8: Cool Down
Let the cookies cool on the baking sheet for a few minutes before transferring them to a wire rack. This is the hardest part—waiting for them to cool down. If you’re like me, you might sneak a warm one. It’s only natural, right?
Tips for Best Results
- Use Fresh Pumpkin Puree: Grab a can labeled ‘100% pure pumpkin’ instead of a sugary version. It makes a world of difference!
- Softened Butter is Key: If your butter isn’t soft enough, your dough might not come together as well. Seriously, let it sit out!
- Don’t Overmix: Seriously, the more you mix, the tougher the cookie. Aim for just combined.
- Use a Cookie Scoop: Get one! It helps with even sizes, and trust me, it’s a game changer.
Ingredient Substitutions & Variations
Want to jazz things up a bit? Consider these substitutions:
- Gluten-Free Flour: Swap out all-purpose flour for a gluten-free blend. Just make sure it includes xantham gum or flaxseed—those work wonders in binding!
- Dairy-Free Butter: Use coconut oil or your favorite plant-based butter.
- Add-ins: Thinking of chocolate chips or pecans? They’re always a hit! You can even sprinkle some sea salt on top before baking for that sweet-salty vibe.
Serving Suggestions
Pair these cookies with a warm cup of spiced tea or hot apple cider. Honestly, you might just find your evening becomes a cozy whirlwind of couch snuggles and rom-coms—heavenly! How amazing would it be to surprise your friends with these cookies after a dinner party? Or simply dig into them yourself after a long day—you do you!
How to Store and Reheat Leftovers
If by some chance you have leftovers (let’s be real, the cookie monster in all of us usually finishes them), here’s what you do. Store them in an airtight container at room temperature for up to a week. My pro tip? Add a slice of bread into the container; it keeps them soft.
If you want a warm-up, toss them in the microwave for 10-15 seconds. But be careful! You don’t want to overheat them—rubber cookies aren’t a good time.
Make-Ahead and Freezer Tips
These cookies are fantastic for batch baking. You can make the dough ahead of time and freeze it. Simply wrap it tightly in plastic wrap or store it in an airtight container for up to three months. When you’re ready to enjoy them, let them thaw in the fridge overnight and just bake as directed.
Common Mistakes to Avoid
- Not Preheating: This one’s key. You can’t skip this step. Going in with a cold oven is a fast-track to cookie frustration.
- Using Pumpkin Pie Filling: Remember: this is not the same as pure pumpkin! Check your can labels.
- Overmixing: With all the excitement, do not overmix your dough; it’ll lead to cookies that are more cake than chewy.
Frequently Asked Questions (FAQ)
Q: Can I use homemade pumpkin puree?
A: Absolutely! Just make sure it’s well-cooked and drained to avoid excess moisture.
Q: Can I substitute maple syrup with honey?
A: Yes, but it will change the flavor slightly. Maple syrup adds a distinct taste that pairs perfectly with pumpkin.
Q: Why did my cookies turn out flat?
A: Most likely, there wasn’t enough flour, or the dough was too warm before baking. Chill the dough to reignite that chewy magic!
Q: Can I store these cookies in the fridge?
A: Yes. However, they stay softer at room temperature. If you need to store them in the fridge, just know they might take on a firmer texture.
Q: What if I don’t have any maple syrup?
A: Honestly, brown sugar or agave syrup can work as substitutes, though it changes the flavor a smidge!
Cooking Tools You’ll Need
- Mixing bowls (the bigger, the better!)
- Whisk and spatula
- Baking sheet
- Parchment paper
- Wire cooling rack
- Cookie scoop or spoon
Final Thoughts
The journey to perfecting these Maple Pumpkin Cookies might have had its ups and downs, but the flavors? Pure bliss. As I take a bite and feel all that warmth wash over me, I can’t help but smile, thinking of those kitchen adventures—each mishap a memory, every sprinkle of flour a reminder that cooking is best when it’s a little messy.
Whether you’re sharing them at a gathering or savoring one solo with your favorite show, these cookies are bound to become a beloved fixture in your fall baking routines. Please do share your own versions with me! And hey, if you enjoyed this recipe, don’t forget to save it on Pinterest or share it with a friend!
Maple Pumpkin Cookies
Ingredients
Wet Ingredients
- 1 cup pumpkin puree (not pumpkin pie filling) Use 100% pure pumpkin
- 1/2 cup maple syrup Use real maple syrup, not pancake syrup
- 1/2 cup softened butter Ensure butter is softened for easy mixing
- 1/2 cup brown sugar For caramel-like richness
- 1 unit egg Can substitute with a flax egg for vegan option
- 1 teaspoon vanilla extract Enhances the comforting flavor
Dry Ingredients
- 2 cups all-purpose flour Standard versatile choice
- 1 teaspoon baking soda For leavening
- 1 teaspoon baking powder For rise
- 1 teaspoon cinnamon Classic fall spice
- 1/2 teaspoon nutmeg Adds warmth
- 1/2 teaspoon salt Balances sweetness
Instructions
Preparation
- Preheat your oven to 350°F (175°C).
- In a large bowl, cream together the softened butter, brown sugar, and maple syrup until smooth and fluffy.
- Add the pumpkin puree and egg, mixing until well combined.
- In another bowl, whisk together the flour, baking soda, baking powder, cinnamon, nutmeg, and salt.
- Gradually combine the dry ingredients into the wet mixture, stirring gently until just combined.
- Using a cookie scoop, drop spoonfuls of dough onto a lined baking sheet, spacing them about 2 inches apart.
Baking
- Bake in the preheated oven for 10-12 minutes or until edges are lightly golden.
- Let the cookies cool on the baking sheet for a few minutes before transferring to a wire rack to cool completely.


