
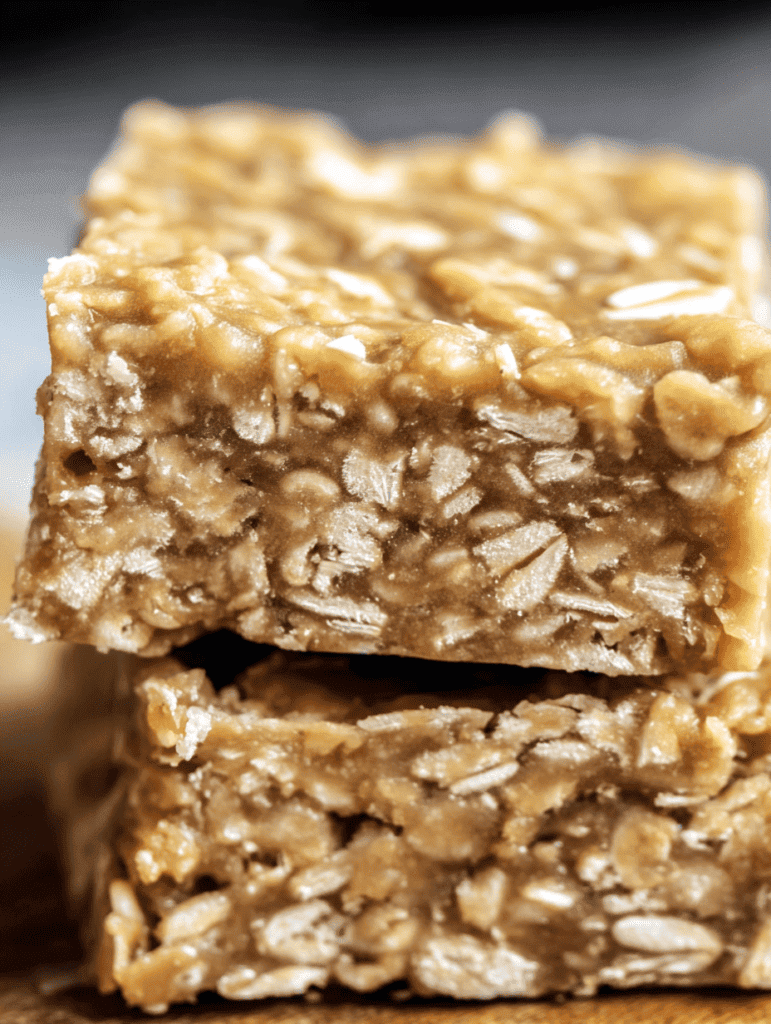
Looking for a quick family meal treat that’s easy to make and totally crave-worthy? These No Bake Peanut Butter Oatmeal Bars are about to become your new favorite healthy comfort food. They’re packed with wholesome oats, creamy peanut butter, and naturally sweetened with honey or maple syrup. Best of all, there’s zero oven time—just a handful of simple pantry staples and a few minutes of hands-on prep. Whether you need a budget-friendly recipe for busy weekdays, a post-workout snack for your high protein meal plan, or a healthy bite for meal prep microwave lunches, this is the snack bar that checks all the boxes.
Why You’ll Love This Recipe
These bars are the perfect answer for best meal prep healthy—no baking, no fuss, just quick, nutrient-dense ingredients that taste amazing together.
There’s nothing quite as satisfying as the chewy, nutty goodness of oats and peanut butter. These bars are loaded with plant-based protein and healthy fats, making them a go-to for high protein pre made meals or best high protein ready meals on the go. You’ll also love how flexible they are—swap in your favorite nut or seed butter, add a sprinkle of chocolate chips, or toss in dried fruit and seeds for an extra nutrition boost.
Perfect for busy mornings, school lunchboxes, meal prepping for the week, or those afternoons when you’re looking for a healthy boxed meal alternative to store-bought snacks.
What Makes This Recipe Special?
The magic of these bars is all in their simplicity. With just a saucepan and a mixing bowl, you can whip up a big batch that’s gluten-free, naturally sweetened, and endlessly customizable. If you’re hunting for no prep healthy lunches or best meal prep plans that actually taste good, these bars are a must-make.
Because they require no baking and only a handful of ingredients, they fit right in with cheap meal plans for 2, healthy meal plans for two, or even a big family batch. Double the recipe and stash extra bars in your freezer for the ultimate low calorie premade meal delivery hack—homemade, fresher, and tailored to your tastes.
Need a vegan version? Just use maple syrup and dairy-free chocolate chips, and you’re set for the vegan meal prep plan of your dreams.
Ingredients
Ingredients You’ll Need
- 2 cups old-fashioned rolled oats (certified gluten-free if needed)
- 1 cup creamy or crunchy peanut butter (or substitute almond or sunflower seed butter for nut-free)
- 1/2 cup honey or maple syrup
- 1/2 teaspoon vanilla extract
- 1/4 teaspoon salt
- 1/2 cup mini chocolate chips (optional)
- Add-ins (optional): chia seeds, flaxseeds, dried fruit, chopped nuts, shredded coconut, or a scoop of protein powder for high macro meals
How to Make It Step-by-Step
- Line Your Pan for Easy Removal
Start by lining an 8×8-inch baking dish with parchment paper, leaving some paper hanging over the edges for easy lifting later. This step makes it so much simpler to get perfectly cut bars without any sticking—a little trick that makes these premade lunch meals feel gourmet! - Melt Peanut Butter and Sweetener
In a medium saucepan over low to medium heat, combine your peanut butter and honey (or maple syrup). Stir gently until melted, smooth, and creamy. Don’t let it boil—just melt everything together for the best chewy texture. Remove from heat, then stir in vanilla extract and salt. - Mix Oats and Add-Ins
In a large mixing bowl, add your oats and any optional mix-ins: chocolate chips, chia seeds, flaxseeds, dried fruit, or nuts. Pour the warm peanut butter mixture over the oats. Use a sturdy spoon or spatula to mix until every oat is coated—this step is key for that signature chewy bite that makes these bars a best dinner prep meal favorite. - Press Firmly Into the Pan
Transfer the oat mixture into your prepared pan. Use a spatula or your hands (lightly greased) to press the mixture down very firmly into an even layer. The firmer you press, the better your bars will hold together—so don’t be shy! - Chill Until Firm
Place the pan in the refrigerator and chill for at least 1–2 hours, or until the bars are set and firm to the touch. This helps them slice neatly and gives them that ready made protein meals texture that’s so satisfying. - Slice and Enjoy
Once fully chilled, lift the bars from the pan using the parchment overhang. Place on a cutting board and use a sharp knife (run it under hot water for clean edges) to slice into bars or squares. Store in an airtight container in the fridge for up to a week.
Tips for Best Results
- For a sweeter bar, use regular peanut butter. For a healthier bar, choose unsweetened natural peanut butter—this gives a softer, more wholesome flavor profile.
- Always press the mixture firmly into the pan—this helps prevent crumbling and gives you neat, grab-and-go bars perfect for protein meal plans or protein eating plans.
- If using chocolate chips, let the mixture cool for a few minutes first so the chips don’t melt completely (unless you love swirled, melty chocolate!).
- For best texture, stick with old-fashioned rolled oats; quick oats will give a softer, less chewy bar.
- Want an extra protein punch? Stir in a scoop of your favorite protein powder for easy high protein high calorie meals and high protein microwave meals.
Ingredient Substitutions & Variations
- Nut-Free: Use sunflower seed butter or tahini in place of peanut butter for a school-safe or allergy-friendly version.
- Vegan: Go with pure maple syrup or agave, and dairy-free chocolate chips.
- Low Sugar: Cut back on honey/maple and add a few drops of stevia or monk fruit sweetener for low calorie high nutrition meals.
- Trail Mix Bars: Add chopped nuts, dried cranberries, raisins, or coconut for that best meals to prep trail mix vibe.
- Chocolate Topping: Melt extra chocolate chips and spread a layer over the top before chilling—now you’ve got a homemade candy bar!
- Oat-Free: Try using quinoa flakes or crushed brown rice cereal for a different take.
- Protein Bars: Mix in extra seeds, protein powder, or even chopped dates for high protein high carb low fat meals and high carb high protein low fat meals.
Serving Suggestions

Serving Suggestions
- Enjoy with a cup of coffee as a quick, energizing breakfast on busy mornings (perfect for your meal planning chicken or full english breakfast spread).
- Pack in lunchboxes for kids and adults alike—they travel well and don’t need to be reheated, ideal for no prep healthy lunches and meal prep microwave lunches.
- Serve as a snack at outdoor gatherings, hikes, or road trips—no refrigeration needed for hours.
- Crumble a bar over Greek yogurt or smoothie bowls for a satisfying, high protein ready made meals twist.
- Wrap up a few bars as a thoughtful, homemade food gift for a friend or neighbor—who doesn’t love a cheap meal plan for 2 surprise?
Pairing Ideas (Drinks, Sides, etc.)
Pair your No Bake Peanut Butter Oatmeal Bars with a cold glass of almond milk, oat milk, or a protein smoothie for an easy weeknight dinner snack. These bars also go great with a hot latte, matcha, or a classic cup of herbal tea.
For a balanced afternoon snack, add some fresh fruit or carrot sticks on the side. You can also enjoy them with cottage cheese or a simple green salad for a more healthy eating for two vibe.
How to Store and Reheat Leftovers
Store the bars in an airtight container in the fridge for up to 1 week—they stay soft and chewy but won’t dry out. If you want them a little softer, just let them sit at room temperature for a few minutes before eating.
To freeze, wrap individual bars in parchment or plastic wrap, then pop them in a zip-top freezer bag. They’ll last up to 3 months. Thaw overnight in the fridge or for a few minutes on the counter before serving. No reheating needed—just grab and go!
Make-Ahead and Freezer Tips
These bars are a meal prep superstar! Make a double batch on Sunday and you’ll have best meal prep plans snacks for the whole week—or even the month. Freeze extras and pull out as needed for best meal prep healthy—think after-school snacks, quick breakfasts, or that 3 p.m. energy dip.
If packing for lunches, wrap each bar individually so you can toss them straight into lunchboxes or bags—this is how you win at good meal prep plans.
Common Mistakes to Avoid
- Not pressing the mixture firmly enough—this is the #1 cause of crumbly bars! Use the bottom of a glass or measuring cup to really pack them in.
- Not chilling long enough before slicing. The bars need time to firm up for that perfect, bakery-style texture.
- Overheating the peanut butter and honey. Just melt until smooth—don’t let it bubble or boil, which can make the bars dry and hard.
- Skipping the parchment paper makes for tough removal and messy bars.
Frequently Asked Questions (FAQ)
Can I use quick oats instead of rolled oats?
Yes, but the bars will be a bit softer and less chewy. If you love that texture, go for it!
Can I use another sweetener besides honey or maple syrup?
Absolutely. Try agave, brown rice syrup, or even date syrup. Adjust the amount if your sweetener is thinner or thicker than honey.
How do I make these vegan?
Use maple syrup or agave instead of honey and swap in dairy-free chocolate chips.
Can I add protein powder?
Definitely! A scoop of vanilla or chocolate protein powder adds a nutrition boost and helps make these bars ideal for your protein meal plan or protein eating plan.
Can I use crunchy peanut butter?
Go for it! Crunchy peanut butter brings an extra layer of texture and bite.
How do I keep my bars from crumbling?
Press the mixture in tightly and chill for at least 1–2 hours before slicing.
Are these gluten-free?
Yes—just be sure to use certified gluten-free oats.
Can I double the recipe?
Yes, double the batch and use a 9×13-inch pan, or prep in two separate pans for meals for two delivered meal planning.
What’s the best way to cut these bars?
Use a sharp knife, and for super clean cuts, run the blade under hot water and wipe between each slice.
Can I substitute oats with something else?
Quinoa flakes, crushed rice cereal, or puffed millet can be used. Texture will vary, but it’s a fun way to change things up!
Cooking Tools You’ll Need
- 8×8-inch baking dish
- Parchment paper
- Medium saucepan
- Large mixing bowl
- Spatula or wooden spoon
- Measuring cups and spoons
- Sharp knife for slicing
If you enjoyed this recipe, don’t forget to save it on Pinterest or share it with a friend!
No Bake Peanut Butter Oatmeal Bars
Ingredients
- 2 cups old-fashioned rolled oats (certified gluten-free if needed)
- 1 cup peanut butter (creamy or crunchy, natural or regular)
- 1/2 cup honey or maple syrup
- 1/2 teaspoon vanilla extract
- 1/4 teaspoon salt
- 1/2 cup mini chocolate chips (optional)
Instructions
- Line an 8×8-inch baking dish with parchment paper, leaving an overhang for easy removal.
- In a medium saucepan over low heat, combine the peanut butter and honey (or maple syrup). Stir until melted and smooth. Remove from heat and stir in vanilla extract and salt.
- Add the oats to a large mixing bowl. Pour the warm peanut butter mixture over the oats and stir until fully combined.
- Allow the mixture to cool slightly, then fold in mini chocolate chips if using.
- Transfer the mixture into the prepared baking dish and press firmly into an even layer using a spatula or lightly greased hands.
- Refrigerate for at least 1 hour, or until the bars are firm.
- Lift the bars out of the pan using the parchment overhang. Cut into squares or bars with a sharp knife. Store in an airtight container in the fridge for up to 1 week.


