Introduction
I blame these potato wedges for making me late to more than one backyard dinner. I pull them from the oven, hear that gentle sizzle as heat slips into cool air, and suddenly I’m hovering over the pan with a potholder in one hand and a wedge in the other, whispering, “Just one.” Famous last words. They’re golden, crackly at the edges, fluffy inside, and exactly the kind of healthy comfort food I want on the table when life feels loud and my brain is juggling best meal prep plans, soccer practice, and a mountain of laundry.
I first made them on a Tuesday when I needed a side that didn’t require deep-frying or a special trip to the store. Russet potatoes? Check. Olive oil? Always. Garlic powder? I keep a backup jar, because garlic is a love language. The plan was to serve them with grilled chicken for quick family meals that would keep everyone happy and not blow up our budget. To be real, I expected “good.” I didn’t expect “hush-the-table” good. When the tray hit the table, the room smelled like a pizzeria met a steakhouse—roasty garlic, toasty Parmesan, and that cozy, herby perfume from Italian seasoning.
The first batch was not perfect. I crowded the pan—rookie move—and the wedges steamed instead of crisping. Oops. I ate them anyway. Then I went back to the drawing board and gave them space, skin side down, like little sailboats on a calm sea. They came out bronzed and audibly crisp. I might have done a victory lap around the kitchen island. Since then, these wedges have become a steady player in my protein meal plan rotation—chilling beside turkey burgers, stealing the show next to salmon, and making fridge-foraged dinners feel complete.
What I love most is that they’re a win for budget-friendly recipes and a dream for meal planning chicken nights. They’re inexpensive, craveable, and adaptable enough to sidle up to everything from tahini bowls (hi, high macro meals) to a plate of eggs for my Sunday almost-full English breakfast routine—halal turkey bacon on the side, obviously. When the week is chaos, these wedges are my little edible calm.
Why You’ll Love This Recipe
- The edges are shatter-crisp while the centers stay cloud-soft. Every bite is crunch-then-cushion.
- Oven-baked, not fried, which keeps things lighter and friendly to best meal prep healthy goals.
- Simple pantry seasonings deliver big flavor, fast—perfect for no prep healthy lunches or add-ons to ready made protein meals.
- Scales easily for crowds, game day, or a snacky dinner that still feels like healthy eating for two.
- Plays well with dips, sauces, and almost any main, from grilled fish to high protein pre made meals on busy nights.
- Easy to customize: smoky with paprika, spicy with cayenne, or lemony with fresh zest.
What Makes This Recipe Special?
A few tiny choices turn basic potatoes into restaurant-level wedges. Cutting them into even ½–¾-inch spears means they cook at the same pace, so every piece hits that sweet spot of crunchy coat and tender middle. Tossing with olive oil first helps seasonings cling, and resting the wedges skin-side down on the sheet gives the exposed sides maximum hot-air contact. Freshly grated Parmesan is the clincher—its salty nuttiness melts into micro-crisps on the edges and forms a delicate shell that crackles when you tap it with your fork.
I also love the flexibility. On nights when I’m building plates around high protein high carb low fat meals, these wedges slip in with zero fuss. For best dinner prep meals, I parboil or soak, season, and then bake right before we eat. And when I’m running a lighter week, I use just enough oil to gloss the potatoes and let the oven do the rest. The result always tastes like more work than it is, which is my favorite kitchen magic trick.
Ingredients
- Russet potatoes: High starch means crisp outsides and fluffy interiors. Yukon Golds work, but russets give the best crunch.
- Olive oil: Helps the seasonings cling and promotes that golden-brown finish without deep-frying—great for a hello fresh low calorie menu vibe at home.
- Garlic powder: Savory depth without burning the way fresh garlic might at high heat.
- Onion powder: Adds roundness and diner-fry nostalgia.
- Italian seasoning: A friendly blend (oregano, basil, thyme) that perfumes the wedges.
- Salt and black pepper: The fundamentals. Season confidently.
- Paprika (optional): For warmth and color; smoked paprika gives a subtle BBQ whisper.
- Grated Parmesan cheese: Salty, nutty crispness. Choose a halal-certified or vegetarian rennet Parmesan if needed.
- Fresh parsley (optional): Brightens the finish and adds a pop of color.
Pro tips, brands, and swaps: I love coarse kosher salt for even seasoning and freshly grated Parmesan for melt and flavor. Pre-grated works in a pinch, but it doesn’t crisp quite as well. If you’re steering toward low calorie high nutrition meals, go light on the oil and rely on high heat for browning. For dairy-sensitive friends, a mix of nutritional yeast and extra-fine breadcrumbs gives a surprisingly cheesy crunch without cheese.
Don’t-do-this warnings: Don’t crowd the pan—the wedges need breathing room or they’ll steam. Don’t skip drying the potatoes after washing or soaking; moisture is the enemy of crisp. Don’t pour all the Parmesan into the bowl at once if your wedges are very hot; it can clump. Sprinkle some on the sheet, some on top, and you’ll maximize the lacy-cheese effect.
How to Make It Step-by-Step
- Heat the stage. Preheat the oven to 400°F (200°C). Line a large baking sheet with parchment or lightly grease it. If you have a heavy, dark sheet, use it—it helps with browning. While the oven warms, I put on music because the soundtrack matters.
- Cut the wedges. Scrub four medium russets and pat them dry. Slice each potato lengthwise in half, then cut each half into 3–4 wedges, aiming for ½–¾ inch thickness. I like to keep the skin on for texture and that comforting baked-potato flavor. As you cut, toss wedges into a bowl of cold water if you have a few extra minutes; soaking for 20–30 minutes pulls off surface starch for extra crispness.
- Dry like you mean it. Drain the wedges and lay them on a clean towel. Pat thoroughly. This part is not glamorous, but it’s the difference between “nice” and “wow.” You want the surfaces as dry as your sense of humor at 6 p.m. on a Wednesday.
- Season the base. In a big bowl, toss wedges with 2 tablespoons olive oil. Sprinkle on 1 teaspoon garlic powder, 1 teaspoon onion powder, 1 teaspoon Italian seasoning, 1 teaspoon kosher salt, ½ teaspoon black pepper, and 1 teaspoon paprika if you like. Toss to coat every surface. You should see a thin glossy sheen and flecks of spice clinging to the sides.
- Add the Parmesan. Sprinkle ½ cup freshly grated Parmesan over the seasoned wedges and toss again gently. The cheese will start to cling and create tiny nubbins on the surfaces—that’s your future crunch. For extra insurance, I dust a teaspoon of Parmesan directly onto the baking sheet where the skin ends will rest. Think of it as Parmesan confetti.
- Arrange with intention. Place wedges skin-side down in a single layer, leaving a bit of space between each. The skin acts like a tiny trivet, propping the wedges so hot air can circulate and crisp all around.
- Bake to golden bliss. Slide the sheet onto a middle rack and bake 35–40 minutes. Halfway through, use a thin spatula to flip the wedges onto a new side for even browning. You’ll hear a faint rustle when you shake the pan—that’s the sound of crispness happening. The kitchen will smell like a pizzeria date night and you will be tempted to snack. Stand strong. Or don’t. I won’t tell.
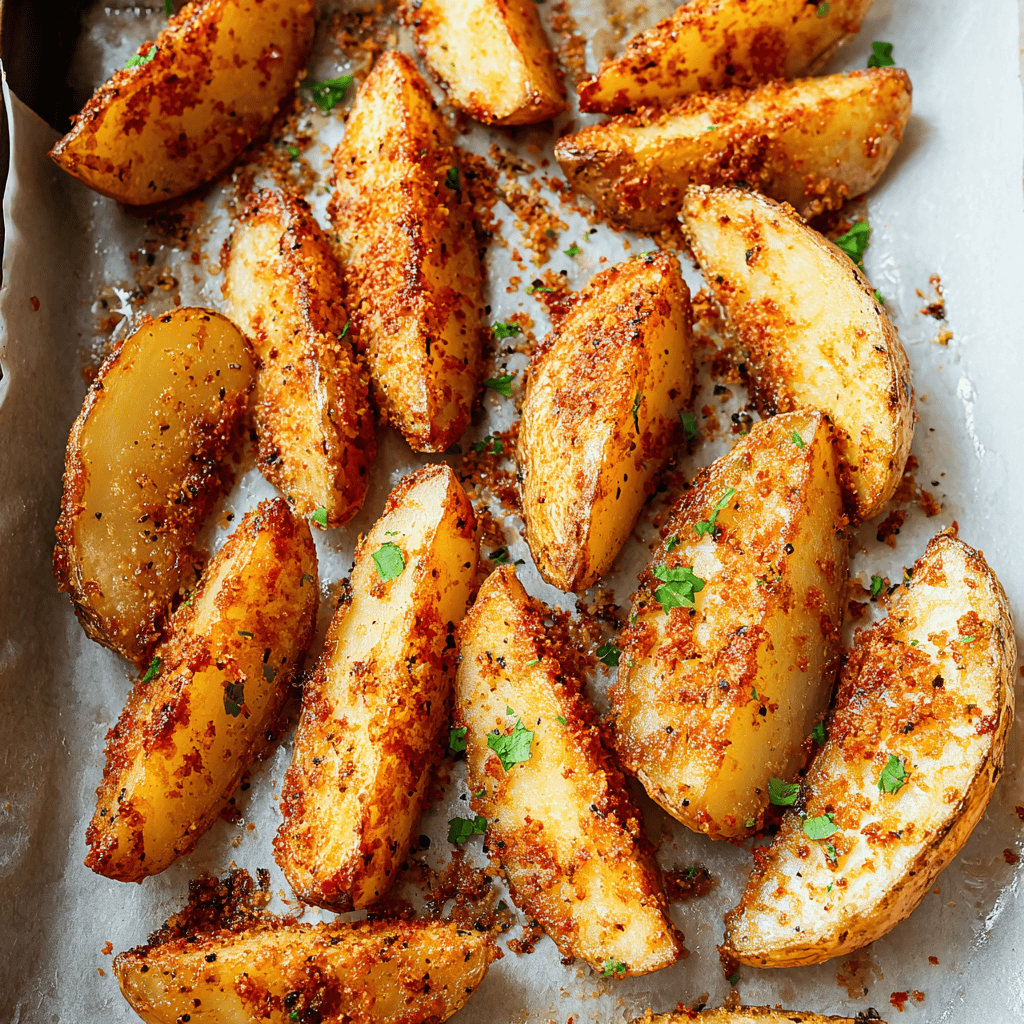
- Finish and serve. When the wedges are burnished and the edges look lacey with cheese, pull them out. Sprinkle with chopped parsley and a pinch of extra salt while hot. Let them sit for 2–3 minutes to set the crust, then dive in. The first bite should be audible: crisp edge, melting center, garlic-herb aroma that feels like a hug with excellent posture.
My mistakes, your wins: I’ve tried to rush these on a lower temp because I had something delicate in the oven. Don’t. They need the heat. I’ve also learned that flipping too soon tears the coating—wait until the bottoms release easily. Lastly, taste a wedge before salting at the end; Parmesan is salty and beautiful, but she’s powerful.
Improv ideas: Add lemon zest in the last five minutes for sunshine. Shake on crushed red pepper for heat if you want a game-day snack that nudges into best meals to prep territory. Coat with a little cornstarch before oil for ultra-crisp wedges that reheat brilliantly—useful if you’re packing meal prep microwave lunches.
Tips for Best Results
- Soak or parboil when you can. A 20–30 minute cold-water soak or a 5-minute parboil helps shed starch for extra-crisp edges.
- Dry, then oil. Moisture prevents browning. Get the wedges truly dry before adding oil and seasoning.
- Use convection if you have it. The fan helps. Drop the temp to 390°F and start checking a few minutes early.
- Space the wedges. Crowding = steaming. Give them room and they’ll reward you with crunch.
- Grate your Parmesan. Freshly grated melts and crisps better than pre-shredded.
- Finish with salt. A tiny sprinkle after baking perks up the flavors—especially for healthy boxed meals style dinners that need a little spark.
Ingredient Substitutions & Variations
- Dairy-free: Swap Parmesan for nutritional yeast plus a pinch of fine breadcrumbs for texture.
- Herb switch: Use dried rosemary and thyme for steakhouse vibes, or cajun seasoning for smoky heat.
- Spicy: Add cayenne or chili powder to the blend. Great with garlic aioli on premade lunch meals nights.
- Smoky: Use smoked paprika and a touch of cumin for BBQ energy.
- Lemon-herb: Toss with lemon zest and a little chopped fresh thyme or rosemary before baking.
- Cheesier: Shower with a little shredded mozzarella in the last 5 minutes for gooey edges—kid magnet.
- Air fryer: 400°F for 20–25 minutes in a single layer, shaking or flipping halfway; an excellent option alongside high protein microwave meals.
Serving Suggestions
These wedges are natural-born dippers. I put out ranch, ketchup, garlic yogurt sauce, or a quick halal-friendly “special sauce” (mayo + ketchup + pickle relish + lemon). They’re fantastic with turkey burgers, grilled chicken, or baked fish when I’m aiming for healthy meal plans for two. Pair them with a big chopped salad and you’ve got best dinner prep meals energy without the stress. On brunchy weekends, I serve them next to eggs and sautéed mushrooms for a cozy almost-full English breakfast plate.
Pairing Ideas (Drinks, Sides, etc.)
- Drinks: Iced tea with lemon, sparkling water with lime, or a pineapple mocktail for brightness.
- Sides: Crunchy coleslaw, blistered green beans, or a tomato-cucumber salad.
- Mains: Grilled chicken thighs, lemon-pepper salmon, lentil patties, or falafel for a plant-forward swing that fits a vegan meal prep plan.
- Sauces: Garlic aioli, tahini-lemon sauce, smoky harissa yogurt, or chimichurri if you want herb fireworks.
How to Store and Reheat Leftovers
Let the wedges cool completely, then tuck them into an airtight container for up to 3 days. To reheat, spread on a sheet and bake at 375°F for 8–10 minutes or pop into the air fryer at 375–390°F for 5–8 minutes until the edges re-crisp. Avoid microwaving unless you’re desperate; it softens the crust. If you’re mapping out low calorie chicken meal prep, roast an extra tray and reheat small portions beside your chicken and veggies for a week of happy plates.
Make-Ahead and Freezer Tips
You can cut the potatoes up to a day in advance and keep them submerged in cold water in the fridge. Dry very well before seasoning. Another make-ahead move: season the wedges and store, uncooked, in the fridge for a few hours, then bake right before serving. Freezing isn’t ideal because the Parmesan crust can soften and the texture changes on thawing. If you must, par-bake for 20 minutes, cool fully, freeze in a single layer, then finish from frozen at 425°F—but fresh is better.
Common Mistakes to Avoid
- Overcrowding the pan. It’s the fast lane to soggy wedges.
- Skipping the dry step. Water clings to cut surfaces—pat thoroughly.
- Using low heat. Anything under 400°F leads to pale, soft wedges.
- Adding cheese too early to a hot bowl. It can clump; distribute partly on the sheet and partly on the wedges.
- Flipping too soon. If they cling, wait a couple more minutes; a well-browned crust naturally releases.
Frequently Asked Questions (FAQ)
Can I use other potatoes?
Yes. Yukon Golds and reds work, but russets give the crispiest texture thanks to their higher starch.
Do I need to soak first?
Optional but helpful. A 30-minute soak removes surface starch and boosts crunch—handy for best meals to prep days.
Can I make these in an air fryer?
Definitely. Cook at 400°F for about 20–25 minutes in a single layer, shaking or flipping halfway. It’s weeknight gold next to ready meals for 2.
What dips go best?
Ranch, ketchup, garlic aioli, spicy mayo, or a yogurt-tahini sauce. I also love them with a drizzle of chimichurri.
How do I make them extra crispy?
Don’t overcrowd, dry thoroughly, use high heat, and consider a teaspoon of cornstarch tossed with the seasonings.
Is fresh Parmesan better than pre-grated?
Yes—better melt, better crisp, richer flavor. Choose halal-certified or vegetarian rennet Parmesan if needed.
Are these gluten-free?
Yes. All ingredients are naturally gluten-free; always check your Parmesan.
Can I skip the Parmesan?
You can. Sub nutritional yeast for a savory kick, or add a dusting of fine breadcrumbs for texture if gluten isn’t an issue.
How thick should the wedges be?
Aim for ½–¾ inch for even cooking and that perfect crisp-meets-fluffy bite.
Cooking Tools You’ll Need
- Large baking sheet (dark or heavy helps with browning)
- Parchment paper or a light coating of oil
- Large mixing bowl and tongs or a spatula
- Chef’s knife and cutting board
- Grater for Parmesan
- Clean kitchen towel for thorough drying
Final Thoughts
These Baked Crispy Parmesan Potato Wedges are humble ingredients doing the absolute most. They make the kitchen smell like a cozy trattoria, they shatter when you bite in, and they turn an ordinary Tuesday into a little celebration. I lean on them when I’m steering our week toward high carb high protein low fat meals, when I’m mapping a simpler night with best high protein frozen meals, and when I just want something that makes everyone at the table say, “Oh, yes please.” Honestly, they’re the side that behaves like a main character.
If you try them, make them yours. Add lemon zest. Go smoky with paprika. Keep them classic with just salt and pepper. And if one slips off the spatula straight into your mouth while no one’s looking? That’s called chef’s tax. If you enjoyed this recipe, don’t forget to save it on Pinterest or share it with a friend!

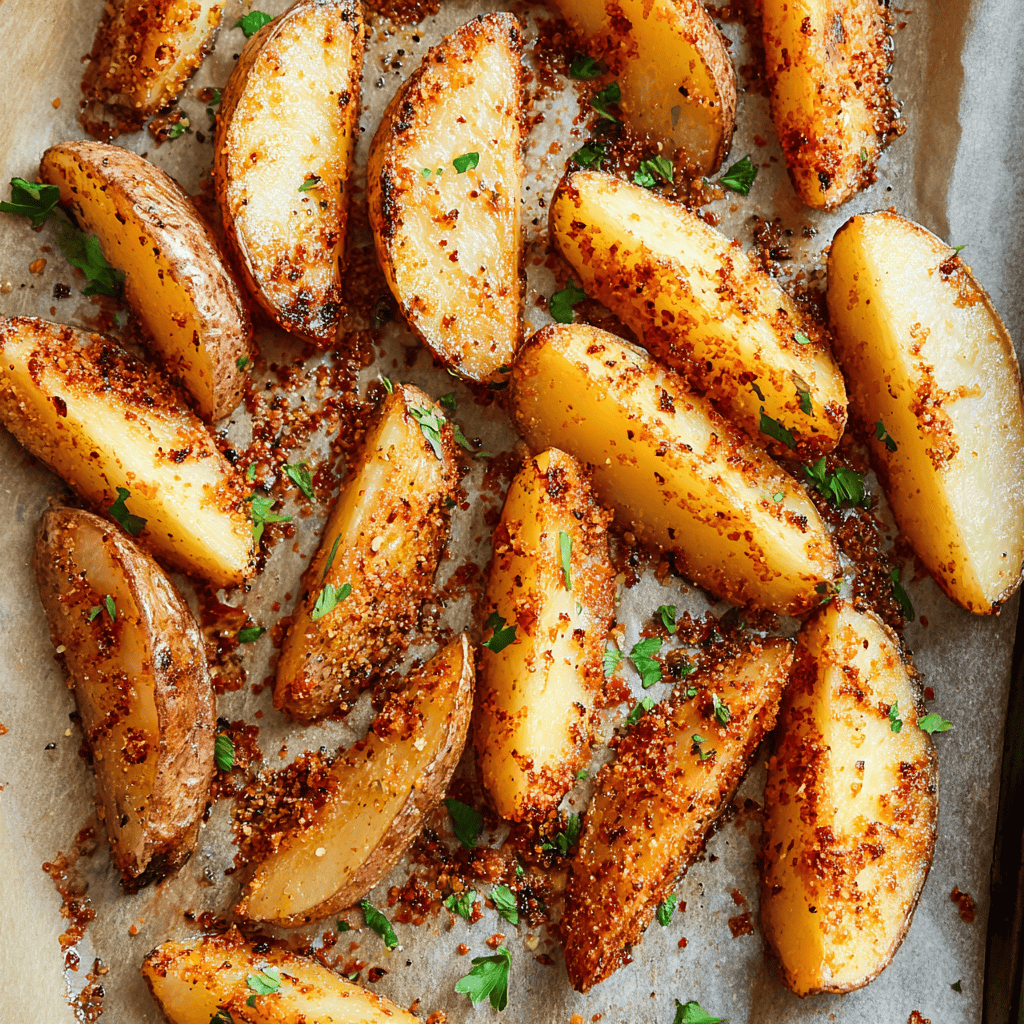
Baked Crispy Parmesan Potato Wedges
Ingredients
- 4 medium russet potatoes, scrubbed and cut into wedges
- 2 tablespoons olive oil
- 1 teaspoon garlic powder
- 1 teaspoon onion powder
- 1 teaspoon Italian seasoning
- salt and black pepper, to taste
- 1 teaspoon paprika (optional; use smoked for smoky flavor)
- 1/2 cup grated Parmesan cheese (halal-certified or vegetarian rennet)
- chopped fresh parsley, for garnish (optional)
Instructions
- Preheat oven to 400°F (200°C). Line a baking sheet with parchment paper or lightly grease it.
- Cut scrubbed potatoes into even 1/2–3/4 inch wedges. Pat very dry. (Optional: soak wedges in cold water 20–30 minutes, then drain and dry for extra crispiness.)
- In a large bowl, toss wedges with olive oil, garlic powder, onion powder, Italian seasoning, salt, pepper, and paprika if using until evenly coated.
- Sprinkle grated Parmesan over the seasoned wedges and toss again to coat.
- Arrange wedges skin-side down on the baking sheet in a single layer with space between pieces.
- Bake 35–40 minutes, flipping halfway through, until the wedges are deep golden and crisp on the edges and tender inside.
- Remove from oven, sprinkle with parsley if using, adjust salt to taste, and serve hot with your favorite dip.