When it comes to party appetizers or weeknight comfort food, you just can’t go wrong with a creamy, cheesy dip. This Bean Dip has become my go-to recipe whenever I need something that’s not only quick and easy but also bursting with flavor. The combination of refried beans, cream cheese, taco seasoning, and plenty of cheese makes this dip an instant hit every time. Whether you’re serving it at a big game day gathering, a casual family dinner, or a fun movie night, this dish will surely satisfy everyone’s cravings. And the best part? You can easily customize it to suit any dietary preference or spice tolerance!
Why You’ll Love This Recipe
If you love a good, cheesy dip, then this Bean Dip is your new best friend. It’s incredibly quick to whip up, needing only about 10 minutes of prep time and just 20–25 minutes in the oven. With ingredients you probably already have on hand, it’s the perfect budget-friendly recipe for those times when you need to feed a crowd without breaking the bank.
The beauty of this dip is in its versatility. It’s creamy, savory, and customizable—you can make it as mild or spicy as you like, and add any toppings you choose. Plus, it’s perfect for any occasion, from casual weeknight meals to parties or holiday get-togethers. And if you’re looking for healthy comfort food, this dip offers a good balance of creamy texture without being too heavy, especially if you opt for lighter sour cream or cream cheese options.
What Makes This Recipe Special?
This Bean Dip is special because it’s more than just a regular dip—it’s a flavor explosion in every bite. The base of refried beans gives it a rich, hearty texture, while the cream cheese and sour cream create a velvety smoothness. The taco seasoning (or a blend of chili powder, cumin, garlic powder, and paprika) adds just the right amount of spice and depth, making it incredibly satisfying. And let’s not forget the melty, gooey cheese that ties everything together. It’s the ultimate comfort food—warm, creamy, cheesy, and so easy to make.
What’s also great is that it’s adaptable. If you like things spicy, you can toss in jalapeños or green chilies. For a more sophisticated twist, add in some fresh herbs like cilantro or a squeeze of lime juice. This dip also works beautifully with different cheeses—sharp cheddar for a tangy bite, Monterey Jack for extra creaminess, or pepper jack for a bit of a kick. It’s all about making it your own!
Ingredients
Let’s take a quick look at the ingredients you’ll need for this delicious Bean Dip:
- Refried Beans (canned or homemade): This is the heart of the dip. You can use traditional refried pinto beans, or if you prefer something with more texture, black beans work great too.
- Cream Cheese or Sour Cream: These add richness and creaminess. I personally love a mix of both to get a smooth and balanced texture.
- Shredded Cheddar or Mexican Blend Cheese: This is the cheese that melts beautifully into the dip. Feel free to swap with any cheese that melts well, like Monterey Jack or a combination of cheeses.
- Taco Seasoning or a mix of chili powder, cumin, garlic powder, and paprika: This brings in all the savory flavors that make this dip irresistible.
- Jalapeños or Green Chilies (optional): If you want some heat, this is the way to go! Add more or less depending on how spicy you like your dip.
- Hot Sauce (optional): A few dashes can bring the heat up a notch!
- Chopped Green Onions or Cilantro (for garnish): Adds freshness and a burst of color to the finished dish.
- Optional Toppings: Feel free to get creative with toppings like diced tomatoes, sliced olives, extra cheese, or creamy avocado.
How to Make It Step-by-Step
Let’s break down the simple process of making this delectable Bean Dip:
- Preheat the Oven: Start by setting your oven to 350°F (175°C). This ensures that the dip will cook evenly and melt into that perfect cheesy texture.
- Mix the Base Ingredients: In a medium mixing bowl, combine the refried beans with the cream cheese (or sour cream), shredded cheese, and taco seasoning. Stir until everything is smooth and well-blended. If you like your dip extra creamy, feel free to add a bit more cream cheese or sour cream.
- Spread into a Baking Dish: Once your mixture is smooth, transfer it to a baking dish (I recommend an 8×8-inch dish, but a slightly larger or smaller one works too). Spread the mixture evenly, smoothing out the top so that it cooks evenly.
- Top It Off: Sprinkle some additional shredded cheese on top of the bean mixture. You can use the same cheese or a different one for added flavor. If you’re using optional toppings like sliced jalapeños, diced tomatoes, or olives, now’s the time to sprinkle those on top as well.
- Bake: Place the dish in the preheated oven and bake for 20–25 minutes, or until the cheese is fully melted and bubbly. You’ll know it’s done when the edges start to brown slightly and the dip is hot throughout.
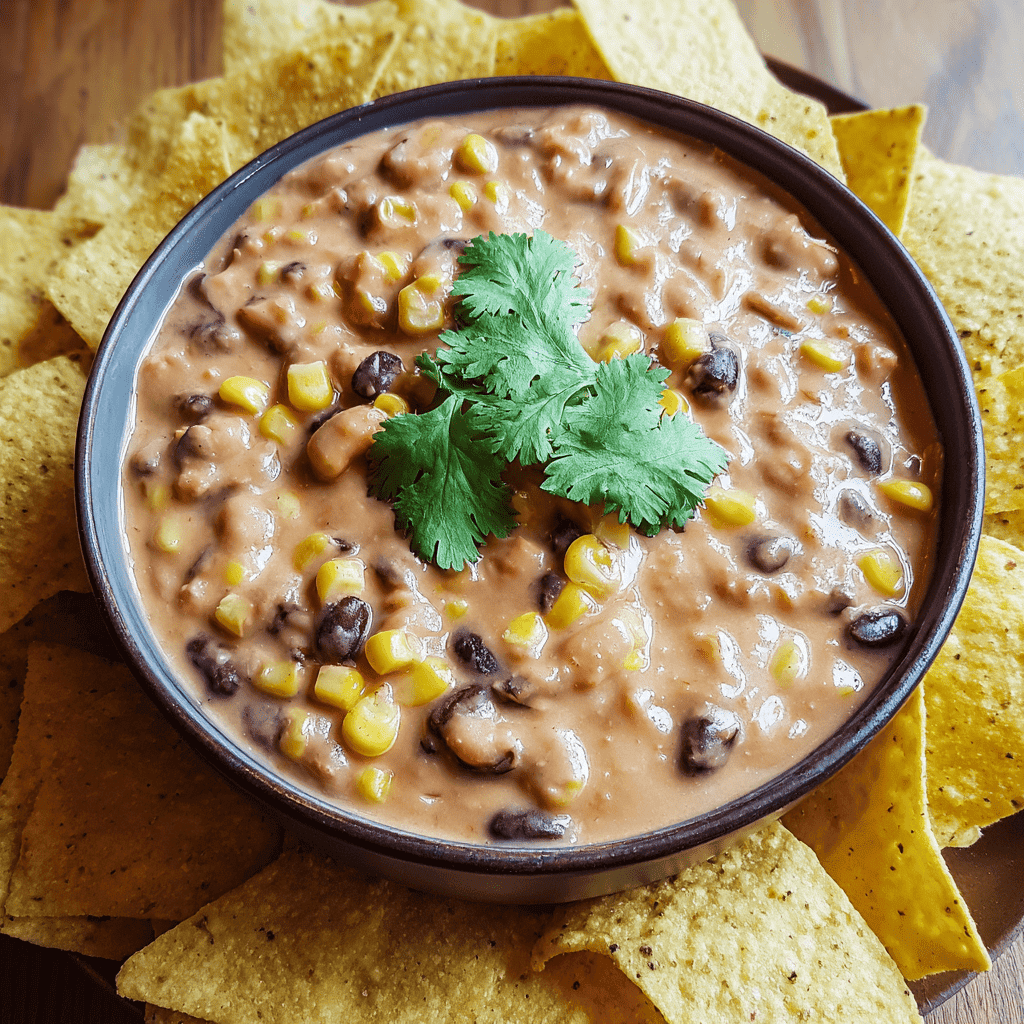
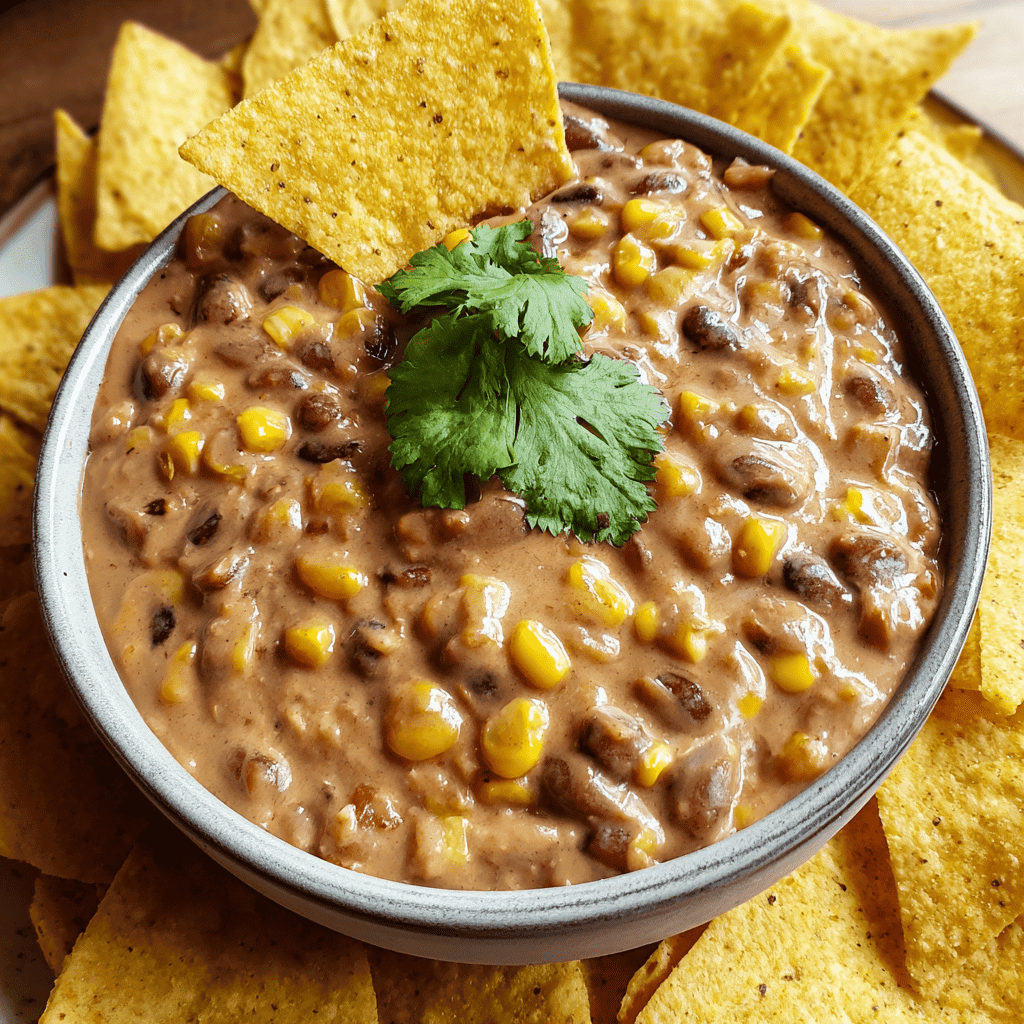
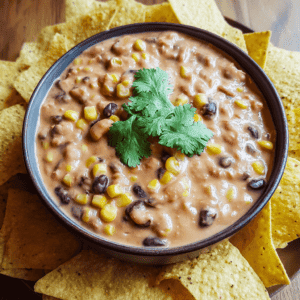
- Garnish and Serve: Remove the dip from the oven and let it cool for a few minutes before serving. Garnish with fresh chopped green onions, cilantro, or any other topping you like. Serve it up warm with tortilla chips, pita chips, or even fresh veggie sticks for dipping.
Tips for Best Results
- Chill the Dip Mixture: If you have time, refrigerate the dip for about 30 minutes before baking. This will help the flavors meld together even more, and you’ll have a thicker consistency.
- Don’t Overload on Spices: While it’s tempting to pile on the spices, remember that a little goes a long way. Start with the recommended amount and adjust to your taste.
- Use Fresh Ingredients: Fresh herbs like cilantro and green onions can really elevate the flavor of this dip, so don’t skip them!
- Double the Recipe for a Party: This recipe can easily be doubled for larger gatherings. Just be sure to adjust your baking time as needed, since the dip will take longer to heat through in a larger pan.
Ingredient Substitutions & Variations
One of the things I love most about this Bean Dip is its flexibility. Here are a few variations and substitutions you can try based on your taste or dietary preferences:
- Vegan Version: If you’re looking for a plant-based option, swap out the cream cheese for a vegan cream cheese alternative and use dairy-free cheese.
- Meat Lover’s Twist: For those who love a bit of extra protein, try adding cooked ground beef or chorizo to the bean mixture. It’s like having a full meal in one dip!
- Low-Carb Option: If you’re following a keto meal plan, you can skip the tortilla chips and serve this dip with low-carb options like celery sticks, cucumber slices, or homemade almond flour crackers.
- Extra Creamy: For an even richer dip, add a dollop of sour cream to the top just before serving. You can also mix some into the base for extra creaminess.
Serving Suggestions
This Bean Dip is perfect for a variety of occasions, and pairing it with the right sides and drinks can take it to the next level. Here are a few ideas:
- Tortilla Chips: The classic choice! Tortilla chips are perfectly crunchy and provide the ideal vessel for scooping up this creamy dip.
- Veggie Sticks: For a healthier option, serve the dip with sliced cucumber, carrots, celery, or bell peppers. It’s a great way to add a fresh crunch.
- Pita Chips or Crackers: If you want to change it up, serve the dip with warm pita chips or whole-grain crackers. The mild flavor of these pairs wonderfully with the boldness of the dip.
- Warm Tortillas: For a more substantial meal, serve the dip with warm tortillas. You can even turn this into a burrito-style treat by adding some extra protein like grilled chicken or beef.
Pairing Ideas (Drinks, Sides, etc.)
When serving this Bean Dip, consider pairing it with these drinks and sides for a more rounded meal:
- Drinks: I recommend a cold, refreshing drink like iced tea, margaritas, or a citrusy lime soda to complement the richness of the dip. If you prefer non-alcoholic options, try a simple lemonade or sparkling water with a splash of lime.
- Sides: Pair the dip with a zesty salad with avocado, tomatoes, and fresh greens. You can even serve it as part of a Tex-Mex meal with rice, guacamole, and beans.
How to Store and Reheat Leftovers
Bean Dip is one of those dishes that tastes just as good the next day. Here’s how to store and reheat it:
- Refrigeration: Store any leftover Bean Dip in an airtight container in the refrigerator for up to 4 days. The dip will stay fresh and creamy, and the flavors will continue to develop.
- Reheating: To reheat, you can place the dip in the oven at 350°F for 10–15 minutes until it’s hot and bubbly again. If you’re in a rush, the microwave works fine too—just heat in 30-second intervals, stirring in between.
Make-Ahead and Freezer Tips
If you want to get a head start on this dip for a busy week or party, you can make it ahead:
- Make Ahead: You can prepare the dip the day before, cover it tightly, and refrigerate it. When you’re ready to serve, simply bake it as directed.
- Freezing: While I don’t recommend freezing the dip once it’s baked (because the texture of the dairy ingredients might change), you can freeze the unbaked mixture. To do this, assemble the dip in a baking dish, cover it tightly with plastic wrap, and freeze for up to a month. When you’re ready to bake, let it thaw in the fridge overnight and then bake as usual.
Common Mistakes to Avoid
- Overmixing: When combining the ingredients, don’t overmix the dip, especially when incorporating the beans and cream cheese. You want a smooth consistency but don’t need to turn it into a paste.
- Underbaking: Make sure to bake the dip long enough for the cheese to melt and the dip to get bubbly. If you don’t bake it long enough, the dip won’t have the proper texture and won’t be as satisfying.
- Not Letting It Cool: Let the dip cool for a few minutes before serving. Not only does this help with flavor, but it ensures that you don’t burn your mouth on molten hot cheese!
Frequently Asked Questions (FAQ)
- Can I use black beans instead of refried beans?
Absolutely! Black beans are a great alternative. Just mash them up or use canned black refried beans for a slightly different texture and flavor. - Can I make this dip ahead of time?
Yes, you can prepare the dip ahead of time and refrigerate it for up to 24 hours before baking. - Is bean dip gluten-free?
Yes, as long as you use certified gluten-free taco seasoning and check the ingredients of your beans and cheese.
Cooking Tools You’ll Need
- Mixing Bowls: For combining all of your ingredients.
- Baking Dish: A medium-sized baking dish, about 8×8 inches, is perfect for this recipe.
- Oven: You’ll need the oven to bake the dip and melt the cheese perfectly.
If you enjoyed this recipe, don’t forget to save it on Pinterest or share it with a friend!
Shrimp Cake
Ingredients
- 1 lb raw shrimp, peeled and deveined
- 1/2 cup breadcrumbs
- 1 large egg
- 1/4 cup mayonnaise
- 1 tbsp Dijon mustard
- 1 clove garlic, minced
- 2 tbsp green onions, finely chopped
- 2 tbsp fresh parsley or cilantro
- 1 tsp lemon zest
- 1/2 tsp salt
- 1/4 tsp black pepper
- 2 tbsp olive oil or vegetable oil (for frying)
Instructions
- Finely chop the shrimp or pulse in a food processor until coarsely ground (don’t overprocess—you want texture).
- In a large bowl, mix shrimp with breadcrumbs, egg, mayo, mustard, garlic, green onions, herbs, lemon zest, salt, and pepper.
- Shape the mixture into small patties and place on a tray. Chill in the refrigerator for 20–30 minutes to help them hold together.
- Heat oil in a skillet over medium heat.
- Fry shrimp cakes for 3–4 minutes per side, or until golden brown and cooked through.
- Transfer to a paper towel-lined plate. Serve hot with lemon wedges or your favorite dipping sauce.


