Introduction
The first time I made this sweet tart crust, I was wearing slippers, playing my “I swear I’m cleaning” playlist, and pretending I wasn’t already three bites into leftover chocolate ganache. The house smelled like butter and vanilla, the kitchen lights were warm, and the oven hummed like a happy cat. Honestly, I was chasing the kind of cozy baking moment that turns a simple crust into a memory. And this one delivered—big time. It’s the kind of base that makes even a quick fruit pile-on feel like bakery magic, and it slides right into easy weeknight dinners energy because dessert can absolutely be part of healthy comfort food when it’s done with love and a little portion control.
To be real, I’ve had my share of pastry drama. I’ve melted butter with my hands (oops), forgotten to chill the dough (hello shrinkage), and tried to roll it out on a hot summer counter like I was starring in a pastry reality show. Still, this pâte sucrée—our fancy term for sweet tart crust—keeps forgiving me. It holds its shape, stays tender yet crisp, and plays well with everything from lemon cream to chocolate silk. It also fits beautifully into meal planning chicken nights or quick family meals, because when dinner’s simple, dessert can be splendid. Add a dollop of whipped cream and suddenly we’re approaching best meal prep plans for joy—yes, joy counts.
If you’re into high protein meals or tinkering with a protein meal plan, you can still love this crust by pairing it with a Greek yogurt filling or a creamy ricotta base. And if you ever dabble in keto meal plan experiments, make this crust for your non-keto friends and keep the almond-flour version for yourself—balance is everything. Whether you need a base for a fresh berry afternoon tart, a fancy dinner finale, or a “just because it’s Tuesday” treat, this recipe brings buttery calm to the chaos. It’s got bakery energy without bakery stress, which is exactly the vibe I need when I’m juggling best high protein ready meals for lunch and dreaming of dessert by 3 p.m.
Why You’ll Love This Recipe
It’s buttery, tender, and lightly sweet—like a hug that crunches.
No shrinking drama when you blind-bake; it stays where you put it.
Beginner-friendly and quick to pull together in a food processor or by hand.
Versatile for fruit, custard, chocolate, and no-bake fillings.
Make-ahead friendly and freezer-friendly for stress-free entertaining.
Crisp edges, clean slices, and that elegant bakery look with minimum effort.
What Makes This Recipe Special?
This is a pâte sucrée, which means the sugar and fat work together to create tenderness without flakiness—the exact texture that loves silky fillings. The powdered sugar dissolves into the dough for a fine crumb and a delicate snap. Cold butter is nonnegotiable; it keeps the structure crisp. A single egg yolk binds everything without making it tough, and a few drips of ice water help the dough come together just when you need it to.
Memory-wise, this crust is my “reset” recipe. When dinner is basic—maybe roasted chicken and greens for those low calorie high nutrition meals vibes—this crust is my tiny bit of extra. I’ve used it for birthdays, for “we made it through Monday” celebrations, and for quiet nights with a rom-com. It’s also the base I recommend to friends who are new to baking. If you can pulse and chill, you can win. And if you’re juggling work and meal prep microwave lunches, this is your treat that feels like an occasion without becoming a project.
Ingredients
All-p
urpose flour: The structure. Regular AP flour (1 1/4 cups) creates a tender bite without being crumbly. I avoid bread flour (too much chew) and stick with brands that are consistent; King Arthur and Gold Medal both behave nicely in this dough.
Powdered sugar: Not granulated. Powdered sugar (1/2 cup) melts into the flour and butter for that fine, cookie-like tenderness. It also helps the crust brown evenly. If you only have granulated, you can pulse it longer, but the texture won’t be quite as delicate.
Salt: Just 1/4 teaspoon, but it matters. It balances the sweetness and makes the butter taste rounder, richer, more grown-up.
Unsalted butter, cold and cubed: Half a cup. Cold is the hill I will die on. Warm butter smears; cold butter crimps. I cube the butter, then pop it back in the fridge while I measure everything else. If your kitchen runs hot, chill the bowl and blade of your food processor, too.
Egg yolk: One yolk is the dreamy emulsifier that turns crumbs into dough. It adds richness and helps the crust slice cleanly after baking.
Ice water: 1–2 tablespoons, just enough to pull the dough together. The colder the better; I toss an ice cube in the water and fish it out before measuring.
Optional vanilla extract or citrus zest: A half teaspoon of vanilla or a teaspoon of finely grated lemon/orange zest is lovely if you want the crust to have its own personality. I love citrus when I’m filling the tart with berries.
Substitutions and warnings from my kitchen misadventures: Don’t swap powdered sugar for brown sugar—it changes moisture and bake time, and I’ve scorched edges trying to make it work. Don’t overwork the dough; if it looks streaky with little butter dots, that’s perfect. And don’t skip the chill. Chilling helps prevent the dreaded slouch, keeps the sides tall, and avoids tough bites. If you’re weaving this into a week of best meals to prep or healthy eating for two, make and chill the dough on Sunday, then roll and bake midweek when you need a quick win.
How to Make It Step-by-Step
- Pulse the dry team. In a food processor, pulse 1 1/4 cups all-purpose flour, 1/2 cup powdered sugar, and 1/4 teaspoon salt until they look combined and fluffy. If you’re doing this by hand, whisk in a mixing bowl and pretend you’re on a cooking show. The air helps.
- Add cold butter. Drop in 1/2 cup cold, cubed unsalted butter. Pulse in quick bursts (6–10 pulses) until the mixture looks like coarse crumbs with a few pea-sized bits. By hand, work it in with a pastry cutter or two knives. You should still see little butter speckles—those are flavor confetti.
- Yolks and maybe vanilla. Add 1 egg yolk. If you’re feeling extra, add 1/2 teaspoon vanilla or a teaspoon of citrus zest. Pulse a few times until the mixture looks evenly damp but still crumbly.
- Drip in ice water. Add 1 tablespoon ice water and pulse twice. Check. If it still looks dusty and doesn’t clump when squeezed, add up to 1 more tablespoon and pulse again. You’re aiming for “just comes together,” not “mud pie.”
- Bring it together gently. Turn the mixture onto a lightly floured surface. Press and fold a few times until it forms a cohesive disk. If you knead like you’re making bread, it’ll get tough—so, light hands. Wrap the disk in plastic and refrigerate for at least 30 minutes. I often make it the night before to build dessert into my week of good meal prep plans.
- Roll it out. Preheat the oven to 375°F (190°C). Let the dough sit at room temperature for 3–5 minutes if it’s rock-hard, then roll on a floured surface to about 1/8 inch thick. Rotate the dough often and dust with flour as needed. If it cracks at the edges, patch with a scrap and keep going. Cracks are normal—this isn’t a perfection contest.
- Transfer to the pan. Ease the dough into a 9-inch tart pan with a removable bottom. Don’t stretch it—lift and nestle it into the corners. Trim the overhang with a sharp knife, then press the sides gently to make sure they’re sturdy. If the sides look thin, add a tiny dough rope and press to reinforce.
- Chill again. Prick the bottom with a fork (lightly—don’t go all the way through) and pop the pan in the freezer for 10–15 minutes. This second chill is the secret to zero slippage during baking. I learned the hard way; once I skipped this step and my crust slid down the sides like it was trying to escape.
- Blind-bake like a pro. Line the crust with parchment and fill with pie weights or dried beans. Bake for 15 minutes. Remove the weights and parchment carefully (steam is spicy!), then bake another 10–12 minutes until the edges are golden and the center looks dry. If your oven runs hot, tent the edges with a loose collar of foil.
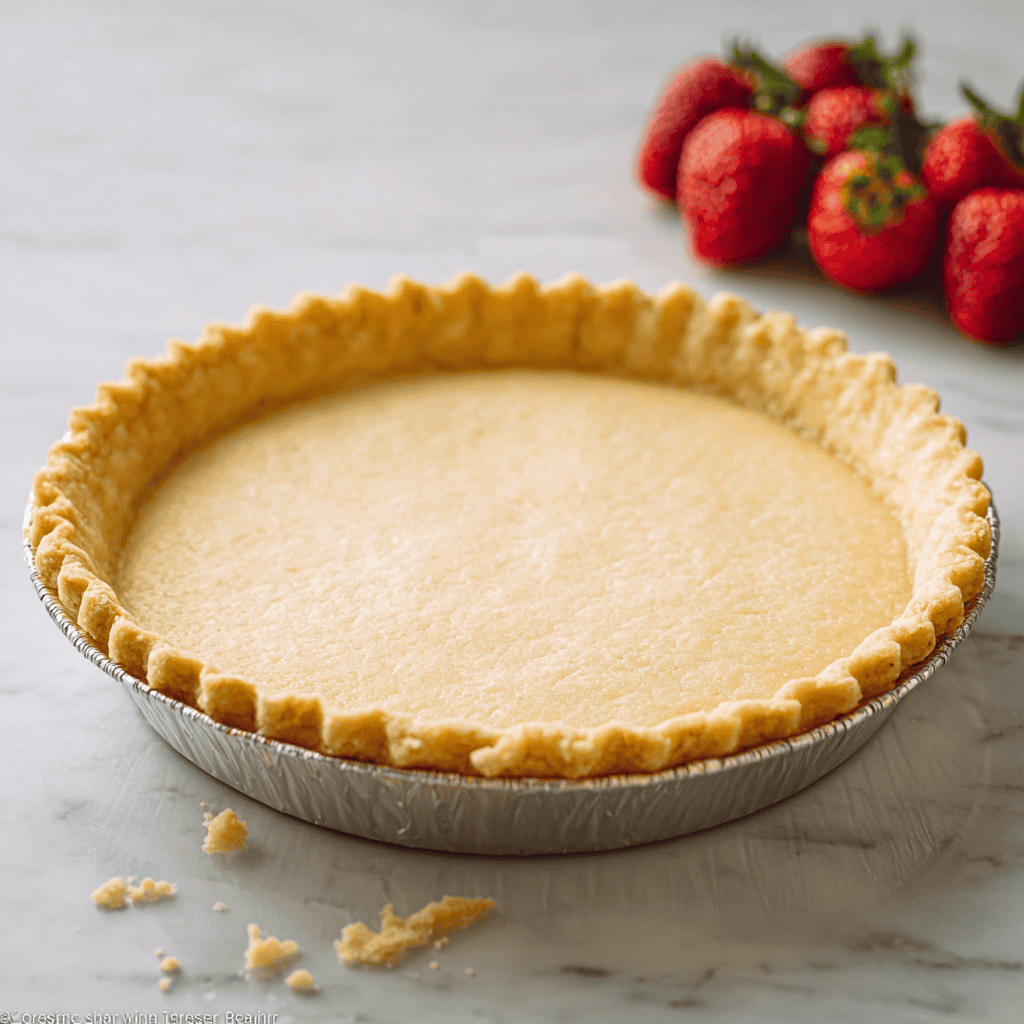
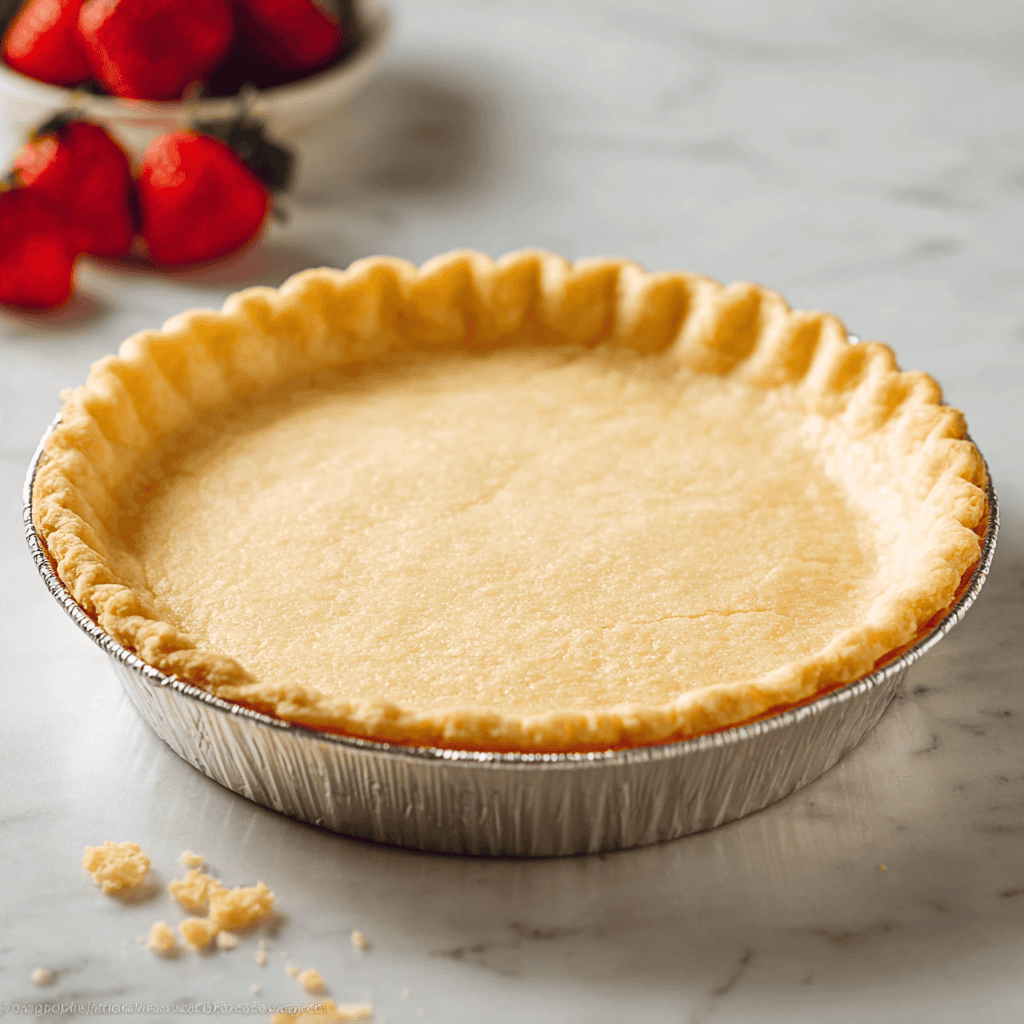
- Cool completely. This is the patience part. Let the shell cool in the pan on a rack before filling. If you rush and pour in a cool custard, you might get soggy bottoms. Been there; not cute. Once cool, the shell is crisp, fragrant, and ready to play nice with whatever filling your heart craves—fresh berries and pastry cream, chocolate ganache, lemon curd, or a silky cheesecake-style filling that still fits a low calorie high nutrition meals day if you go heavy on fruit.
Tips for Best Results
Keep everything cold—ingredients, tools, even your hands. Warm dough slumps and tastes dense.
Measure accurately. Too much flour equals dry crust. Spoon and level; don’t pack.
Don’t overwork. The dough should come together with minimal kneading. Streaks of butter are good; tough dough is not.
Chill twice. The first chill hydrates flour; the second chill locks in shape.
Bake fully. If you see shiny patches, give it another couple of minutes. You want dry, golden, and crisp.
Plan around your week. Bake shells ahead on Sunday to make dessert effortless after quick family meals or when you’re leaning on healthy boxed meals during busy seasons.
Ingredient Substitutions & Variations
Almond touch: Replace 1/4 cup of the flour with almond flour for a subtle nutty flavor and extra tenderness. It’s dreamy with berries and citrus fillings.
Chocolate version: Add 2 tablespoons unsweetened cocoa powder to the flour and bump the powdered sugar to a scant 1/2 cup if your cocoa is bitter. Fill with chocolate mousse or salted caramel.
Citrus-kissed: Add 1 teaspoon finely grated lemon or orange zest. This sings under lemon curd or mascarpone cream with kiwi.
Warm spice: A pinch of cinnamon or nutmeg brings autumn energy. Try it with apple compote or pumpkin cream.
Gluten-free: Use a 1:1 gluten-free baking blend that includes xanthan gum. Chill extra long and handle gently; GF dough is more fragile but totally workable.
Dairy-free: Use a high-quality plant butter that stays firm when cold. The texture will be slightly different, but still crisp and tasty.
Serving Suggestions
A glossy layer of chocolate ganache topped with raspberries is my “I have guests in 2 hours” move.
Pastry cream with sliced strawberries, blueberries, and a quick apricot jam glaze gives bakery-window vibes.
Lemon curd with lightly sweetened whipped cream is sunshine on a plate.
Mascarpone and Greek yogurt swirl with honey feels light and fits right into healthy comfort food and no prep healthy lunches when you serve petite slices with fruit.
For brunch, fill with vanilla custard and fresh peaches. It cozies up next to eggs or even a not-so-traditional full english breakfast spread minus the heavy bits.
Pairing Ideas (Drinks, Sides, etc.)
Coffee: A medium roast with a little cream plays beautifully with the buttery snap of the crust.
Tea: Earl Grey if you’re going citrus, peppermint if you’re going chocolate, and chamomile when you want dessert to feel like a lullaby.
Sparkling: A bubbly water with lemon or a light, dry soda to keep things fresh.
Sides: A scoop of vanilla bean ice cream or a spoon of crème fraîche. Fresh mint and berries on the side feel luxe without extra work.
For planning around ready meals for 2 nights or healthy meal plans for two, slice smaller wedges and pair with a protein-forward dinner to keep balance in check.
How to Store and Reheat Leftovers
Unfilled shells: Wrap the cooled tart shell (still in the pan) tightly in plastic, then foil. Keep at room temperature up to 2 days. For longer storage, freeze up to 1 month. Thaw at room temperature, unwrapped, so condensation doesn’t make it soggy.
Filled tarts: Most fillings store well in the fridge for 1–2 days. Fruit-heavy ones are best on day one. To keep the crust crisp, brush the cooled shell with a thin layer of melted chocolate or jam before filling—my favorite trick.
Reheating isn’t usually necessary for a baked shell, but if it softens, pop an empty shell in a 325°F oven for 5–7 minutes to refresh. Don’t heat a filled tart unless the filling is bake-safe.
Make-Ahead and Freezer Tips
Make the dough disk and refrigerate up to 3 days, or freeze up to 2 months. Thaw in the fridge overnight.
Blind-bake the shell, cool completely, and freeze in the pan. Wrap well. It’ll taste freshly baked after a quick 5-minute refresh at 325°F to crisp it back up before filling.
For party planning that aligns with best dinner prep meals and low calorie premade meal delivery schedules, assemble components ahead and fill day-of.
Common Mistakes to Avoid
Overmixing: If it looks like cookie dough, you went too far. Stop when it clumps.
Skipping the chill: The sides will slide and shrink. Freeze 10–15 minutes pre-bake.
Too much water: This makes the dough sticky and tough. Drizzle, don’t dump.
Underbaking: A pale crust turns soggy with creamy fillings. Bake to light golden.
Rolling too thin or too thick: Aim for 1/8 inch. Too thin cracks; too thick bakes unevenly.
Frequently Asked Questions (FAQ)
Can I make the dough in advance?
Yes. The dough disk keeps in the fridge up to 3 days or the freezer up to 2 months. I often tuck a disk beside my vegan meal prep plan soups so dessert is one step away.
Why do I need to chill the dough?
Chilling relaxes gluten, keeps butter cold, prevents shrinkage, and helps you get that tender, crisp bite.
Can I use this for mini tarts?
Absolutely. Divide dough into smaller pans. Blind-bake 10–12 minutes, then 6–8 minutes without weights, watching closely.
Is this the same as pâte sucrée?
Yes—this sweet tart crust is a classic pâte sucrée, which is tender, cookie-like, and perfect for creamy fillings.
Can I make it without a food processor?
Yes. Use a pastry cutter or your fingertips to rub butter into the flour mixture. Work quickly to keep it cold.
What if my dough cracks when rolling?
Let it warm a minute on the counter, then patch cracks with trimmings and roll gently. A little imperfection gives it charm.
Can I reduce the sugar?
You can shave a tablespoon off the powdered sugar if your filling is very sweet, but don’t remove too much—the sugar affects texture and browning.
Cooking Tools You’ll Need
9-inch tart pan with removable bottom for clean edges and easy release.
Food processor or mixing bowl with pastry cutter—both work.
Rolling pin, bench scraper, and a ruler if you like precision.
Parchment paper and pie weights (or dried beans/rice) for blind-baking.
Wire rack for cooling so steam doesn’t soften the crust.
Sturdy offset spatula for lifting slices like a pro.
Final Thoughts
Every time I pull this crust from the oven—golden edges, that gentle sheen, the soft crackle as it cools—I feel a little triumphant. Not the “I just ran a marathon” kind of triumphant, but the “I made something simple and beautiful in the middle of a busy week” kind. It’s the home baker’s secret handshake. It plays nice with berries when you’re leaning toward vegan low calorie meal plan days and feels luxe with chocolate when you need a little drama. It’s a foundation you can rely on, even when your schedule is packed with best meal prep healthy goals and your freezer is full of high protein pre made meals or best high protein frozen meals for lunch.
If you’ve ever felt intimidated by pastry, let this be your win. Make the dough, chill, roll, bake. Fill it with whatever makes your heart sing. Then cut a slice, take a breath, and enjoy what you just made with your own two hands. If you enjoyed this recipe, don’t forget to save it on Pinterest or share it with a friend!

Sweet Tart Crust (Pâte Sucrée)
Ingredients
- 1 1/4 cups all-purpose flour
- 1/2 cup powdered sugar
- 1/4 teaspoon salt
- 1/2 cup unsalted butter, cold and cubed
- 1 large egg yolk
- 1–2 tablespoons ice water, as needed
- 1/2 teaspoon vanilla extract (optional)
Instructions
- In a food processor (or bowl), combine flour, powdered sugar, and salt; pulse or whisk to blend.
- Add the cold cubed butter; pulse (or cut in with a pastry cutter) until the mixture resembles coarse crumbs with a few pea-sized bits.
- Add the egg yolk and vanilla (if using); pulse a few times to moisten the crumbs.
- Drizzle in 1 tablespoon of ice water and pulse; add up to 1 more tablespoon only if needed until the dough just comes together when squeezed.
- Turn dough onto a lightly floured surface; press together gently and shape into a disk. Wrap in plastic and refrigerate for at least 30 minutes.
- Preheat oven to 375°F (190°C). On a floured surface, roll the chilled dough to about 1/8-inch thickness.
- Fit dough into a 9-inch tart pan with removable bottom, lifting and pressing gently into corners. Trim edges. Prick the base lightly with a fork.
- Freeze the lined tart shell for 10–15 minutes to prevent shrinking.
- Line the shell with parchment and fill with pie weights or dried beans. Blind-bake for 15 minutes.
- Carefully remove parchment and weights; bake 10–12 minutes more, until golden and the center looks dry.
- Cool completely on a wire rack before adding any filling.


