Oh, where do I even begin with this melt-in-your-mouth treat? Honestly, it’s like a culinary hug that hits all the right spots—and let’s be real, we could all use more hugs right now, right? So just three days ago, I stumbled across this heavenly recipe while scrolling through my favorite food blogs, and boy, am I glad I did! I just printed it out and have already whipped it up twice—yes, twice! I think I’ve reached that level of obsession where I’m considering a double batch next time—because who wouldn’t want these delightful bites handy?
There’s something about the kitchen that inspires a cozy, weekday ritual—especially as the cool air settles in, and the leaves start to turn golden. The soft glow of my fairy lights and the comforting hum of my oven heating up create the perfect backdrop for what I like to call my “culinary therapy.” The scent of vanilla wafts through the air, and I swear, it’s one of the simplest, most comforting smells in the universe. Suddenly, even the most chaotic of day jobs fade away, and my little kitchen feels like a sanctuary.
Now, these bites are perfect for a rainy night when binge-watching your favorite rom-com (because let’s be honest, popcorn just doesn’t cut it anymore). They make for excellent easy weeknight dinners, and I promise, both kids and adults alike will be searching for seconds! Plus, they fit right into the realm of quick family meals or even healthy comfort food. Does it get any better than that?
One little quirk? I didn’t expect my first batch to vanish as quickly as it did! It’s that kind of recipe that leaves you imagining all the fun variations you can create or oops moments I’ve had while making it. Just last night, I accidentally used baking soda instead of baking powder—oops! But in the end, it still turned out delicious, proving that sometimes cooking is more forgiving than we give it credit for.
Trust me, if you’re looking for a simple yet delicious treat that makes any occasion feel special, listen up! This recipe is about to become your new best friend. So grab your apron, and let’s dive in!
Why You’ll Love This Recipe
- Ease: This is not your complicated pastry that requires fancy culinary techniques. Seriously, it’s that quick—perfect for us busy bees!
- Comforting: Every bite feels like a cozy hug. Once you take a bite, you’ll understand what I mean.
- Approved by Picky Eaters: It has that universal appeal that even the pickiest of eaters will appreciate (trust me, my niece usually only eats pizza).
- Meal Prep Magic: If you’re diving into meal planning, this treat can easily find its way into your week’s line-up. It’s perfect for snacking, breakfast, or dessert.
- Leftover Bliss: And if you make too much (not that it’s possible), just pop ‘em in the fridge. They taste just as good warm as they do straight out of the fridge!
- Versatile: You can play around with flavors and toppings. I mean, who doesn’t love fun iterations in the kitchen?
What Makes This Recipe Special?
What makes this recipe stand out from the rest? It’s not just about the ingredients—though they are pretty magical on their own—but it’s the layers of memories and experiences that come with it. I think of my grandmother in her cozy kitchen, tossing everything into a bowl with carefree abandon. There’s an art to her chaos, and each little mess had a story.
When I took my first bite, I could literally hear the whispers of family gatherings and cozy firesides. The flavors dance merrily on your tongue, and each bite melts away stress and worries. It’s no surprise that I can already envision making this for brunch gatherings or cozy evenings with friends.
Now, let’s check what goes into this marvelous treat!
Ingredients
- All-Purpose Flour: The foundation of any treat, it’s what gives structure without stealing the show.
- Granulated Sugar: Because we all need a touch of sweetness in our lives.
- Unsalted Butter: This helps to keep things rich and flavorful! I usually opt for Kerrygold; it’s worked wonders!
- Baking Powder: The magical element that makes everything fluffy and light.
- Eggs: For moisture and richness, binding everything together beautifully.
- Milk: A splash of milk keeps the batter moist and dreamy.
- Vanilla Extract: Just one teaspoon, but it elevates everything with a warm, aromatic note.
- Salt: A little pinch to balance the sweetness. Never skip this—it’s a game changer.
Important Tip: Make sure you don’t mistakenly grab baking soda instead of baking powder—trust me; we don’t want flat treats!
How to Make It Step-by-Step
Let’s get to the good stuff! Making this melt-in-your-mouth treat is easy, and I’ll guide you through each delightful step.
1. Preheat Your Oven: First things first! Preheat that oven to 350°F (175°C). As the air begins to warm, the excitement builds—just imagine that smell already!
2. Mix the Dry Ingredients: In a medium bowl, whisk together your flour, sugar, baking powder, and salt. The aromatic sweetness of sugar mixed with flour fills your kitchen, and it just feels right, you know?
3. Cream the Butter: In another bowl, cream your room-temperature butter using a hand mixer or stand mixer. I always forget this step—who wants chilly butter, right? Let it be soft, fluffy, and pale in color. I often include a little fun music in the background to lighten the mood—suddenly, I’m channeling my inner chef!
4. Add Eggs and Vanilla: Now, crack those eggs in one at a time, mixing well after each addition. Next, pour in that heavenly vanilla extract. It’s like adding warmth to a chilly day. I always inhale deeply—it fills the room with dreams!
5. Combine Wet and Dry: Gradually add the dry ingredients to your wet mixture and alternate with milk, blending until just combined. Don’t overmix! I once learned the hard way that overzealous mixing can lead to dense results.
6. Bake: Pour the batter into a greased baking dish. You might want to lick the bowl—it’s tempting! Bake for about 25-30 minutes or until a toothpick comes out clean. Lean in close; the aroma will envelop you like a cozy blanket!
7. Cool and Serve: Once it’s out of the oven, let it cool for a bit. This is where the magic truly happens; you can almost hear your taste buds cheering. Slice into squares or scoop into bowls; it’s all about presentation, after all!
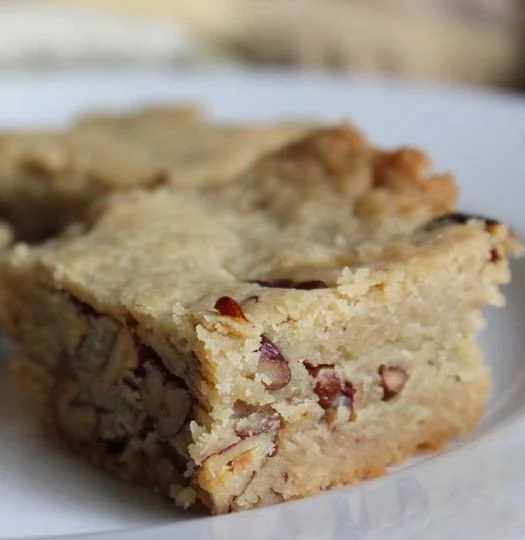
If you’re feeling adventurous, you can add chocolate chips or nuts into the batter before baking. Just remember to account for the extra moisture—they’re your little treasure surprises!
Tips for Best Results
- Use room temperature butter and eggs for even mixing.
- Don’t skip out on the vanilla. Your future self will thank you.
- Invest in quality ingredients; they truly make a difference in flavor.
- Experiment! This recipe is welcoming to add-ins like dried fruits or spices—get creative!
Ingredient Substitutions & Variations
If you’re in the mood for some twists, here are a few ideas:
- Coconut Milk: Swap regular milk with coconut milk for a tropical flair.
- Nut-Free: Leave out nuts if you have allergy concerns—you won’t even miss them!
- Flavored Extracts: Consider almond or maple extracts for an interesting kick.
- Vegan Version: Replace butter with coconut oil and eggs with flaxseed meal or a commercial egg substitute. Your loved ones might be surprised at just how delicious they are!
Directions
Mixing this treat is straightforward, but I can’t recommend enough to savor the experience. Picture it—baking while listening to your ultimate playlist, the sweet aroma surrounding you, and the smile on your faces when munching on them later! Serve warm and perhaps drizzle some chocolate or a dusting of powdered sugar to elevate the presentation. Treat this as a playful moment because, at the end of the day, cooking is rarely perfect—and that’s the beauty of it!
How about pairing this with fluffy whipped cream or a scoop of vanilla ice cream? Let’s not forget a hot cup of tea or coffee! Pair them with your current Netflix obsession for the ultimate comfort experience.
How to Store and Reheat Leftovers
If you find yourself with leftovers (an anomaly in my kitchen, to be honest), store them in an airtight container in the fridge. You can warm them in the microwave for about 15 seconds for a quick treat. Note: try not to overdo it, or they might end up chewy!
Make-Ahead and Freezer Tips
Simply prepare the batter ahead of time and store it in the fridge (for up to 24 hours) before baking. You can also freeze the baked treats in an airtight container. Reheat in the microwave straight from the freezer—but, again, short intervals to keep them pillowy soft!
Common Mistakes to Avoid
- Overmixing: You want a gentle touch here—too much mixing leads to dense treats.
- Not Checking for Doneness: Keep a close eye on those last few minutes. A toothpick should come out clean!
- Skipping Ingredients: Trust me; missing that pinch of salt can change everything!
Frequently Asked Questions (FAQ)
Q: Can I use different flour?
A: Absolutely! Whole wheat flour adds a nuttier flavor, but it might change the texture slightly. Just keep that in mind!
Q: Can I make this gluten-free?
A: Sure can! Just substitute with a good gluten-free flour blend, and you’re golden.
Q: How long will these last?
A: Stored properly, they should be good for about three to four days—if they last that long!
Q: Can I freeze these?
A: Yes! They freeze well. Just remember to wrap them tightly in plastic wrap and place them in a freezer-safe container.
Q: Can I double the recipe?
A: Of course! Just be mindful of your baking time; it may take a little longer for larger batches.
Cooking Tools You’ll Need
- Mixing bowls (various sizes)
- Measuring cups and spoons
- Whisk or hand mixer (depends on your preference)
- Baking dish or pan of your choice
- Spatula for scraping down the sides (you don’t want to miss out on any batter goodness!)
Final Thoughts
As I wrap this up, thinking about my next batch brings the warmest feelings of excitement. This easy high protein high calorie meal isn’t just a recipe; it’s an experience, a story, a memory in the making. It’s the kind of treat that will have everyone coming back for more and asking for your secret. Personally, I think the secret is started with love—and maybe a secretly added touch of chaos!
So, what are you waiting for? Go ahead, and dive into this recipe! When you do make it (and I really hope you will), I’d love to hear how it goes—did you add any special twists?
If you enjoyed this recipe, don’t forget to save it on Pinterest or share it with a friend!

Melt-in-Your-Mouth Treat
Ingredients
Dry Ingredients
- 2 cups All-Purpose Flour The foundation of any treat.
- 1 cup Granulated Sugar Adds sweetness.
- 1 tbsp Baking Powder The leavening agent for fluffiness.
- 1 tsp Salt Essential for balancing sweetness.
Wet Ingredients
- 1/2 cup Unsalted Butter Use room temperature for best results.
- 2 large Eggs For moisture and richness.
- 1/2 cup Milk Keeps the batter moist.
- 1 tsp Vanilla Extract Elevates the flavor.
Instructions
Preparation
- Preheat your oven to 350°F (175°C).
- In a medium bowl, whisk together flour, sugar, baking powder, and salt.
- In another bowl, cream the room-temperature butter until fluffy and pale.
- Add eggs one at a time, mixing well after each, then add vanilla.
- Gradually add the dry ingredients to the wet mixture, alternating with milk until just combined.
Baking
- Pour the batter into a greased baking dish.
- Bake for about 25-30 minutes, or until a toothpick comes out clean.
- Let it cool before slicing and serving.


