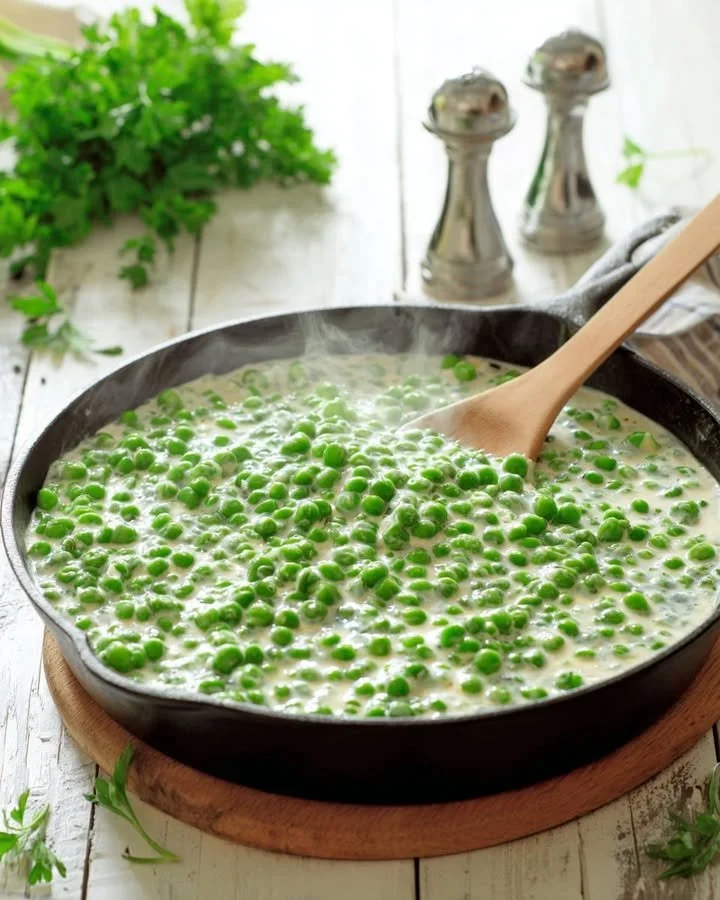
The Best Easy Creamy Peas Recipe for Comfort Food Lovers
It’s funny how food can carry such nostalgic weight. I was never the type of kid who loved peas—at least, not until I grew up and learned how to make them creamy and dreamy. Back then, the thought of a pile of green balls on my plate felt like punishment. Now? Admittedly, I’m the proud owner of an unrepentant love for these tiny green gems.
There’s this unofficial parenting handbook that implies cooking food your kids hate will somehow end in culinary disaster. Well, let me tell you, the first time I tried making Creamy Peas, I didn’t just fumble—I practically had a full-blown make-a-mess party. I thought—hey, how hard could it be? I melted butter, added onions, and then… wait, what do you mean I forgot to turn the heat down? The mess was real, folks. But once I got it right, these creamy peas became a weekly staple in my house.
As winter settles in, I find myself craving cozy evenings with comforts like this healthy comfort food to warm my heart and fill my belly. The whole house fills with this delightful smell, a little nutty from the sautéed onions, a hint of garlic, and that buttery goodness that makes you feel like you’re wrapped in a big fluffy blanket. And yes, I admit—eating these while binge-watching a rom-com feels like what dreams are made of.
If you’ve had a rough day, these Creamy Peas might just be the ultimate pick-me-up. They have a knack for finding their way into family dinners and even the fussy palates of kids. I know what you’re thinking, but trust me—these peas manage to melt resistance while serving an extra dose of guilt-free goodness. So, grab your apron and let’s dive into this deliciously creamy escapade!
Why You’ll Love This Recipe
-
Quick and Easy: Seriously, it only takes about 15 minutes from start to finish, making it perfect for easy weeknight dinners when time is tight.
-
Picky Eater’s Delight: These creamy peas are like negotiation tools in a food standoff. They have that silky texture and rich flavor that can woo even the most discerning little ones.
-
Meal Prep Winner: I make a double batch and store leftovers for quick family meals throughout the week. Nothing beats the ease of ready meals when you’re exhausted after a long day!
-
Versatile Side Dish: You can pair these creamy wonders with almost anything. From barbecue chicken to steak, they play well with all kinds of flavors.
-
Feels Like a Hug: Honestly, there’s something incredibly comforting about indulging in a bowl of creamy peas; it’s like childhood in a dish, minus the drama of refusing to eat them.
What Makes This Recipe Special?
This recipe isn’t just another side dish—it has a backstory. Each ingredient is purposeful: rich creaminess from the butter and half and half, a gentle sweetness from the onion, and savory undertones from the spices. The pinch of nutmeg is like the surprise twist in a favorite novel—it elevates the dish without being flashy.
As you swirl these ingredients together, you fall in love with the transformation that happens—each step is essential. The moment you add the peas, it’s like the grand finale of a show. They turn a simple sauce into something vibrant, filling it with color and a slight pop that makes every bite a celebration.
Ingredients
-
1 lb package frozen petite peas: These little gems are the star of the show! Using frozen peas means you get all that sweet, vibrant flavor and bright green color, no matter what time of year it is.
-
3 Tbsp unsalted butter: Because what’s life without butter? It provides richness and depth to the sauce while helping to create that luxurious creaminess. I’m partial to Kerrygold, but use your favorite!
-
2 Tbsp all-purpose flour: This is your magic thickening agent. Just a little bit helps transform the sauce from a runny mess to a creamy masterpiece.
-
1/3 cup finely diced sweet onion or shallots: I find that sweet onions, like Vidalia, add a gentle taste that doesn’t overpower the dish. Just be careful not to chop them too big or too small since we want a nice caramelization without burning them.
-
2 cups half and half or light cream: The creamy, dreamy texture will have your taste buds singing! You can also use whole milk if that’s what you have on hand.
-
1 tsp salt: Enough to enhance all those flavors, but adjust to your heart’s liking!
-
1 tsp black pepper: Freshly cracked is always better, but I’m not above using pre-ground if I need to.
-
1/2 tsp granulated garlic or garlic powder: Just a whisper of garlic for that earthy, warm flavor that brings everything together.
-
1/4 tsp onion powder: You can never have too much onion flavor!
-
Pinch nutmeg: This is where it gets interesting—just a small pinch transforms the whole dish and adds that extra special touch.
Pro tip: If you want to bring in some additional flavor, try adding grated parmesan or a splash of lemon juice!
How to Make It Step-by-Step
Okay, let’s roll up those sleeves and get to the good stuff—cooking time!
-
Melt the butter: Grab a large skillet (trust me, the bigger the better), toss the butter in there over medium heat, and let it melt slowly. As it starts bubbling, your kitchen will smell amazing.
-
Add the onions: Once the butter is melted to your liking (no need to snack on raw sticks of butter, please), throw in the finely diced onions or shallots. Here’s where the magic begins. The sizzling sound is music to my ears. Stir them around, let them become translucent, and watch as they transform from sharp to sweet. This should take about 3-4 minutes.
-
Stir in the flour: Now, sprinkle the flour over these sautéed golden beauties. Stir it in like you’re a wizard casting a spell! This will thicken your mixture. Cook for about a minute but don’t let it brown. You want just a hint of golden color, not a full-on charred situation.
-
Whisk in the cream: Gradually add the half and half or light cream while whisking relentlessly. Seriously, channel your inner whisking champion. It should become smooth and creamy as you add it, and voilà—your sauce is happening!
-
Season it up: Next, add the salt, black pepper, granulated garlic, onion powder, and that delightful punch of nutmeg. Honestly, don’t skip the nutmeg—it’s the secret handshake of this dish.
-
Bring it to a simmer: Keep whisking occasionally until the sauce starts to simmer lightly. It’s time for some thickening action to happen! You can sense it’s ready when it coats the back of a spoon.
-
Add the peas: Stir in the frozen petite peas. They don’t need thawing—you want them to cook directly in the sauce. Not to brag, but this is where you can take a moment to appreciate your genius for making something this easy! Let them heat through for about 5 minutes, stirring occasionally. They should be vibrant green and perfectly cooked.
-
Serve warm: Oh, baby! Serve these beauties warm. I mean, you could try them cold, but warm is where the magic truly lies.
Tips for Best Results
-
Watch the onions: Don’t let them brown too much. You want them just translucent; it keeps their sweetness intact.
-
Don’t over-complicate it: This dish shines because of its simplicity. Stick to the basics for a classic flavor without overwhelming your taste buds.
-
Know your heat: Medium heat is your best friend. Too low, and things won’t cook; too high, and you’ll risk burning your butter.
-
Homemade addition: You can add some cooked diced ham or crispy chicken for a heartier creation if you’re feeling adventurous.
Ingredient Substitutions & Variations
-
For a vegan version: Try using coconut cream instead of half and half and olive oil instead of butter. Add some nutritional yeast for umami and depth.
-
Herbed Up: Sprinkle in some fresh herbs like basil, thyme, or parsley right before serving to elevate the dish with a fresh finish.
-
Seasonal swap: Feel free to mix in seasonal vegetables like sautéed asparagus or spinach for an interesting twist. Don’t forget to adjust the cooking time slightly based on your vegetables.
Serving Suggestions
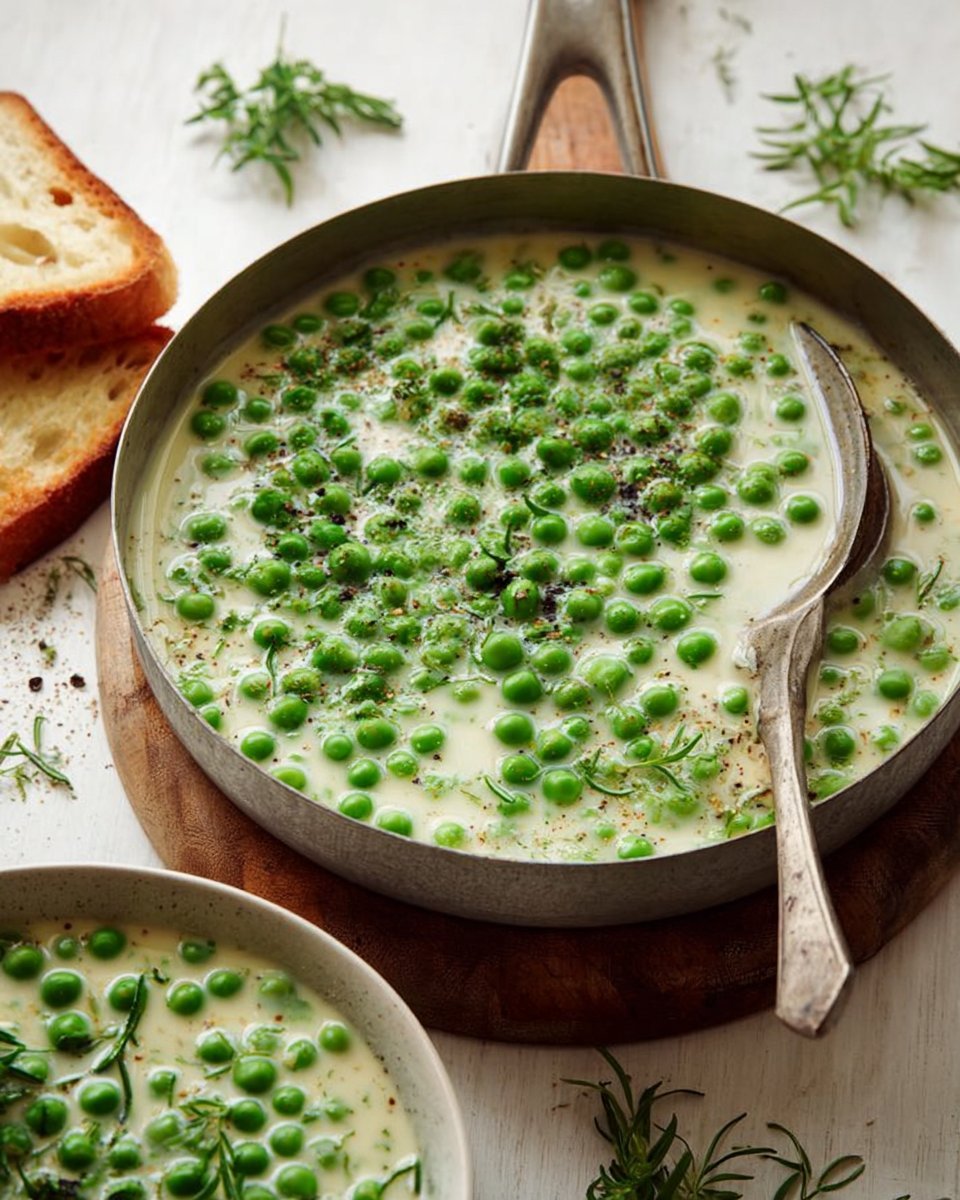
Pair with… a juicy grilled chicken breast or salmon fillet, and maybe a squeeze of lemon over everything for a little zing. Or keep it vegetarian and serve alongside stuffed bell peppers. It’s comfort and class all at once!
And for dessert? You can’t ever go wrong with a classic chocolate cake or a fruit tart—rom-com approved! Picture it: creamy peas, a lovely protein source, and a delightful dessert to wrap up a cozy evening.
How to Store and Reheat Leftovers
You’re probably going to have leftovers—because let’s face it, this dish is that good! Store them in an airtight container in the fridge for up to 3 days. When reheating, use a skillet over low heat and add a splash of milk to keep everything creamy. Nobody wants dried-out peas, right?
Make-Ahead and Freezer Tips
Here’s the deal—while I believe these Creamy Peas are best enjoyed fresh, you can prepare the creamy sauce ahead of time and keep it in the refrigerator. Just heat it up when you’re ready to eat, add the peas, and serve. If you’re planning to freeze, keep the sauce separate from the peas; both components freeze well for around 1 month. Just be sure to let it cool completely before freezing.
Common Mistakes to Avoid
-
Burnt butter: Keep a close eye while melting your butter. Too high a heat can lead to bitterness, and nobody wants that.
-
Overmixed sauce: When whisking in the cream, don’t overdo it. You just want to incorporate; too much whipping can lead to separation.
-
Cooking the peas too long: You want them heated through, but not mushy. Five minutes in the hot sauce should do the trick!
Frequently Asked Questions (FAQ)
-
Can I use fresh peas instead of frozen?
Absolutely! Just blanch them first, as they need less cooking time in the pan than frozen peas. -
Can I make this dish lactose-free?
Totally! Use a lactose-free cream or substitute with a nut-based cream for the same creamy texture without the lactose. -
Can I add protein to this dish?
Yes! Cooked chicken, turkey, or even tofu will complement this creamy base wonderfully.
Cooking Tools You’ll Need
-
Skillet: A good, large skillet is essential. You want enough room for stirring and simmering. Plus, a non-stick surface helps with cleanup!
-
Whisk: Whisking it all together makes for a smooth and luscious sauce—don’t skip this tool!
-
Chopping board and knife: For cutting your onions. The quicker the prep, the quicker you’ll be eating!
-
Measuring cups: Accurate measurements mean happy cooking!
Final Thoughts
Food is so much more than sustenance; it’s about nostalgia and threading memories into the fabric of our everyday lives. For me, Creamy Peas are a bridge between the past and present. They remind me of the mess I made when I first tried to recreate them and the joy they brought once I got it right. These satisfying green wonders bring smiles to the dinner table—not just because they taste good but because they come with the magic of warmth and togetherness.
Now, I’d love to hear from you! What do you think of this recipe, and how did your Creamy Peas turn out? If you enjoyed this recipe, don’t forget to save it on Pinterest or share it with a friend! Happy cooking!
Creamy Peas
Ingredients
Main Ingredients
- 1 lb frozen petite peas These little gems are the star of the show! Using frozen peas means great flavor and color year-round.
- 3 Tbsp unsalted butter Provides richness and creaminess. Choose your preferred brand.
- 2 Tbsp all-purpose flour Thickens the sauce.
- 1/3 cup finely diced sweet onion or shallots Adds a gentle sweetness.
- 2 cups half and half or light cream For a creamy texture; can substitute with whole milk.
Seasonings
- 1 tsp salt Enhances flavors.
- 1 tsp black pepper Freshly cracked is preferred.
- 1/2 tsp granulated garlic or garlic powder Adds earthy flavor.
- 1/4 tsp onion powder Boosts onion flavor.
- pinch nutmeg A special touch to elevate the dish.
Instructions
Preparation
- Melt the butter in a large skillet over medium heat until bubbling.
- Add the diced onions or shallots and sauté for 3-4 minutes until translucent.
- Stir in the flour and cook for about a minute without browning.
- Gradually whisk in the half and half or light cream until smooth.
- Season the mixture with salt, pepper, garlic, onion powder, and nutmeg.
- Bring the sauce to a simmer until it thickens and coats the back of a spoon.
- Add the frozen peas directly into the sauce and heat for about 5 minutes until vibrant and cooked.
- Serve warm and enjoy!


