Introduction
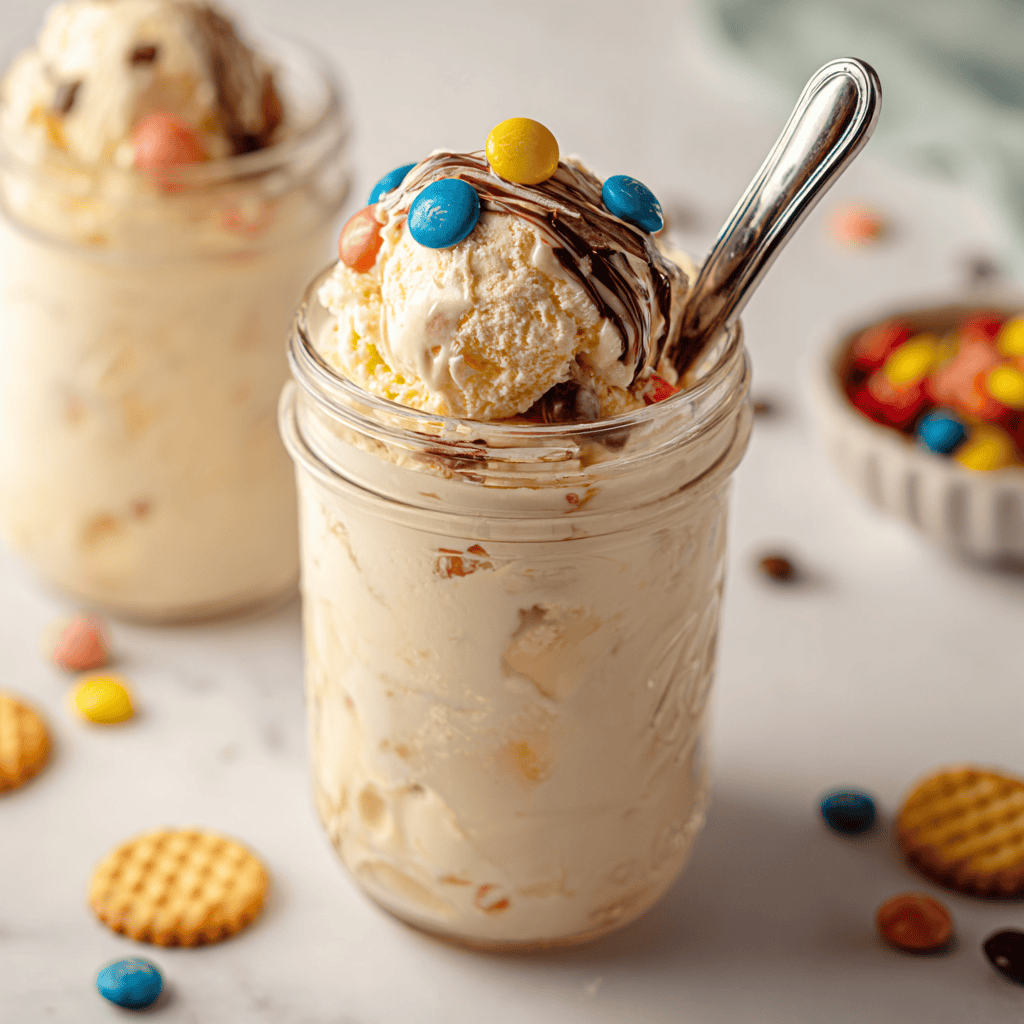
I discovered Mason Jar Ice Cream on a night when the sink was full, my patience was empty, and the dessert craving was obnoxiously loud. The plan was to finish dishes, prep salad, and stick to our healthy comfort food groove after one of those easy weeknight dinners. Then I spotted a clean jar with a shiny lid and thought, “What if we made ice cream without the machine?” Honestly, I didn’t expect much. Four minutes of enthusiastic shaking later, I cracked the lid and saw thick, velvety cream swirled with vanilla specks. A DIY miracle, right on my countertop.
There’s a certain soundtrack to this recipe—ice-cold jar clinking, sugar whispering against glass, the soft slosh that turns into a muffled thud as the cream thickens. The kitchen smelled like vanilla and a hint of sweetness, the kind of scent that makes kids wander in and ask “Is it ready yet?” with hopeful eyes. The lights were warm, the fridge hummed, and I was grinning like I’d just hacked dessert. To be real, shaking a jar isn’t exactly glamorous, but it’s the good kind of silly. It makes the kitchen feel like a playground again.
This recipe matters to me because it’s tiny but mighty. It fits real life—the best meals to prep spirit without stress. It’s perfect for portion control on a protein eating plan week when you just want a scoop, not a whole tub, after quick family meals. It’s the small-batch dessert that doesn’t wreck your plans for low calorie high nutrition meals or turn your evening into a dish marathon. Make it in 8-ounce jars for healthy eating for two nights, or line up several jars for a party and let everyone choose mix-ins.
Also, let me confess an “oops.” I once shook the jar with the lid slightly crooked. Vanilla confetti everywhere. Countertop, shirt, a very unimpressed cat. I wiped, laughed, then shook again—tight lid, vigorous arms, triumph secured. That’s part of the charm. This dessert says yes to chaos and still rewards you with creamy, spoonable bliss. Whether your week looks like meal planning chicken and vegetables or a mix of leftovers and budget-friendly recipes, this little jar of joy knows how to end the day on a high note.
Why You’ll Love This Recipe
It’s a true five-minute hands-on dessert. You shake, you freeze, you win. No gadgets, no cords, no ice cream maker to wrestle back into the cupboard.
Portion control built in. Single jars mean you can honor your best meal prep healthy intentions and still have something sweet waiting after dinner.
Highly customizable. Your jar, your rules—cookie crumbs, sprinkles, chopped fruit, or chocolate chips, each one fits different moods and good meal prep plans.
Kid magic. Shaking is the best kind of kitchen job for small helpers, and there’s instant pride when their individual jar becomes ice cream.
Crowd-friendly and economical. It slides effortlessly into cheap meal plans for 2 that scale to a group without buying specialty tools.
Tastes like classic vanilla ice cream with a texture that’s surprisingly creamy considering the simplicity—comforting and nostalgic, like a hug in a bowl.
What Makes This Recipe Special?
The method is the star. Shaking in a jar traps air inside the cream and disperses sugar evenly, creating a mini no-churn effect. You don’t get the same overrun as a churned batch, but you do get a thick, luscious spoonful that feels like dessert with capital D.
I love how it supports spontaneity. The pantry-friendly list makes it easy to pair with best dinner prep meals or throw together after easy weeknight dinners without planning. It also works for prepared meals for two nights when you want a small sweet. You can craft a lineup of jars—vanilla, chocolate, mint chip, strawberry swirl—and stash them like little treasures in the freezer.
There’s also a memory baked into the routine. The first time my niece helped, she shook the jar so fiercely it sounded like a drum solo. We timed it with a song, laughed until our arms ached, and wrote “mint chip champion” on the lid. That jar became a trophy. To be real, these tiny rituals are the secret ingredient that makes homemade food taste better, and that’s why I keep this recipe on standby right next to the list of best meal prep plans.
Ingredients
Heavy cream
Granulated sugar
Vanilla extract
Pinch of salt
Optional mix-ins: chocolate chips, crushed cookies, sprinkles, fruit puree, etc.
Mason jar with a tight-fitting lid
Let’s walk through the lineup. Heavy cream is non-negotiable because the fat content gives you structure and silk. Milk alone can freeze hard and icy, so stick with cream for that scoopable finish. If you want to lean into a lighter vibe for a week of hello fresh low calorie menu style meals, keep the portion small rather than swapping the cream—you’ll be happier with the texture.
Granulated sugar sweetens and helps soften the freeze. You can use superfine sugar if you want it to dissolve faster, but regular works perfectly. Vanilla extract is the flavor backbone; choose pure vanilla for the roundest flavor. The tiny pinch of salt is the quiet hero that makes the sweetness sing.
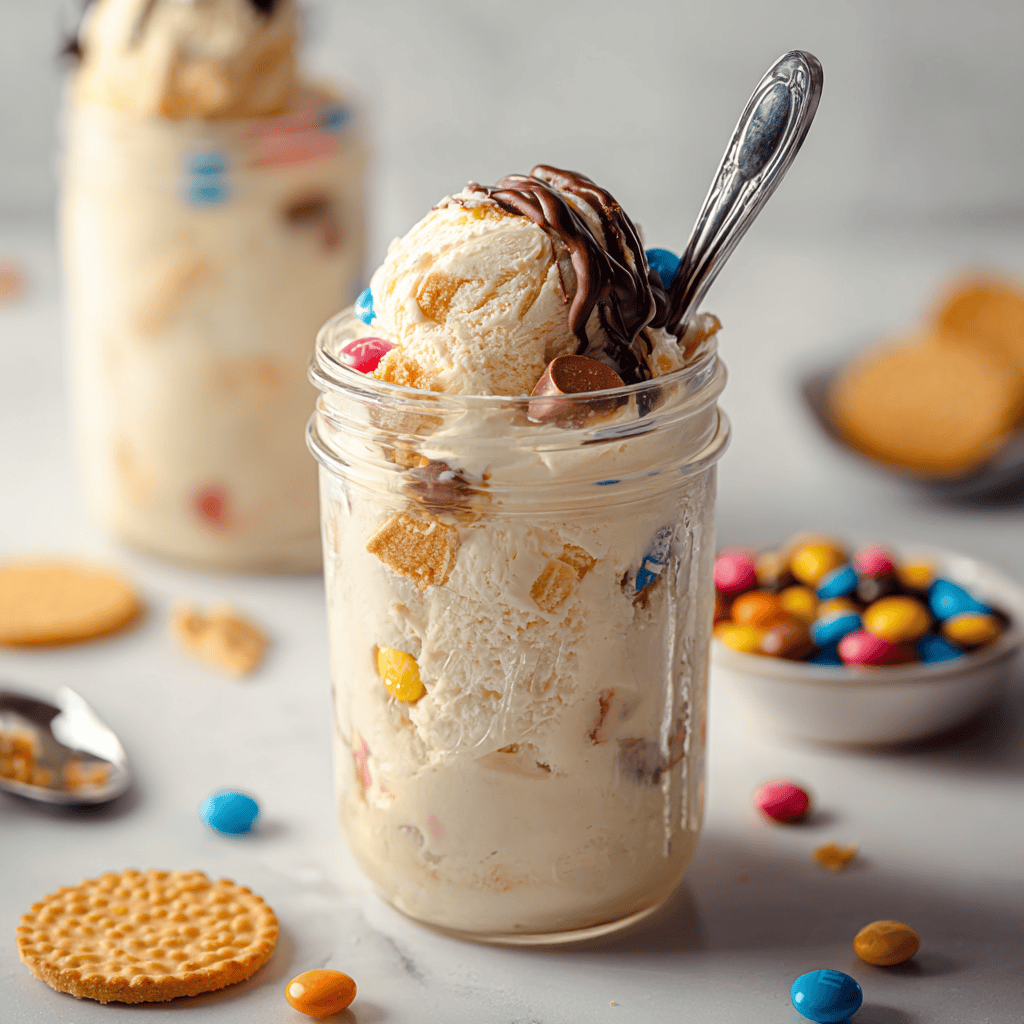
Mix-ins are where you turn this into your signature. Chocolate chips bring pops of bite; cookie crumbs melt slightly into the cream and give nostalgic ice-cream-truck energy; fruit puree adds ribbons of brightness. Pro tip: if you use jam or puree, keep it thick, and fold it gently after shaking so you get cute swirls. And the jar—go for an 8-ounce (half-pint) mason jar with a snug lid. Too big and shaking becomes a workout; too small and you’ll make a mess. One jar equals one heroic scoop, which is perfect for healthy meal plans for two evenings at home.
A few “don’t do this” warnings from my kitchen blooper reel. Don’t overfill the jar; you need headspace for the mixture to expand as it aerates. Don’t use a lid that’s seen better days—if it doesn’t seal, you’ll be cleaning vanilla from the backsplash. And don’t add watery fruit before shaking; it thins the cream and messes with your set. Add fruit swirls after the shake for the prettiest stripes.
How to Make It Step-by-Step
- Get the jar cold and clear the deck.
I like to set the jar in the freezer for 10 minutes while I measure ingredients. Cold glass gives your cream a head start. The kitchen should smell like vanilla by the time you’re done measuring—always a good sign. - Add the base.
Pour heavy cream into the jar, add the sugar, vanilla, and that tiny pinch of salt. The sound of sugar tapping the glass is oddly satisfying. Make sure the rim is spotless so the lid seals. If you’re a precise person, leave about one-third of the jar empty for shaking room. - Seal and shake like you mean it.
Screw on the lid tightly. Now shake vigorously for 4 to 5 minutes. Use both hands. Dance if you must. At first, it feels watery; then it thickens, the slosh becomes a thud, and the jar gets heavier in your hands. You’ll see the mixture coat the sides like melted milkshake. If your arms tap out, pass the jar to a family member—that’s teamwork and cardio. - Check the texture.
Crack the lid open and peek. You want the mixture to look like pourable whipped cream—thick, lightly mounded, not butter. If it’s still thin, lid back on and shake another minute. If it’s too thick (oops, you over-shook), add a teaspoon of cream and swirl to loosen. - Fold in the fun.
Stir in your mix-ins with a spoon. Chocolate chips? A small handful. Crushed cookies? Absolutely. Fruit puree or jam? Dollop and fold gently so you get marbled ribbons. You’ll smell the vanilla and whatever extras you tossed in—mint extract hits the air like a winter breeze; strawberry puree smells like summer. - Freeze with intention.
Wipe the rim, seal the lid, and lay the jar on its side in the freezer for the first 30 minutes. This little trick keeps mix-ins from sinking. After that, stand the jar upright and freeze for 3 to 4 hours, or until firm. If your freezer runs cold, check at the 3-hour mark. - Scoop, snap, and savor.
Let the jar sit on the counter for 3 to 5 minutes. The surface will soften just enough for a spoon to slide in and curl a perfect scoop. You’ll see tiny air pockets like a mousse and maybe a streak of fruit or a constellation of chocolate chips. Take a picture—Pinterest will thank you—and then taste. It’s creamy, sweet, and exactly as personal as you made it.
Mistakes I’ve made and survived: I once added liquid food coloring directly to the cream (looked pretty, tasted fine), but it thinned the texture slightly. Gel coloring is better if you want a hue. Another time I added chopped frozen strawberries before shaking, and the mix froze unevenly—beautiful, but icy. Now I stir fruit in after the shake and it’s perfect. And yes, I’ve misplaced a lid mid-recipe and used a rubber band with plastic wrap. Not recommended—my freezer smelled like vanilla for a week.
Tips for Best Results
Chill everything—jar, cream, even the spoon. Cold ingredients whip faster and set smoother.
Shake in bursts if your arms tire. Five minutes is average, but jars vary; trust the texture more than the timer.
Leave headspace. A jar filled to the top can’t trap air, and you’ll end up with a denser, icier scoop.
Use thick mix-ins. Jam, fudge, or peanut butter should be spoonable, not runny, to keep your base rich.
Label the lids. If you’re making multiple jars for ready meals for 2 nights or meal prep microwave lunches dessert moments, write the flavor and date. Future you will be delighted.
Keep portions modest during weeks of low fat meal delivery style eating or high macro meals. A small scoop goes a long way for happiness per calorie.
Ingredient Substitutions & Variations
Chocolate dream: Add 1 tablespoon cocoa powder before shaking. Stir a ripple of warm (not hot) fudge after shaking for a swirl.
Mint chip: A drop or two of mint extract plus mini chocolate chips. This is wildly refreshing after easy high protein high calorie meals like steak night.
Cookies & cream: Fold in crushed chocolate sandwich cookies. For extra crunch, add a sprinkle on top before freezing.
Strawberry swirl: Spoon thick strawberry jam and fold gently. It tastes like a summer stand cone and pairs beautifully with quick family meals.
Peanut butter cup: Stir in a spoonful of creamy peanut butter and chopped chocolate candies. It satisfies big-time dessert cravings.
Dairy-free version: Use full-fat coconut cream and dairy-free sweetened condensed coconut milk, shake a little longer, and keep portions small. It’s lush and friendly to best vegan meal prep plans.
Serving Suggestions
Serve it straight from the jar with a tiny spoon, which somehow makes dessert feel fancier. For a date-night finish to healthy meal plans for two, split one jar into two petite bowls and shower with shaved chocolate. Add a few fresh berries or banana slices if you want something bright and juicy. When friends come over for burgers and best dinner prep meals, set out a little topping bar—mini chips, sprinkles, cookie crumbs—and let everyone crown their jar.
For brunch (yes, dessert brunch is a thing) set the jars next to coffee and a full english breakfast spread and watch adults smile like kids. And on movie nights, tuck a jar between two warm cookies for an instant ice cream sandwich situation. This and a rom-com is perfection.
Pairing Ideas (Drinks, Sides, etc.)
Strong iced coffee or cold brew with a splash of vanilla is dreamy with vanilla jars.
Mint tea or lemon-ginger tea cuts the richness and refreshes the palate.
Sparkling water with a citrus wedge works when you want bubbles, not more sweetness.
Warm brownies, blondies, or a crisp waffle cone piece add crunch and temperature contrast.
A dish of salted roasted nuts on the side brings that salty-sweet magic.
How to Store and Reheat Leftovers
No reheating needed—just good habits. Keep the lid screwed on tightly and store the jar in the coldest part of the freezer (usually the back). Press a small square of parchment directly on the surface before sealing if you plan to store for a few days; it helps prevent ice crystals. When you’re ready to serve, let it soften on the counter for 3 to 5 minutes, then scoop.
Avoid temperature swings. Constant in-and-out opens the door to ice crystals and dull flavor. If you made multiple jars for prepared meals for two evenings or best meals to prep, pull only what you’ll serve. If the top picks up a bit of frost after a week, scrape a thin layer off and the scoop underneath will be creamy as ever.
Make-Ahead and Freezer Tips
Mason Jar Ice Cream was born to be made ahead. Shake the jars in the morning, freeze, and you’re party-ready by evening. For events, line a sheet pan with the labeled jars so you can grab the right flavors fast. When building a week of best meal prep plans that include a little joy, make two or three jars with different mix-ins and freeze. Rotating flavors keeps dessert exciting, even if you’re sticking to low calorie high nutrition meals the rest of the day.
Common Mistakes to Avoid
Overfilling the jar. No room for air = heavy, icy texture. Leave that headspace.
Skimping on the shake. Stop too early and you’ll get thin, icy results. The mixture should coat the glass like thick cream.
Using a loose lid. If it leaks when you shake, it’ll leak flavor (and make a mess). Tighten or replace.
Adding watery fruit before shaking. Excess liquid dilutes the cream. Swirl jam or puree after shaking for the prettiest ribbons.
Forgetting to soften before scooping. A few minutes on the counter turns “unyielding” into “dreamy.”
Frequently Asked Questions (FAQ)
What size jar should I use?
An 8-ounce (half-pint) jar is ideal for one to two servings and leaves space to shake.
Can I use milk instead of heavy cream?
Milk won’t thicken properly and freezes icy. Heavy cream is essential for that creamy scoop.
How long do I have to shake?
Usually 4 to 5 minutes, but watch the texture. It should thicken and coat the sides. If unsure, shake one more minute.
Can kids make it?
Yes, with supervision for the shaking step and the freezer. It’s a fantastic hands-on kitchen activity.
Can I double the recipe in one jar?
It’s better to make two jars. A full jar won’t aerate well and the texture will suffer.
How long does it last in the freezer?
Up to a week for peak flavor. Keep it sealed tight and consider parchment pressed on the surface.
Is it as creamy as churned ice cream?
It’s very creamy, though slightly denser since it’s not churned. Still absolutely satisfying.
What sweeteners can I use?
Stick to granulated sugar for best texture. Liquid sweeteners can thin the mixture.
How do I make chocolate or strawberry versions?
Add cocoa powder before shaking for chocolate; swirl in thick strawberry jam after shaking for a marbled look.
Can this fit with my protein meal plan?
As a small planned treat next to high macro meals, yes. Keep portions modest and enjoy the moment.
Cooking Tools You’ll Need
Half-pint mason jars with tight-fitting lids
Measuring spoons and a small liquid measuring cup
A small funnel (optional, neat-freak friendly)
A sturdy spoon for folding mix-ins and scooping
Labels or a marker for flavor and date
A freezer-safe tray to keep jars organized and upright
Final Thoughts
Mason Jar Ice Cream is proof that dessert doesn’t need a machine or a special weekend to be worth it. It fits into real life—after easy weeknight dinners, between homework and bedtime, during cozy Sundays when you want something sweet without a sink full of dishes. It’s flexible enough for meals for 2 delivered vibes at home and whimsical enough for parties where everyone personalizes their own jar. It’s also the dessert that forgives little chaos—crooked lids, overzealous shaking, sprinkles on the floor—and still delivers a creamy spoonful that feels like a tiny celebration.
To be real, I love the ritual as much as the result. The shake, the check, the swirl, the freeze. The satisfaction of cracking the lid open and seeing a cloud you made yourself. Keep a stack of clean jars ready, and you’ll always have a quick path from craving to joy. And if you invent a combo I haven’t tried—peanut butter strawberry swirl? espresso chocolate chip?—tell me everything. I’ll be in the kitchen, shaking along.
If you enjoyed this recipe, don’t forget to save it on Pinterest or share it with a friend!

Mason Jar Ice Cream (No-Churn)
Ingredients
- 1 cup heavy cream, well chilled
- 2 tablespoons granulated sugar
- 1/2 teaspoon vanilla extract
- pinch of fine salt
- optional mix-ins: mini chocolate chips, crushed cookies, sprinkles, thick fruit jam or purée
Instructions
- Chill the mason jar for 5–10 minutes while gathering ingredients.
- Add heavy cream, granulated sugar, vanilla extract, and a pinch of salt to the jar, leaving at least 1/3 of the jar empty for headspace.
- Seal the lid tightly and shake vigorously for 4–5 minutes until the mixture thickens, coats the sides of the jar, and roughly doubles in volume.
- Open the jar and fold in any desired mix-ins (chips, cookie crumbs, or thick fruit jam). Do not overfill.
- Press a small piece of parchment directly on the surface (optional), reseal the lid, and freeze on its side for 30 minutes, then upright for 3–4 hours, until firm.
- Before serving, let the jar sit at room temperature for 3–5 minutes to soften slightly. Scoop and enjoy from the jar or transfer to a bowl.


