Introduction
The first time I made Cookie Monster Ice Cream, I was supposed to be prepping a sensible dinner. You know, roast chicken, greens, the kind of thing that belongs on healthy comfort food boards and keeps us on our protein meal plan. Then I opened the pantry, spotted a half-eaten sleeve of chocolate sandwich cookies, and the plan turned into a blue, cookie-studded detour. Honestly, it was the most delightful rebellion—one that still works even on nights dedicated to easy weeknight dinners and quick family meals. I tell myself a small scoop after dinner fits the vibe of healthy eating for two when we’re portioning sensibly. Balance, right?
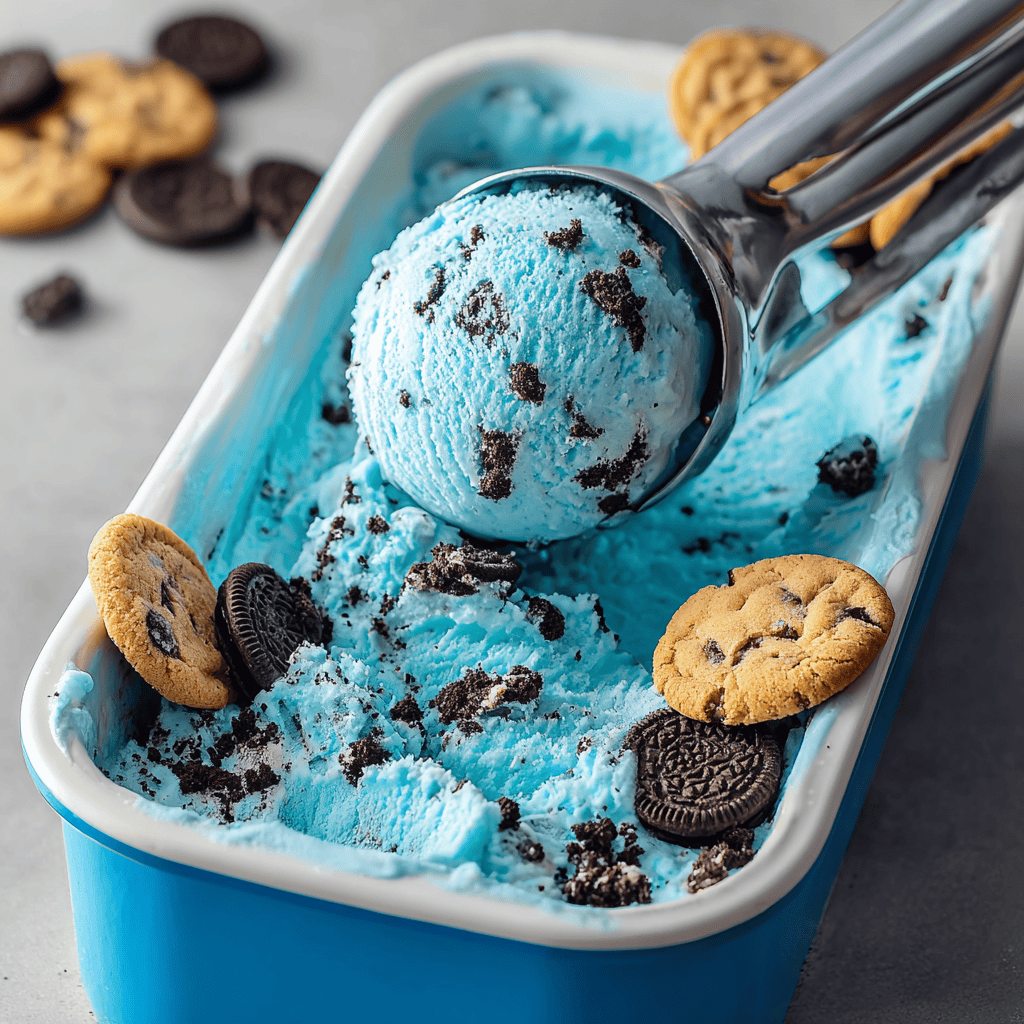
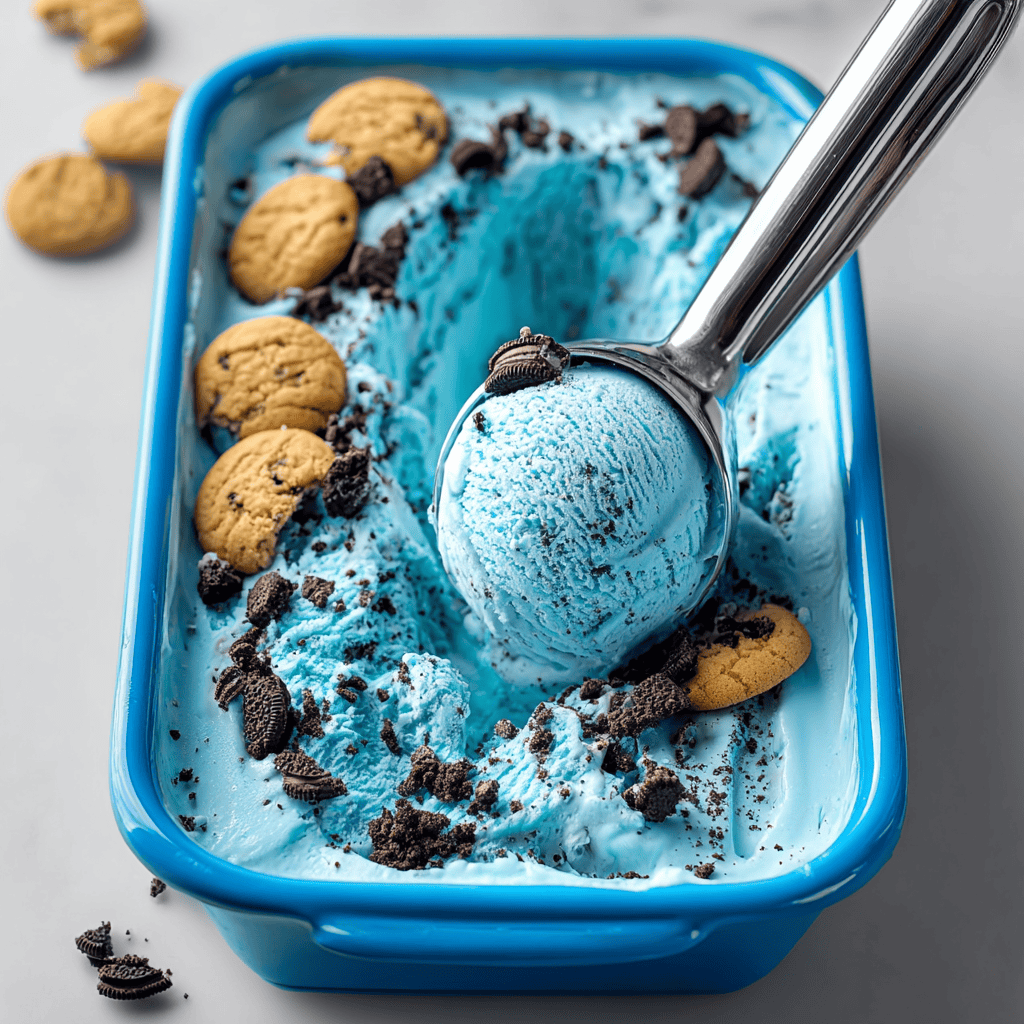
The magic of this ice cream is the texture. When you whip cold heavy cream, there’s this quiet music to it—soft swooshes, a faint thwap as peaks appear. Then comes the sweetened condensed milk, glossy as satin and rich enough to make you sigh. Stir in vanilla, a few drops of blue gel food coloring, and suddenly you have a bowl that looks like Saturday morning cartoons. It’s nostalgia by the spoonful, with cookie rubble for crunch. To be real, the smell is subtle—gentle cream and vanilla—but the visual turns heads like a parade float.
The very first batch was chaos. I overdid the food coloring (oops) and turned the kitchen towels turquoise. I folded in still-warm cookie chunks and watched the chocolate melt into streaks. It looked like a marble notebook and tasted like a dream. Lesson learned: cool the mix-ins and start light with color. The second round set perfectly, with ribbons of cookie throughout and a scoop that held its shape like a pro. Also, the no-churn method means there’s no fussy machine to freeze or clean—just a mixer and a loaf pan. It’s the kind of dessert that slides neatly into best meals to prep for parties, and it’s playful enough to cap off brunch—even a full english breakfast spread—when everyone wants a sweet bite hours later.
Here’s my favorite secret: tuck single-serve scoops into small containers as you’re freezing. They feel like ready made protein meals but for dessert—grab-and-go happiness that doesn’t derail your best dinner prep meals or your good intentions for the week. Is it part of a keto meal plan? No. But on a real-life eating plan where joy matters, a few spoonfuls of Cookie Monster bliss totally fit. Consider this whimsy your reward for getting through the day.
Why You’ll Love This Recipe
It’s truly no-churn. No special equipment, no salt, no ice, no drama.
The color thrills kids and the cookie chunks please grown-ups. It’s whimsical, but the vanilla-cream base tastes classic.
You can build it with pantry staples and store-bought cookies—hello, budget-friendly recipes and last-minute party wins.
It’s ideal for birthdays, movie nights, and make-ahead desserts to accompany meal prep microwave lunches through the week.
Customizable like crazy: go heavy on chocolate chip cookies, add sprinkles, swirl in fudge, or fold in mini chips.
It scoops like a dream and holds up well in the freezer for up to two weeks, which means dessert is always ready for prepared meals for two nights at home.
What Makes This Recipe Special?
Two words: sweet simplicity. We lean on the science of no-churn ice cream where whipped cream brings air and condensed milk brings body, so you get creamy texture without churning. The blue hue is just for fun, of course—but it sets the mood. It’s the dessert equivalent of a confetti popper.
Then there’s the cookie strategy. I like a 50/50 split: softish chocolate chip cookies for chew, snappy chocolate sandwich cookies for crunch and contrast. The mix of textures makes each bite feel new. If you’re a planner, this recipe is a friendly add-on to best meal prep plans because it needs time to freeze, and you can portion it easily. If you’re feeding a crowd on cheap meal plans for 2 that scale up to many, this dessert stretches like a champ—one loaf pan gives six to eight happy scoops.
Ingredients
Heavy whipping cream
Sweetened condensed milk
Vanilla extract
Blue gel food coloring
Chocolate chip cookies (chopped)
Chocolate sandwich cookies (chopped)
Optional: mini chocolate chips, sprinkles
Let’s talk details so your scoop hits all the right notes. Heavy whipping cream is your structure. Chill it well; cold cream whips faster and traps more air, which means softer scoops that still hold shape. Sweetened condensed milk plays two roles: sweetness and silk. It also helps lower the freezing point so your ice cream stays scoopable rather than turning into a rock. If you’re exploring dairy-free options, use coconut cream and condensed coconut milk—the texture remains luscious and the faint coconut note plays nicely with vanilla and chocolate.
Vanilla extract is more than perfume; it rounds the sweetness and makes the cookie flavor pop. Blue gel food coloring is the easiest way to get that vibrant, saturated color without adding extra moisture. Start with a few drops and sneak up on your perfect shade—electric sapphire? sky blue? You get to play artist. For the cookies, choose a mix. I love soft-baked chocolate chip cookies because they stay chewy when frozen, and I break classic chocolate sandwich cookies into chunky shards for crunch. Optional mini chocolate chips add a little staccato texture. Sprinkles? Always a mood booster.
Quick warnings I learned the messy way: don’t use liquid food coloring; it can water down the base. Don’t add warm cookies; heat will streak the color and melt the cream. And don’t pulverize the cookies to dust—crumbs are nice, but we want bite-sized treasure in every scoop.
How to Make It Step-by-Step
- Whip the cream.
Pour cold heavy cream into a chilled mixing bowl. Start low, then increase speed. You’ll watch soft tracks appear, then firm peaks that stand up but curl just a little at the tip. The sound shifts from sloshy to thick and whispery. Stop right at stiff peaks—over-whipping turns it grainy. If you’ve ever whipped a little too far (been there), add a splash of cream and mix gently to save it. - Tint the base.
In a separate bowl, stir together sweetened condensed milk and vanilla extract. Add blue gel food coloring one drop at a time, whisking until the color looks like a sunny-day sky. I usually stop a shade lighter than I want; once you fold in the cream it deepens slightly. If you’re going for Cookie Monster bold, a few extra drops will do it—but start light and creep up. - Fold like a cloud.
Gently fold the whipped cream into the blue mixture. Use a spatula and sweep from the bottom up, rotating the bowl. This keeps the air in the cream where it belongs. The texture should become uniform and glossy, like soft mousse. If streaks of white remain, keep folding—but slowly. This part always feels calming to me, like smoothing bedsheets. - Cookie time.
Add chopped chocolate chip cookies and sandwich cookies. Keep the pieces around pea to nickel size for the best distribution. Fold them in with a few lazy turns so you don’t crush everything into crumbs. The bowl should look like a treasure map—blue with islands of cookie. - Layer and top.
Scrape the mixture into a metal loaf pan or a freezer-safe container. For extra crunch, sprinkle a layer of cookie crumbs halfway through filling the pan, then continue. Smooth the top, then add a pocketful of reserved cookies, a sprinkle of mini chips, and maybe a confetti rain of sprinkles for sparkle. - Freeze like a pro.
Press a piece of parchment directly onto the surface to minimize ice crystals, then cover with a lid or tight wrap. Freeze for 4 to 6 hours until set. Overnight gives the best scoop. If your freezer runs cold, let the container sit on the counter for 5 to 10 minutes before scooping. - Scoop and smile.
Warm your scoop under hot water, dry it, and glide through the ice cream. It should slice cleanly with specks of cookie in every curl. If you hear a gentle squeak and see neat ridges, your texture is perfect.
Lessons learned from past chaos: once I used a plastic container without a lid and forgot the parchment. The top formed icy crystals and the flavor dulled. Not tragic, just less magical. Another time I folded in whole mini cookies. Cute idea, but the scoops looked lumpy and the pieces were too big to eat comfortably. Chop them a bit—your future self will thank you.
And yes, I’ve made a spirited “blue batch” after a week of meal planning chicken, salads, and low calorie high nutrition meals. It felt like a tiny parade. A small bowl after dinner didn’t derail anything; it just brightened the night.
Tips for Best Results
Chill everything—bowl, beaters, cream. Colder equals faster whip and better body.
Use gel color. It’s potent and won’t water down your base.
Fold, don’t stir. Keep the batter airy so scoops stay fluffy.
Chop cookies to varied sizes for bite and crunch in each spoonful.
Line with parchment to reduce ice crystals and keep flavor vibrant.
Portion into small containers for healthy meal plans for two and ready meals for 2 style nights. Built-in portion control makes dessert feel smart, not impulsive.
Ingredient Substitutions & Variations
Go gluten-free with certified GF sandwich cookies and chocolate chip cookies. The method stays the same.
Dairy-free? Use coconut cream (the thick, chilled kind) whipped until fluffy and sweetened condensed coconut milk. Vanilla extract keeps the flavor classic.
Color play: swirl in a second color—violet or teal—by streaking a small portion of tinted base and folding twice for ribbons.
Cookie remix: peanut butter sandwich cookies, mint chocolate cookies, or crispy chocolate wafer cookies for a deeper cocoa vibe.
Monster mix-ins: mini chocolate chips, candy-coated chocolates, or a fudge ripple. To swirl fudge, microwave 2–3 tablespoons until pourable and ribbon it over the top before freezing.
If you love best vegan meal prep, use plant-based cookies and dairy-free whipped topping alternatives for a party-friendly version.
Serving Suggestions
Serve scoops in waffle bowls with extra cookie crumbs and a drizzle of chocolate sauce. The crunch against the creamy scoop is unbeatable. For little birthday hands, I like mini cones with a shower of sprinkles. For date night, two small bowls topped with a shard of chocolate wafer feel fancy in an “effortless” way—perfect after quick family meals. If you’re hosting brunch, bring it out between savory casseroles and fruit platters; the color makes people grin.
I love pairing a small scoop with a warm brownie or a blondie for total texture nirvana. Or keep it simple: a scoop alongside fresh strawberries or banana slices. If you’re mapping good meal prep plans, make single-serve jars in your freezer so dessert feels like part of your best meals to prep—pre-portioned and ready when you are. And yes, this and a rom-com is perfection.
Pairing Ideas (Drinks, Sides, etc.)
Iced coffee or cold brew with a splash of vanilla.
A steamy mug of black tea or mint tea for balance.
Sparkling water with a lemon wedge between bites.
Warm chocolate chip cookies (meta, I know) for double-cookie delight.
A small dish of salty roasted peanuts on the side—the sweet-salty contrast sings.
How to Store and Reheat Leftovers
No reheating here—just good storage. Keep the ice cream in an airtight container with parchment pressed directly on the surface. It’ll stay scoopable and tasty for up to two weeks. If your freezer runs extra cold, set the container out for 5 to 10 minutes before serving or microwave the scoop for 10 seconds to warm it (just the scoop, not the ice cream). Avoid frequent thaw-freeze cycles; they cause crystals. If you notice the top getting icy after a few days, scrape a thin layer off before scooping—flavor underneath will be creamy as ever.
Make-Ahead and Freezer Tips
This dessert is born for make-ahead. Mix, freeze overnight, and you’re party-ready. For clean scoops at show time, pre-scoop balls onto a parchment-lined sheet and refreeze; transfer to a container. Then you can serve like a pro—no wrestling with a rock-hard tub. If you’re managing a week of best meal prep healthy snacks and desserts, pack ½-cup portions into small lidded cups for grab-and-go moments after dinner.
Common Mistakes to Avoid
Using liquid food coloring. It can thin the base and mute the color.
Over-whipping cream past stiff peaks. Grainy cream doesn’t fold smoothly.
Adding warm cookies. Heat melts the base and smears the color.
Skipping the parchment lid. Exposed surfaces form ice crystals fast.
Heavy stirring instead of folding. You’ll deflate the mix and lose that dreamy scoop.
Frequently Asked Questions (FAQ)
Do I need an ice cream maker?
Nope. This is a classic no-churn method—whipped cream + sweetened condensed milk does all the heavy lifting.
How do I get that vibrant blue?
Use gel food coloring. Start with a couple of drops and build slowly to the shade you love.
Can I use store-bought cookies?
Absolutely. Any favorite brand of chocolate chip and chocolate sandwich cookies works.
Can I make it gluten-free or dairy-free?
Yes. Choose GF cookies for gluten-free. For dairy-free, use coconut cream and condensed coconut milk and stick with dairy-free cookies.
How long does it take to freeze?
At least 4 hours; overnight is ideal for the cleanest scoops.
How long does it last?
Best within 1–2 weeks when stored airtight with parchment on top.
Can I reduce the sugar?
The condensed milk provides necessary sweetness and texture. Reducing it will change the scoop and stability.
What container is best?
A metal loaf pan or any freezer-safe airtight container. Metal chills quickly and makes scooping easier.
Can I scale the recipe?
Yes. Double for parties and freeze in two shallow pans for quicker set time.
Will it fit into my protein eating plan?
While it’s not a protein dessert, small, planned servings can happily live beside high macro meals and low fat meal delivery-style dinners at home.
Cooking Tools You’ll Need
Large mixing bowl and hand mixer or stand mixer
Rubber spatula for gentle folding
Measuring cups and spoons
Cutting board and knife for chopping cookies
Metal loaf pan or freezer-safe airtight container
Parchment paper for pressing onto the surface
Sturdy ice cream scoop
Final Thoughts
Cookie Monster Ice Cream is the dessert that reminds me to keep some play in the kitchen. It looks like a cartoon, tastes like childhood sleepovers, and comes together with fewer steps than tying an apron. I make it when the week feels too serious, when our meal planning chicken routine needs a bright blue plot twist, or when friends are coming over and I want that “wow” without fuss. A small scoop after easy weeknight dinners makes the table feel like a party, and a double scoop on birthdays turns everyone into a kid again.
If you end up with blue fingerprints on the counter and cookie crumbs on your shirt, same. That’s part of the charm. To be real, dessert should feel a little mischievous. That first cold, creamy spoonful—flecked with chocolate and crunch—will make you laugh at the chaos and love your kitchen exactly as it is.
If you enjoyed this recipe, don’t forget to save it on Pinterest or share it with a friend!

Cookie Monster Ice Cream (No-Churn)
Ingredients
- 2 cups heavy whipping cream, well chilled
- 1 can sweetened condensed milk (14 oz)
- 1 teaspoon vanilla extract
- blue gel food coloring (to shade)
- 1 cup chopped chocolate chip cookies
- 1 cup chopped chocolate sandwich cookies
- mini chocolate chips or sprinkles, for topping (optional)
Instructions
- In a large chilled mixing bowl, whip heavy cream to stiff peaks with a hand mixer or stand mixer; set aside.
- In a separate bowl, whisk together sweetened condensed milk and vanilla. Add a few drops of blue gel food coloring and mix until evenly tinted, adding more as needed to reach your preferred shade.
- Gently fold the whipped cream into the blue mixture with a rubber spatula until smooth and airy.
- Fold in the chopped chocolate chip cookies and chocolate sandwich cookies, reserving a handful for topping if desired.
- Transfer the mixture to a loaf pan or freezer-safe container. Smooth the top and sprinkle reserved cookie pieces and optional mini chocolate chips or sprinkles over the surface.
- Press a piece of parchment directly onto the surface (optional) and cover the container. Freeze for 4–6 hours, or until firm.
- Let sit at room temperature for 5–10 minutes for easier scooping. Scoop and serve.


