
Introduction
I learned these Peanut Butter Cornflake Cookies on a night when the oven and I were not on speaking terms. You know that kind of evening—lights low, a stack of dishes in the sink, and me craving something sweet but refusing to preheat anything. The pantry was a chaotic scene (open cereal box teetering on the edge, sugar canister missing its lid, rogue cornflake crunching underfoot), and I thought, “Okay, let’s make magic out of this mess.” Honestly, it worked. One saucepan later, the kitchen smelled like warm peanut butter fudge and toasty cereal, and I was standing there, spoon in hand, whispering to myself, “Well, I didn’t expect that.”
These cookies are the little victory you get when you want dessert now, not in 45 minutes. They’re chewy and crisp in the same bite. They’re buttery-nutty without the butter, sweet without being cloying, and they set up fast—perfect when the craving strikes at 9:47 p.m. while you’re deep in a cozy show and not budging from the couch. It’s that “I can make this while the pasta water boils” energy, and I love it.
They’re nostalgic, too. The first time I tasted them, a neighbor dropped off a plate wrapped in crinkly plastic and said, “No oven, just a pot.” I bit in and the texture snapped and squished in the best way—cornflake crunch giving way to peanut-butter hug. It felt like childhood snack time and late-night college studying all at once. To be real, these have become my go-to for easy weeknight dinners dessert add-on, last-minute bake sales, and “the kids need a treat in eight minutes” scenarios. They also slide into budget-friendly recipes territory because everything comes from the pantry—no fancy stuff, no chill.
If you’re big on prep, these are a stealth hero for meal prep microwave lunches dessert companions and even part of a best meal prep healthy balance when you portion them small and stash them out of sight (good luck with that). I’ve tucked them into lunchboxes, on party platters, and as the sweet finish to quick family meals. And while they’re not a protein bar, they absolutely satisfy that sweet tooth that sneaks up at 3 p.m., the same one that derails your protein meal plan if you don’t plan for it. Consider these your planned derail—joy included. Oh, and the aroma? Like a warm, peanut-buttery cloud drifting through your kitchen. I swear the smell alone makes me kinder.
Why You’ll Love This Recipe
- Chewy-crunchy texture that hits every snack craving in one bite—like a hug and a high-five.
- Truly no-bake. No oven, no “did I remember to set the timer,” just stovetop ease and done.
- Pantry-friendly ingredients that work for quick family meals desserts and budget-friendly recipes.
- Fast to set and easy to portion, perfect for party trays, cookie swaps, and school snacks.
- Make-ahead friendly and a dream for last-minute cravings or “company’s coming” moments.
- Nostalgic flavor with room for fun twists—chocolate drizzle, butterscotch vibes, mini marshmallows, you name it.
What Makes This Recipe Special?
There’s an elegant little rhythm to these cookies. You dissolve sugar into syrup, stir in peanut butter until it turns glossy and cuddly, then fold in cornflakes so every piece gets a shiny coat. The trick is timing—just enough heat to melt and mingle, not enough to harden into candy. When you get it right—and you will—the clusters set with a soft chew and a crisp bite.
And then there’s the customization. You can pull them toward “festive” with sprinkles, “movie night” with chocolate chips, or “snack-attack fuel” with a handful of chopped peanuts. They’re endlessly flexible for healthy comfort food dessert moments and sneakily helpful alongside best dinner prep meals when you want a sweet payoff without derailing your plan. If your life runs on checklists, these belong under “wins.”
Ingredients
Cornflakes cereal
Creamy peanut butter
Granulated sugar
Light corn syrup (or honey as an alternative)
Vanilla extract
Pinch of salt (optional)
Let’s talk specifics so you nail that perfect texture. Cornflakes are your crunch structure. I like classic, unflavored cornflakes because they give that thin, delicate crisp you can break with a spoon. If you use a thicker, artisan cereal, you’ll get chunkier clusters—which is fine, just different. Peanut butter is the soul. A creamy, shelf-stable jar (the kind you grew up with) guarantees a consistent set. Natural peanut butter works, but stir really, really well; otherwise, the oil can separate and make the cookies too soft or slick.
Granulated sugar and light corn syrup team up to create the “soft candy” base that binds everything. Corn syrup gives that glossy, chewy finish and helps prevent crystallization. Honey is a lovely option if you prefer a rounder, floral sweetness—but it sets a tad softer, so keep your clusters small. Vanilla extract is a background note that makes everything taste like a bakery on a Saturday morning. A pinch of salt brings the peanut butter into focus; skip it if your peanut butter is already salted.
Brands? Use your favorite. If I’m feeling fancy, I grab a high-quality vanilla because it absolutely sings in a simple recipe like this. Substitutions? Almond butter is great; sunflower seed butter works if there’s a nut allergy in the house. Warnings (learned the hard way): don’t crush the cornflakes into dust before stirring (you’ll lose that signature snap). Don’t keep the pot on the heat after adding peanut butter—the mixture can seize or harden too much. And don’t dump in the cereal all at once if you’re working with a smaller pot—coating gets uneven and you’ll chase dry flakes around like confetti.
How to Make It Step-by-Step
- Bubble the base. In a medium saucepan, combine the granulated sugar and light corn syrup over medium heat. Stir constantly as the mixture warms and the sugar dissolves. You’ll see it go from cloudy to clear. Listen for soft plips and watch for small, gentle bubbles around the edges—this is your cue. Oops moment to avoid: if it full-on boils aggressively, it’ll set firmer and the cookies could be tooth-chipping hard. We want smooth, not shattery.
- Add the peanut butter and vanilla. Lift the pan off the heat and immediately stir in the peanut butter and vanilla extract. The scent will hit you first—warm, nutty, cozy. Stir until everything looks glossy and uniform, like satin. This is the part where I usually think, “I could eat this with a spoon,” and then I remember the cornflakes waiting for their spa treatment.
- Fold in the cornflakes. Tip in the cornflakes and switch to a wide spatula or a large spoon. Gently fold, lift, and turn. Try not to crush the flakes too much; the whole point is that feather-light crunch. It should look like every flake got a shiny peanut butter blanket. If spots look dry, keep folding. If your pot is small, add the cereal in two batches—trust me, it helps.
- Scoop the clusters. Work fairly quickly—this sets fast. Drop spoonfuls onto a parchment-lined baking sheet. If you want them uniform, use a cookie scoop. If you want “grandma style,” use two spoons and embrace the lumpy charm. Press the top lightly if you prefer flatter cookies, or leave them pebbly for extra texture.
- Let them set. Give the cookies about 30 minutes at room temperature to firm up. The surface goes from glossy to softly matte, and the base feels set but still bendy if you press gently. If you’re rushing to a potluck, pop the tray in the fridge for 10–15 minutes, but don’t leave them there long-term or they’ll get a bit too firm.
- Cue the upgrades (optional). Drizzle melted chocolate in zigzags, sprinkle a pinch of flaky salt for contrast, or scatter mini marshmallows over a few while they’re still warm so they stick. This is where you make them your own—birthday sprinkles, chopped peanuts, even a few pretzel bits. It’s giving best high protein frozen meals dessert energy in spirit—customizable, convenient, and smile-inducing.
- Serve and smile. Plate them up with cold milk, a strong coffee, or a late-night tea. They bring that “party snack” vibe to quick family meals and land squarely in the sweet-treat side of healthy eating for two when you keep portions modest. I’ve even tucked a couple alongside a leftover salad for balance because, hi, I’m human.
What went wrong the first time I made these? I got cocky and let the syrup boil hard for a full minute. The cookies set like tiny peanut butter helmets—crunchy in a “chew carefully” way. Lesson learned. The second time, gentle bubbles only, and they set like a dream. Another fun hiccup: I stirred too vigorously and pulverized the cereal into crumbs. Still tasty, but the texture lost its swoon. Keep your folds slow and wide, like you’re tucking in a blanket.
Tips for Best Results
- Gentle heat is everything. As soon as you see steady little bubbles, pull it. That’s your perfect set point.
- Stir off-heat. Add peanut butter and vanilla away from the burner to avoid seizing and over-thickening.
- Work in batches. If your pot is small, add cereal in two rounds so every flake gets coated.
- Scoop quickly. The mixture tightens as it cools. Keep your sheet lined and ready.
- Add-ins wisely. If using chocolate chips or marshmallows, fold them in once the mixture cools a minute so they don’t melt completely.
- Portion control win. A small cookie scoop gives the perfect bite—great for no prep healthy lunches dessert perks and keeps you aligned with a low calorie high nutrition meals mindset.
Ingredient Substitutions & Variations
- Sweetener swap: Honey instead of corn syrup yields a slightly softer set and a warmer flavor. Maple syrup can work, but the set is looser—keep clusters small.
- Nut butters: Almond or cashew butter both shine. For nut-free, use sunflower seed butter or tahini (tahini adds a toasty, grown-up vibe).
- Chocolate drizzle: Melt your favorite chocolate and drizzle thin lines once cookies set. A whisper of flaky salt on top = chef’s kiss.
- Butterscotch detour: Replace half the peanut butter with melted butterscotch chips. The flavor is nostalgic carnival-fudge.
- Crunch mix-ins: Chopped peanuts, mini marshmallows, or tiny pretzel bits bring fun textures.
- Gluten-free path: Choose certified gluten-free cornflakes and you’re golden.
- Flavor nudges: Add a pinch of cinnamon for warmth or a dash of espresso powder to amplify chocolate if you’re drizzling.
Serving Suggestions
These are the cookie equivalent of a confetti cannon; they go with everything. For weeknight dinners that end on a sweet note, add a cookie (or two) alongside fruit and greek yogurt for that healthy comfort food feeling. For movie night, pair with popcorn and a rom-com—this and a cozy blanket is perfection. If you’re on a protein eating plan, keep them petite and enjoy one with a tall glass of milk or a protein-rich latte as your sweet landing.
They also love brunch and can stand right alongside a full english breakfast—controversial opinion, but sweet bites on a savory plate are a joy. Planning a little weekend gathering? Stack them on a tiered tray with brownies and sliced fruit. Hosting friends with different preferences? Offer a “build-your-own” finish: cookies with bowls of mini chips, chopped nuts, and sprinkles so everyone can dress theirs.
Pairing Ideas (Drinks, Sides, etc.)
- Drinks: Cold milk, oat milk, strong iced coffee, cinnamon tea, or a simple hot chocolate.
- Sides for a snack board: Apple slices, grapes, pretzels, and a bowl of mixed nuts.
- Dessert party: Serve with chocolate-dipped strawberries, vanilla yogurt dip, or mini brownie bites.
- After-dinner treat: One cookie with espresso is the minimalist dream for quick family meals that end fast but happy.
How to Store and Reheat Leftovers
Storage is easy—airtight container at room temperature for up to a week. If your home runs warm, stash them in the fridge for up to two weeks, but let them sit out for 10 minutes before serving so the chew returns. Freezer-friendly? Yes. Freeze in a lidded container with parchment between layers for up to two months. Thaw at room temp.
Reheating isn’t really a thing here—you want them at room temperature. If you accidentally refrigerate and they feel too firm, set them on the counter until gently bendy again. Avoid microwaving; they can turn sticky and lose that delicate snap. This is the rare dessert that slides perfectly into best meals to prep snack territory with zero fuss.
Make-Ahead and Freezer Tips
Make the mixture, scoop the cookies, and let them set. Store at room temperature if you’ll serve within 3–4 days. For longer, freeze as noted. If you’re entertaining, you can make these the night before—just keep them covered so they don’t absorb pantry aromas. For lunchboxes, wrap two at a time in little parchment packets for grab-and-go sweetness that plays nicely with best meal prep plans and good meal prep plans you actually stick to.
Common Mistakes to Avoid
- Over-boiling the syrup. Leads to rock-hard cookies. Pull the pan at gentle bubbles.
- Stirring too aggressively. Pulverizes the cornflakes—good flavor, meh texture. Fold slowly.
- Adding cereal to a too-hot base. The mix thickens instantly and coats unevenly. Give it 15–20 seconds off heat first.
- Skipping the parchment. Trust me, you want easy release and less cleanup.
- Oversized scoops. Big cookies set unevenly. Smaller scoops equal better texture and portion control for low calorie premade meal delivery style portioning at home.
Frequently Asked Questions (FAQ)
Can I use natural peanut butter?
Yes, but stir the jar thoroughly to reincorporate the oils. Expect a slightly softer set. If it’s very loose, add an extra small handful of cornflakes to balance.
What can I use instead of corn syrup?
Honey works well and brings a mellow floral note. The set will be a touch softer, so keep clusters small and let them rest the full 30 minutes.
How do I keep them from turning too hard?
Don’t let the sugar-syrup mixture boil aggressively. Remove from heat at gentle, steady bubbles. Also, don’t keep cooking after adding peanut butter.
Can I add chocolate?
Absolutely. Drizzle melted chocolate after they set, or fold in mini chips once the mixture cools a minute so they don’t melt away.
Are these gluten-free?
Use certified gluten-free cornflakes and check labels on your peanut butter and syrup. Then you’re set.
Can I make them ahead?
Yes. They keep beautifully at room temp for several days and can be frozen up to two months. Ideal for best meal prep healthy dessert strategies that still feel fun.
Cooking Tools You’ll Need
- Medium or large saucepan with a heavy bottom
- Heat-safe spatula or wooden spoon
- Measuring cups and spoons
- Parchment paper and baking sheet
- Cookie scoop (optional but satisfying)
- Small microwave-safe bowl if you’re melting chocolate to drizzle
Final Thoughts
These Peanut Butter Cornflake Cookies are proof that dessert doesn’t need to be complicated to be wonderful. They’re the snack I make when the day’s been long and I want a quick win, the sweet bite I tuck into lunchboxes, and the nostalgia bomb I bring to parties where someone always says, “Wait, what are these?” I grin every time because it feels like sharing a tiny secret: no oven, big joy.
If you’re balancing high protein meals and a flexible protein meal plan, consider these your built-in treat that keeps you from raiding the baking aisle at 10 p.m. They’re simple, fast, and they make the kitchen smell like comfort. And if a few “oops” moments happen along the way—an extra crumble of cereal here, a chocolate squiggle there—that’s the charm. Dessert should be delicious and a little bit mischievous.
If you enjoyed this recipe, don’t forget to save it on Pinterest or share it with a friend!
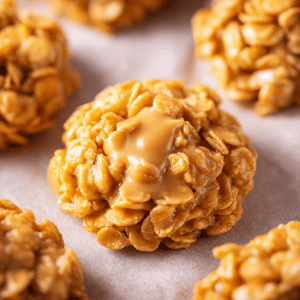
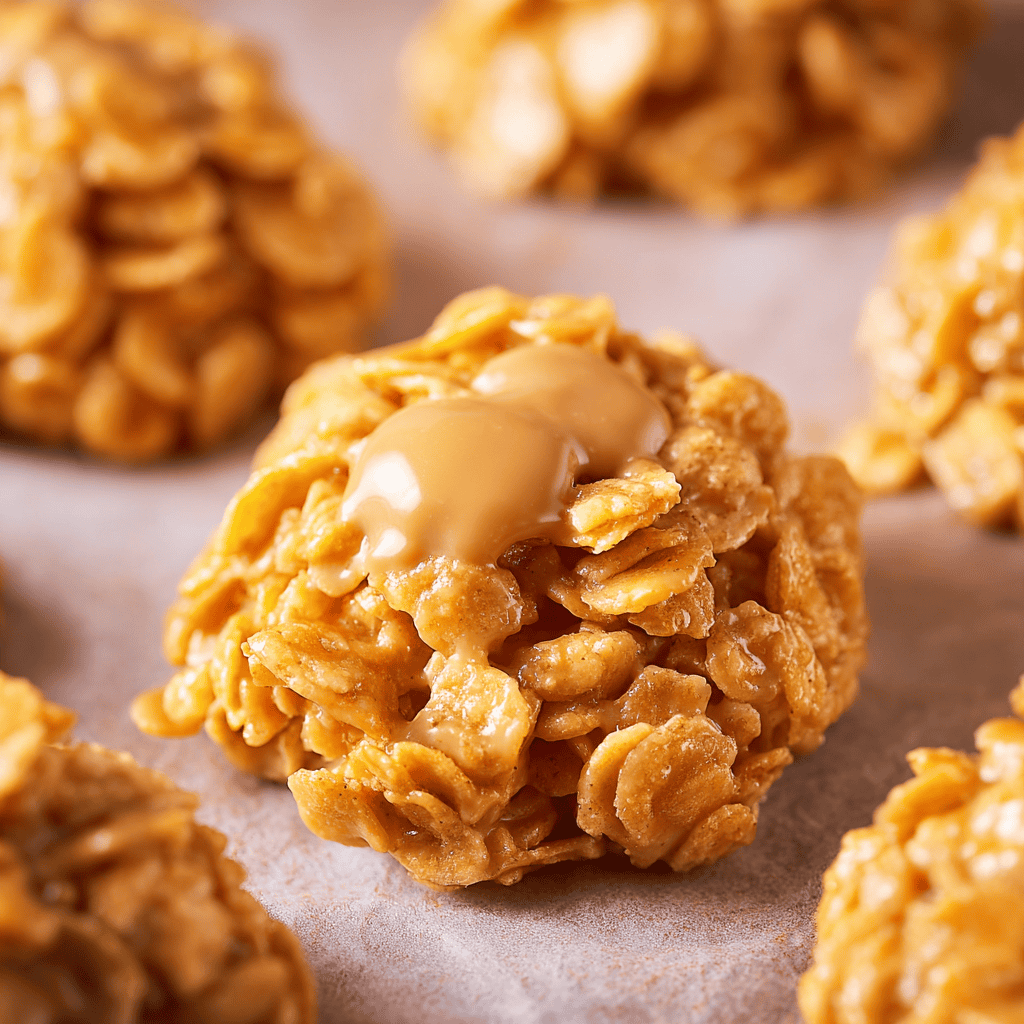
Peanut Butter Cornflake Cookies (No-Bake)
Ingredients
- 1 cup granulated sugar
- 1 cup light corn syrup (or honey)
- 1 cup creamy peanut butter
- 6 cups cornflake cereal
- 1 teaspoon vanilla extract
- pinch of salt (optional)
Instructions
- Line a baking sheet with parchment paper and set aside.
- In a medium saucepan over medium heat, stir the granulated sugar and light corn syrup until the sugar dissolves and the mixture reaches a gentle simmer.
- Remove the pan from heat and immediately stir in the peanut butter and vanilla extract until smooth and glossy.
- Gently fold in the cornflakes until all flakes are evenly coated. If using salt, add a small pinch now and fold again.
- Working quickly, drop spoonfuls (or use a cookie scoop) of the mixture onto the prepared baking sheet, shaping into cookies.
- Let the cookies cool and set at room temperature for about 30 minutes before serving.


