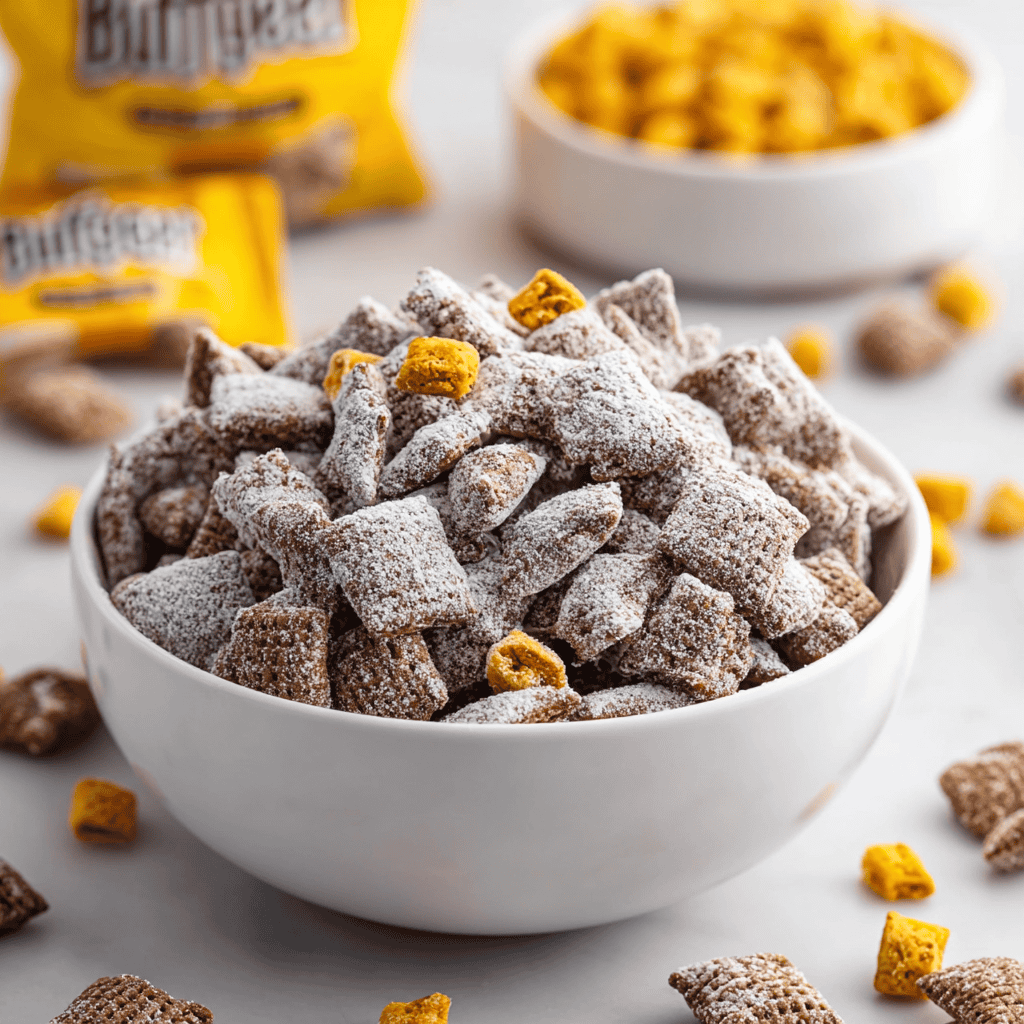
Introduction
The first time I made Butterfinger Puppy Chow, I had a bowl in one hand, a zip-top bag in the other, and the absolute confidence of someone who thought powdered sugar behaves like a calm snowfall. It doesn’t. It’s a blizzard. There I was, tripod set up for photos, ceiling fan still spinning, and—poof—white dust everywhere. The cereal looked like fresh snow, my sweater looked like fresh snow, my dog looked at me like, “We’re doing this again?” Honestly, worth it. Because this crunchy, chocolatey, peanut-buttery mix is the kind of snack that turns an ordinary night into a mini celebration. It checks all the cozy boxes: smells like a candy shop, tastes like a sweet hug, and makes your whole kitchen feel like a movie-night concession stand.
What I love most is how this “no recipe, recipe” flexes for real life. Got 20 minutes? You’re in. Need something for easy weeknight dinners dessert? Got you. Want a treat that doubles as budget-friendly recipes for crowds and makes snacking feel like one of those quick family meals moments where everyone stops scrolling and actually gathers around the bowl? Yes, yes, and absolutely yes. Even better, this is perfect for meal-prep-style snacks (hello, meal prep microwave lunches—okay, this one doesn’t need a reheat, but it packs like a champ). It leans into that healthy comfort food mood—not because it’s “health food,” but because it comforts your busy brain and reminds you simple is good. To be real, it’s also the kind of make-ahead sweet that plays nicely with your best meal prep plans, your good meal prep plans, and your “oops, I forgot I promised to bring something” plans.
If you’re the person forever googling best dinner prep meals (for the salty-sweet dessert portion), or quietly assembling ready meals for 2 snack plates while a rom-com is warming up, this one’s for you. The Butterfinger crunch gives you this toffee-peanut flair that surprises people in the best possible way. And when you shake everything with powdered sugar, there’s this satisfying soft rattle that just says, “cozy.” Lights dim, bowl between us, and that first bite—crisp cereal shell, glossy chocolate-peanut butter hug, sweet sugar finish—yep, I didn’t expect it to be this addictive either.
Why You’ll Love This Recipe
- Quick, no-bake magic. You’re done in under 30 minutes—perfect for busy nights or last-minute gatherings.
- Pantry-friendly. It uses simple ingredients you probably already have, which makes it perfect for budget-friendly recipes and spontaneous cravings.
- Seriously crowd-pleasing. Kids, teens, adults… everyone “just takes a handful” and then goes back for three more.
- Make-ahead friendly. Mix a big batch, stash it in airtight containers, and you’ve got instant party fuel for days.
- Crunch + melt factor. The Rice Chex gives crisp structure, while melted chocolate and peanut butter coat every nook with a candy-bar vibe.
- Easy to customize. Swap in other candies, toss in marshmallows, or add pretzels. It’s a choose-your-own-snack-adventure.
What Makes This Recipe Special?
I grew up on traditional muddy buddies, but Butterfinger Puppy Chow has that secret-sauce crunch: those crumbly, toffee-like ripples in Butterfinger bars melt slightly into the chocolate-peanut butter layer. Every bite has micro-surprises—little buttery shards, peanutty edges, and a light sugar snow. It’s nostalgic and new at the same time. Also, there’s no stovetop drama here. The microwave does the heavy lifting, and you, my friend, get all the glory. As a bonus, it scales beautifully for holidays, bake-sales, or gifting—think cute jars with ribbons and a hand-written tag. Instant hero energy.
Pro confession: I once over-melted the chocolate and peanut butter until it looked sandy. I panicked, added a tiny dab of butter, whisked like my life depended on it, and—boom—it came back smooth. This snack forgives. It’s here for the chaos.
Ingredients

- 6 cups Rice Chex cereal
- 1 cup milk chocolate chips (semi-sweet also works if you prefer a deeper cocoa note)
- 1/2 cup creamy peanut butter
- 1/4 cup unsalted butter
- 1 teaspoon vanilla extract
- 1 1/2 cups powdered sugar
- 4 Butterfinger candy bars, crushed (about 2 cups pieces)
Why each one matters (and little tips):
- Rice Chex cereal: The airy grid structure gives maximum crunch and perfect coating coverage. If you use Corn Chex, expect a slightly toastier flavor. Crispix can work too, but it’s more delicate—stir gently.
- Milk chocolate chips: Milk chocolate keeps things playful and candy-bar-like. Semi-sweet chocolate chips make it a touch richer (great if you’re sneaking this after easy weeknight dinners). Use a brand that melts smoothly; if yours seizes easily, add 1–2 teaspoons neutral oil.
- Creamy peanut butter: Smooth is key for even coating. Natural peanut butter can be thinner and oilier—stir it extremely well or add a tablespoon of powdered sugar to stabilize.
- Unsalted butter: A tiny amount relaxes the chocolate-peanut butter mixture so it drapes instead of clumps. If using salted butter, reduce any added salt elsewhere (we don’t add salt here, but still).
- Vanilla extract: Adds warmth and bakery-shop aroma. Add after melting to keep the flavor bright.
- Powdered sugar: The snowy topcoat that prevents sticking and gives that classic puppy chow look. Sift if yours has stubborn lumps.
- Butterfinger candy bars: The star. Crush them into small, uneven bits for a mix of dust (it clings to the chocolate layer) and crunch nuggets (like mini treasure).
Don’t do this: Don’t pour the hot chocolate mixture on too slowly; the bottom cereal soaks while the top stays naked. Don’t skip the cooling step before storing; trapped heat turns everything soft. And don’t shake the bag with the seal open… ask me how I know.
How to Make It Step-by-Step
- Set the stage. Pour 6 cups of Rice Chex into a very large mixing bowl. Bigger than you think you need—more space equals less breakage. Line a sheet pan with parchment for later. I like to set out my zip-top bag (2-gallon works best) and measure the powdered sugar ahead. It makes me feel like a snack scientist.
- Melt the magic. In a microwave-safe bowl, combine 1 cup chocolate chips, 1/2 cup creamy peanut butter, and 1/4 cup unsalted butter. Microwave for 30 seconds, stir, then another 20–30 seconds. You want it glossy and pourable. If there are a few stubborn chips, keep stirring; residual heat usually finishes the job. If it looks grainy, add 1–2 teaspoons neutral oil and whisk. Now stir in 1 teaspoon vanilla—this is when the aroma hits and your kitchen smells like a candy counter at the mall (nostalgia unlocked).
- Coat the cereal. Pour the warm mixture over the Chex. Here’s the move: use a wide spatula and scoop from the bottom, turning gently so you coat without crushing. Every square should look shiny. If a few hide in the corners, that’s normal—keep folding until all the pieces glow.
- Butterfinger blitz. Add the crushed Butterfingers. You’ll see a little dust cloud of candy bits—this is good. It nestles into the chocolate so every bite tastes “candy-bar official.” Stir gently to distribute. I like to reserve a small handful of larger shards to sprinkle over the finished batch for texture pops.
- Shake with sugar. Transfer the coated cereal to your giant zip-top bag or a container with a lid. Add 1 1/2 cups powdered sugar. Seal the bag tightly (press out air) and shake like you’re auditioning for a maraca solo. Short, fast shakes work best—too wild and you risk cereal confetti. You’re aiming for a snowy, soft-white coating where no shiny chocolate peeks through.
- Cool and set. Spread the mix on your parchment-lined sheet in a single-ish layer. Grab a few “chef’s bites,” obviously. Let it cool 10–15 minutes until the chocolate sets and the sugar clings firmly. This is the moment the rattly, sticky edges turn crisp and clean.
- Finish and store. Sprinkle the reserved Butterfinger shards on top for glam. Once fully cool, store in airtight containers. Try not to stand over the counter eating it by “quality checks.” Or do. This is a no-judgment pantry.
Oops moments & fixes:
If your chocolate mixture seizes (looks dull and stiff), whisk in a teaspoon of warm milk or oil. If you under-sugar it and pieces still feel tacky, sift a little more powdered sugar over the tray and toss very gently. If cereal edges look soggy, it wasn’t cool before storage—spread back out and give it more time. It usually rebounds.
Encourage your inner improviser: Add pretzel sticks for salty snap, mini marshmallows for squish, or roasted peanuts/almonds if you want protein crunch that leans into high protein meals energy (snack edition). You can even split the batch and use white chocolate on half—stripe them for a party platter that looks fancy with almost zero extra work.
Tips for Best Results
- Go big on the bowl. Space prevents breakage and ensures fast, even coating.
- Microwave in short bursts. Chocolate is moody. Gentle heat and frequent stirring keep it silky.
- Shake in batches. If your bag is too full, you’ll get streaky sugar coverage. Two smaller shakes beat one overstuffed one.
- Crush strategically. Aim for a mix of dust (flavor glue) and small pebbles (crunch therapy).
- Cool completely. Warmth equals condensation equals soft cereal. Airy and dry is the goal.
- Flavor check. A pinch of flaky salt over the cooled batch can sharpen the chocolate-peanut notes and make flavors pop—tiny but mighty.
Ingredient Substitutions & Variations
- Chocolate: Swap milk chocolate for semi-sweet or dark to steer less sweet and more cocoa-bold. White chocolate gives candy-shop vibes and plays beautifully with Butterfinger.
- Nut butter: Sunflower seed butter or soy butter works for nut-free households—just choose a thicker style so it coats well.
- Cereal: Corn Chex, Crispix, or even Golden Grahams deliver great crunch with a different personality.
- Add-ins: Pretzels, freeze-dried bananas, roasted peanuts/almonds, peanut butter chips, or mini marshmallows. For a party tray, split into halves and drizzle one with melted white chocolate and the other with caramel.
- Protein-leaning snack bowls: Toss in roasted nuts or high-protein cereal bits to nod toward high protein high carb low fat meals energy—snack version, obviously.
- Flavor upgrades: A whisper of espresso powder in the chocolate mixture deepens the cocoa. A dash of cinnamon warms things up for holidays.
Serving Suggestions
This is your “bowl on the coffee table, movie queued, fuzzy socks on” snack. It’s perfect after easy weeknight dinners when you want something playful and shareable. I love piling it into mason jars for casual gifts or tucking a baggie into lunch boxes for a “you’ve got this” treat. For game days, set out a big bowl with scoops or paper cups—built-in portion control that still feels fun.
If you’re making snack boards for healthy eating for two, add sliced apples, salty peanuts, and dark chocolate squares alongside the puppy chow. It’s chaos in the most charming way. Honestly, this and a rom-com is perfection.
Pairing Ideas (Drinks, Sides, etc.)
- Drinks: Cold milk, hot chocolate, vanilla iced lattes, or black coffee (the bitterness balances the sweet). For a fun twist, a chai latte amplifies the warm vanilla vibes.
- Snack board buddies: Salted pretzels, kettle chips, fresh berries, and peanut butter cups. A small bowl of roasted nuts adds protein (hello, high macro meals inspo).
- Dessert duet: Serve with brownies or a scoop of vanilla ice cream and shower the top with extra crushed Butterfingers.
How to Store and Reheat Leftovers
No reheating needed—this is a “open container, grab handfuls, grin” situation. Store in an airtight container at room temperature for up to 1 week. If your kitchen runs warm or humid, tuck a dry paper towel in the container to absorb moisture; it keeps the coating crisp. For longer storage, freeze in a sealed freezer-safe bag for up to 3 months. Thaw at room temp in the sealed bag to avoid condensation. If the coating ever feels tacky, sift a little extra powdered sugar over and toss lightly.
Make-Ahead and Freezer Tips
Make the full batch 1–3 days ahead for parties or gifting. Store in airtight containers away from sunlight (chocolate can bloom). For bulk prep—maybe you’re planning a holiday spread or building snack kits for your protein meal plan week—freeze in portioned bags. When you need a sweet bite after your meal planning chicken lunches or your vegan meal prep plan dinners (balance, my friend), you’re ready.
Common Mistakes to Avoid
- Overheating the chocolate. Slow and steady wins. If it looks thick or dull, whisk in a little oil.
- Skipping the big bag. Shaking in a tiny bag leaves patches and broken cereal. Go big or do it in two rounds.
- Storing while warm. Traps steam, invites sogginess. Always cool on parchment first.
- Ultra-fine crush only. You want a mix—dust for flavor cling, chunks for crunch. All dust = meh texture.
- Fan on during the sugar shake. Ask my sweater how that went.
Frequently Asked Questions (FAQ)
What is Butterfinger Puppy Chow?
It’s a sweet snack mix where Chex cereal is coated in melted chocolate and peanut butter, tossed with crushed Butterfingers, and finished with powdered sugar. It’s quick, no-bake, and wildly snackable.
Can I use a different cereal?
Yes—Corn Chex, Crispix, or Golden Grahams all work. Each brings a slightly different crunch personality.
How should I crush the Butterfingers?
Pop the bars in a zip-top bag and roll with a rolling pin. Aim for a mix of small bits and fine dust. A few larger shards are gold.
Can I make it nut-free?
Use sunflower seed butter or soy butter and confirm your candy choice aligns with your household needs. The texture will still be great.
Is this gluten-free?
Check labels. Some cereals and candies vary. If you need gluten-free, choose a certified cereal and candy that fit your requirements.
Can I make this ahead?
Absolutely. Store airtight at room temp for a few days, or freeze in portions for up to 3 months.
What’s the best way to coat with powdered sugar?
Use a big zip-top bag or lidded container so you can shake vigorously and evenly. Don’t overfill; do it in batches if needed.
Can I use chunky peanut butter?
You can, but smooth coats more evenly. If using natural peanut butter, stir it very well before measuring.
How can I keep the cereal from going soggy?
Cool it fully on parchment before storing and keep it airtight away from heat or steam.
Cooking Tools You’ll Need
- Large mixing bowl (truly large)
- Microwave-safe bowl
- Spatula (wide and flexible)
- Measuring cups and spoons
- 2-gallon zip-top bag or a large lidded container
- Rolling pin (for crushing candy)
- Parchment-lined sheet pan for cooling
Final Thoughts
There’s a certain kind of joy that lives in simple snacks. The ones you can throw together on a Tuesday night after quick family meals, or pack alongside your best meal prep healthy routine for a sweet moment that doesn’t require forks, plates, or a big production. Butterfinger Puppy Chow is exactly that kind of joy. It’s crunchy, it’s familiar, it’s a little mischievous, and it always disappears faster than I plan. I’ve made it for birthdays, movie marathons, and “we survived the week” celebrations, and it never once failed to pull everyone closer to the bowl. It’s the friendly neighbor of desserts—shows up fast, plays well with others, and leaves everyone smiling.
If you tweak it—swap the chocolate, stir in pretzels, drizzle caramel—I want to hear about it. There’s room for your personality here. That’s the beauty of this snack: it says, “use what you’ve got,” and somehow still tastes like you went out of your way. If you enjoyed this recipe, don’t forget to save it on Pinterest or share it with a friend!
Butterfinger Puppy Chow
Ingredients
- 6 cups Rice Chex cereal
- 1 cup milk chocolate chips (or semi-sweet)
- 1/2 cup creamy peanut butter
- 1/4 cup unsalted butter
- 1 teaspoon vanilla extract
- 1 1/2 cups powdered sugar
- 4 Butterfinger candy bars, crushed
Instructions
- Pour the Rice Chex cereal into a large mixing bowl and set aside. Line a baking sheet with parchment for cooling.
- In a microwave-safe bowl, combine the chocolate chips, peanut butter, and butter. Microwave in 30-second increments, stirring after each, until fully melted and smooth (about 60–90 seconds total).
- Stir in the vanilla extract, then pour the warm mixture over the cereal. Gently fold with a spatula until all cereal pieces are evenly coated.
- Add the crushed Butterfinger bars and fold again to distribute the candy throughout the coated cereal.
- Transfer the mixture to a large zip-top bag (or lidded container). Add the powdered sugar, seal, and shake until the cereal is thoroughly coated and no glossy spots remain.
- Spread the puppy chow on the parchment-lined baking sheet to cool and set, about 10–15 minutes. Serve or store airtight.


