Introduction
The first time I made these Chocolate Peanut Butter Cookie Sandwiches, I was convinced I could “just whip up a batch” between unloading groceries and finishing meal planning chicken for the week. Ha. To be real, the mixer was whirring, the timer was beeping, and my dog stole a cooling cookie like it was a high-stakes heist. I also learned—oops—that if you set a stack of warm cookies on a drafty windowsill, they cool fast…and slide like chocolate hockey pucks. I laughed, rescued what I could, and kept going. Because once that creamy peanut butter filling hits soft, fudgy chocolate cookies, all is forgiven.
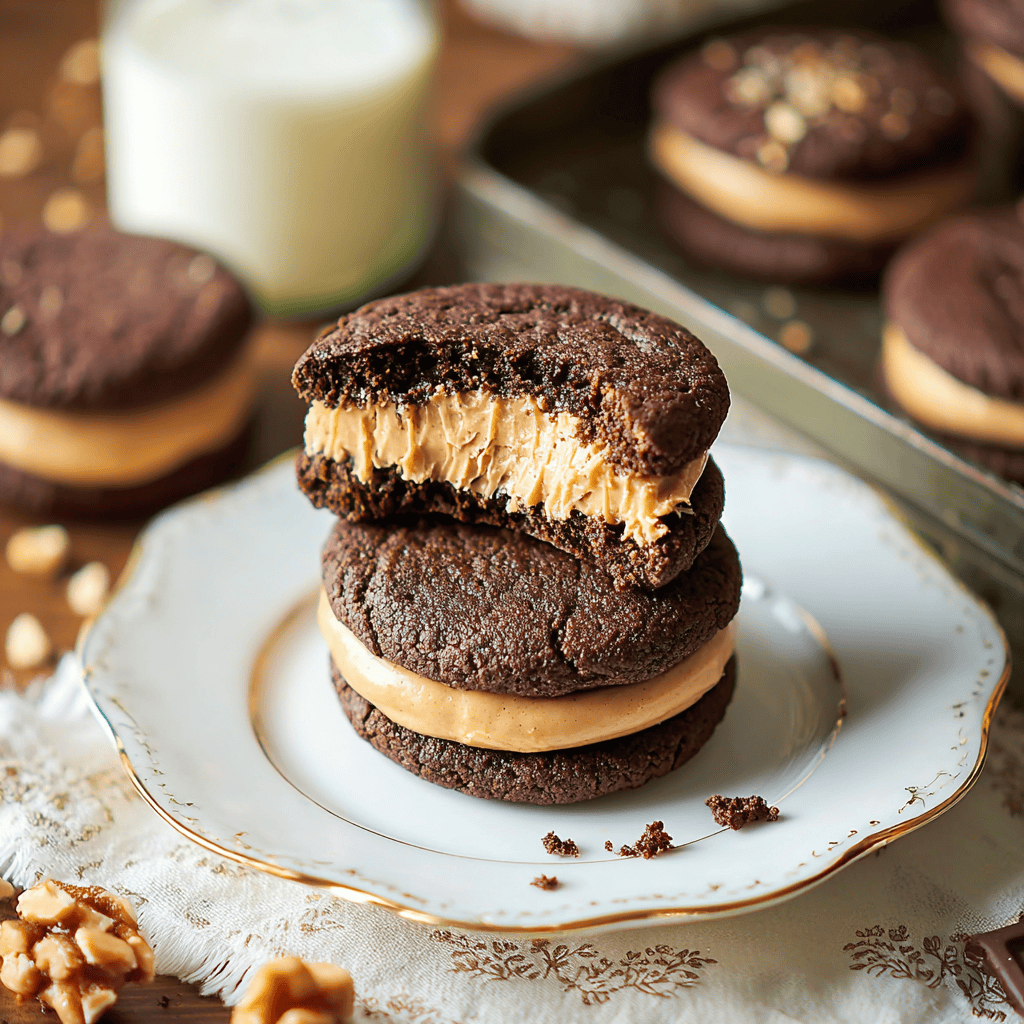
There’s a particular smell that always gets me: cocoa blooming in the bowl when butter and sugar meet, then that homey, roasty note when the cookies puff in the oven. The edges get barely set, the centers stay soft, and the whole kitchen feels like a bakery hug. Meanwhile, the filling is pure comfort—silky, salty-sweet, and perfectly spreadable. I pipe it on in big swirls because I want every bite to be generous. If you grew up dunking sandwich cookies in milk, this is the grown-up, cozier version you’ll crave after easy weeknight dinners or with a late-night decaf.
What I love most is how these fit real life. They look fancy on a platter, but the steps are straightforward and forgiving. The dough chills if you need a pause. You can bake ahead, freeze, and assemble later. And if you’re balancing budget-friendly recipes, juggling quick family meals, or mapping a protein eating plan alongside best meal prep plans, here’s your treat that still plays nice with planning. No special trips, no tricky techniques—just pantry staples and a big pay-off. I’ll even show you how to make the edges party-ready with mini chips or sprinkles, plus a nut-free option for school events. And yes, I’ll casually weave in ideas for no prep healthy lunches, hello fresh low calorie menu nights, and even a cozy brunch where dessert doubles as a coffee-dunking situation after your not-quite full english breakfast spread.
Honestly, these sandwich cookies feel like a celebration crammed into two soft layers. The bite is tender. The filling is lush. The chocolate and peanut butter dance like old friends. If desserts could talk, this one would say: you did great today—sit down, breathe, and take another cookie.
Why You’ll Love This Recipe
They’re soft, fudgy, and melt-in-your-mouth—no dry cookie energy here.
The peanut butter filling is creamy, pipeable, and sets just firm enough for tidy sandwiches.
Make-ahead friendly: bake the cookies now, fill later, and freeze for stress-free entertaining.
Picky-eater approved, giftable, and totally photogenic for Pinterest.
Flexible for parties: roll edges in mini chips, sprinkles, or chopped peanuts for flair.
Feels like a hug in a bite—comforting and nostalgic, perfect after best dinner prep meals or alongside no prep healthy lunches days when you need a little joy.
What Makes This Recipe Special?
Two things: texture control and a filling that doesn’t ooze. The cookie dough is balanced with cocoa and just enough fat to keep the centers soft for days. A quick chill (even 15 minutes) keeps them thick and tender. The filling? It’s classic and reliable—peanut butter, a touch of butter, powdered sugar, and a whisper of milk to reach that dreamy spreadability. Salt is the quiet hero; it makes the chocolate taste, well, chocolaty, and keeps the filling from reading too sweet.
There’s also the bakery trick I swear by: slightly underbake. When the tops look dry around the edges but still puffed and soft in the middle, pull them. They finish on the sheet while you breathe in that cocoa cloud. Another little flourish is rolling the finished sandwiches in mini chocolate chips or sprinkles. It makes them party-ready without extra effort—like slipping on lipstick before the doorbell rings. And because I love you planners, I tested the freezer situation: wrapped individually, they thaw like a dream, which means your best meals to prep list just got dessert.
Ingredients

Unsalted butter
You’ll use this in both the cookies and the filling. Butter beats with sugar to trap air, giving the cookies a softer crumb. Use room-temperature butter—soft to the touch but not greasy.
Granulated sugar
For sweetness and spread control. Granulated sugar helps build the cookie’s delicate crisp edge while keeping the centers tender.
Brown sugar (optional version)
A bit of brown sugar brings moisture and a hint of caramel warmth. If you like deeper flavor, use half granulated and half brown sugar.
Large egg
Binds the dough and contributes to chew. Room temperature mixes more evenly.
Vanilla extract
Chocolate’s best friend. A teaspoon smooths out the cocoa’s edges and adds that “bakery” aroma.
All-purpose flour
The structure. Spoon and level for accuracy. Too much flour equals cakey cookies, so measure with care.
Unsweetened cocoa powder
Choose natural cocoa for a classic chocolate cookie. Dutch-process will make them darker and slightly more tender; both work.
Baking soda
Helps lift for softness and keeps the crumb tender. Check it’s fresh.
Fine salt
A little in both cookie and filling makes every flavor pop.
Creamy peanut butter
For the filling, use a standard creamy peanut butter (not the fully “natural” kind that separates), which keeps the texture silky. If you adore texture, try crunchy—just know it’ll be rustic.
Powdered sugar
Dissolves into the filling for smooth spreadability.
Milk
Adds just enough moisture to loosen the filling. Start small; you can always add a few extra drops.
Tips and tiny warnings
Use parchment so the cookies bake evenly and release easily. Don’t overmix once you add flour, or the cookies can toughen. And don’t stack warm cookies—steam is the enemy of soft edges.
How to Make It Step-by-Step
Cream the butter and sugar
In a large bowl, beat the softened butter with granulated sugar (and brown sugar if using) until pale and fluffy, about 2–3 minutes. The sound changes from dull to whippy—that’s your signal the air is getting in. Scrape down the bowl.
Add egg and vanilla
Beat in the egg until glossy, then mix in vanilla. The mixture should look satiny and unified. If it looks curdled, keep mixing; butter and egg are just negotiating.
Whisk the dry ingredients
In another bowl, whisk flour, cocoa powder, baking soda, and salt. Whisking breaks up cocoa lumps so you don’t get chocolate freckles later.
Bring it together
Add the dry mixture to the wet on low speed until a soft dough forms. It will look like brownie dough—soft but scoopable. If it’s sticky, let it rest 5 minutes so the flour hydrates. If your kitchen’s warm, slide the bowl into the fridge while you line trays.
Scoop and flatten
Roll tablespoon portions into balls and set 2 inches apart on parchment-lined sheets. Lightly press each with your palm or the bottom of a glass so they bake evenly. Aim for ¼-inch flattening—too much and you’ll lose that luscious middle.
Bake
Into a 350°F oven for 8–10 minutes. You’re looking for set edges and slightly soft centers. I pull them when the tops lose their shine but still look plush. They’ll deflate slightly as they cool—perfect.
Cool completely
Let cookies sit 5 minutes on the tray, then move to a rack. This is when I make the filling and, to be honest, snag the ugliest cookie for “quality control.” It’s a sacred baker’s rule.
Make the filling
Beat creamy peanut butter with softened butter until smooth and slightly lighter in color. Add powdered sugar gradually, then beat in milk a teaspoon at a time until you have a spreadable, pipeable frosting. You want soft peaks that hold and swirl.
Match and fill
Pair cookies by size like little buddies. Pipe or spread a generous tablespoon of filling onto the bottom of one cookie, then cap with its partner and press gently until the filling just kisses the edges. If you’re feeling extra, roll the sides in mini chocolate chips, sprinkles, or finely chopped roasted peanuts.
Set and serve
Let the sandwiches sit 15 minutes to firm slightly. If your kitchen is warm, a quick chill helps the edges set for sharp photos and tidy lunchbox packing.
What can go sideways? I’ve rushed and filled while cookies were still warm—hello sliding situation. I’ve also added too much milk to the filling, which turns it slack. If that happens, add a spoonful of powdered sugar and beat again. And yes, I’ve forgotten to chill the dough on a 90°F day; the cookies baked thinner but were still delicious. Deep breaths. You’ve got this.
Tips for Best Results
Chill the dough 15–30 minutes for thicker, softer cookies—especially in summer.
Use a cookie scoop for even portions so your sandwiches match without hunting.
Underbake slightly for fudgy centers; they’ll set as they cool.
Salt the filling. A tiny pinch balances sweetness and makes peanut butter sing.
Pipe the filling. It’s neater, faster, and looks bakery-level with zero stress.
Freeze unfilled cookies. They’re fantastic stash-bakes for surprise guests and ready meals for 2 nights when dessert wasn’t on the plan.
Ingredient Substitutions & Variations
Nut-free. Swap the peanut butter with sunflower seed butter or cookie butter. Add a pinch of cinnamon to the filling for warmth.
Double chocolate. Stir mini chocolate chips into the dough for melty pockets.
Espresso lift. Add ½ teaspoon instant espresso to the dry ingredients to deepen the cocoa.
Gluten-free. Use a 1:1 gluten-free flour blend; bake time may shift by a minute.
Vegan path. Choose plant-based butter, an egg substitute, and a dairy-free peanut butter. Use almond milk for the filling, added sparingly.
Festive edges. Roll the filled cookies in seasonal sprinkles—red and green for December, pastels for spring, team colors for game day.
Serving Suggestions
Serve these with cold milk, hot coffee, or a mug of tea depending on the weather and your mood. For dessert boards, pair with sliced strawberries, pretzels, and roasted nuts for a sweet-salty spread. A small scoop of vanilla frozen yogurt between two warm cookies is a glorious “ice-cream sandwich” moment. For date nights and healthy meal plans for two, split one cookie sandwich after dinner and add a few raspberries. This and a rom-com is perfection.
Pairing Ideas (Drinks, Sides, etc.)
Drinks: Cold brew with a dash of vanilla, hot chocolate, or chai latte. For summer afternoons, iced milk tea is wildly good with the peanut butter filling.
Sides: Fresh fruit (bananas, strawberries, or apple slices), a small bowl of pretzels for crunch, or a salt-forward nut mix for contrast.
Occasions: Pop into lunchboxes after no prep healthy lunches, gift in cellophane bags tied with ribbon, or stack on a pedestal plate for parties.
How to Store and Reheat Leftovers
Room temperature: Keep sandwich cookies in an airtight container up to 3 days. Separate layers with parchment to protect the edges.
Chilled: Refrigerate up to 1 week for a firmer filling and neater bites. Let sit 10 minutes before serving so the flavors wake up.
Frozen: Freeze unfilled cookies or filled sandwiches. For filled, wrap each one in plastic, then store in a sealed container for up to 2 months. Thaw at room temperature 20–30 minutes. No reheating needed—these aren’t a “warm it up” dessert.
If the filling softens in summer heat, a quick 10-minute chill fixes everything. If cookies lose a little chew after freezing, a tiny rest at room temp brings it back.
Make-Ahead and Freezer Tips
Bake and cool the cookies a day in advance, then fill right before serving for the softest bite. For true make-ahead magic, freeze filled sandwiches individually wrapped; they thaw quickly and taste freshly made. This is gold for party prep, bake sales, and those weeks you’re deep in best meal prep healthy routines but still want dessert waiting in the wings.
Common Mistakes to Avoid
Overbaking. Dry cookies won’t make dreamy sandwiches. Pull when edges set and centers look soft.
Overmixing the dough. Once flour goes in, mix just to combine.
Warm cookies + filling. Let the cookies cool completely or the filling slides.
Too much milk in the filling. Start with less; add drops until it’s spreadable.
Skipping salt. A pinch in dough and filling keeps flavors balanced, not flat.
Frequently Asked Questions (FAQ)
Can I make the cookies ahead and fill later?
Yes. Bake, cool, and store airtight up to 2 days or freeze longer. Fill the day you serve.
What cocoa powder should I use?
Natural unsweetened is classic; Dutch-process gives richer color and slightly softer texture. Both work.
How do I keep them from spreading?
Chill the dough 15–30 minutes and be sure your butter is softened, not melted.
Can I pipe the filling?
Absolutely. Use a piping bag with a large round or star tip for neat swirls.
Nut-free option?
Use sunflower seed butter or cookie butter in the filling. The texture remains smooth and pipeable.
Can I make these smaller?
Yes—use a 1-teaspoon scoop for minis. Reduce bake time by 1–2 minutes.
Are they freezer-friendly?
Yes—freeze filled or unfilled. Wrap individually to prevent freezer aroma.
Cooking Tools You’ll Need
Electric mixer (hand or stand)
Two mixing bowls (one for dry, one for wet)
Rubber spatula and whisk
Baking sheets and parchment paper
Cookie scoop for even portions
Wire rack for cooling
Piping bag and tip (optional, but delightful)
Final Thoughts
Every time I stack a plate with these Chocolate Peanut Butter Cookie Sandwiches, I think about the little kitchen moments: flour prints on my shirt, a stolen warm cookie, the quiet click of the oven turning off. These are the cookies I bake on wild weeks as a reminder that joy fits in the margins. They’re nostalgic but elevated, simple but special, and they keep beautifully for sharing with neighbors or tucking into lunchboxes after high macro meals or a lineup of best meal prep plans. If you’re navigating healthy eating for two some nights and cheap meal plans for 2 others, let these sweet sandwiches be the tiny celebration you planned for—or didn’t.
Bake them once and you’ll start dreaming up your own riffs—mini versions, sprinkle edges, espresso cocoa. Share a batch, keep a stash, and don’t be surprised when they disappear faster than you can say, “Who wants another?”
If you enjoyed this recipe, don’t forget to save it on Pinterest or share it with a friend!

Chocolate Peanut Butter Cookie Sandwiches
Ingredients
- 1 cup unsalted butter, softened
- 1 1/4 cups granulated sugar
- 1 large egg
- 1 teaspoon vanilla extract
- 2 cups all-purpose flour
- 3/4 cup unsweetened cocoa powder
- 1 teaspoon baking soda
- 1/2 teaspoon fine salt
- 3/4 cup creamy peanut butter (for filling)
- 1/2 cup unsalted butter, softened (for filling)
- 2 cups powdered sugar (for filling)
- 2–3 teaspoons milk, as needed (for filling)
Instructions
- Preheat the oven to 350°F (175°C). Line baking sheets with parchment paper.
- In a large bowl, cream the softened butter and granulated sugar on medium speed until light and fluffy, 2–3 minutes.
- Beat in the egg and vanilla extract until smooth and glossy.
- In a separate bowl, whisk together the flour, cocoa powder, baking soda, and salt to remove any cocoa lumps.
- Add the dry ingredients to the wet on low speed just until a soft dough forms. If the dough seems sticky, let it rest 5 minutes or chill briefly.
- Scoop tablespoon-sized portions of dough, roll into balls, and arrange 2 inches apart on the prepared sheets. Lightly flatten each ball with your palm or the bottom of a glass.
- Bake 8–10 minutes, until the edges are set and centers look slightly soft. Cool on the sheet 5 minutes, then transfer to a wire rack to cool completely.
- Make the filling: Beat the creamy peanut butter and softened butter until smooth. Gradually add powdered sugar and beat until fluffy. Add milk 1 teaspoon at a time until the filling is smooth and spreadable.
- Pair cookies by size. Spread or pipe peanut butter filling onto the flat side of half the cookies. Top with the remaining cookies and press gently to form sandwiches.
- Serve immediately or chill 15 minutes to help the filling set. Store in an airtight container (room temp up to 3 days, refrigerated up to 1 week, or freeze up to 2 months).


