Introduction
The first time I made these sliders, I was still in my gym shoes, answering emails with one hand and flipping onions with the other. I needed dinner that felt fun, not fussy—something that could pass as easy weeknight dinners while still wowing the crowd. These little beauties came sizzling out of the oven, cheese melting into every corner, and I thought, “Yep. This is how you win at quick family meals.” And because they’re loaded with steak and provolone, they land beautifully in that high protein meals sweet spot without trying too hard.
Honestly, the whole kitchen smelled like a ballpark stand met a cozy bistro. Sweet onions, toasty buns, that buttery garlic glaze on top—if you close your eyes, you can hear the soft crackle when the rolls hit the sheet pan and the low, happy sigh from the cheese when it melts. It’s the kind of aroma that makes people drift into the kitchen, hovering like seagulls near a picnic. You’ll hear fork drawers opening. Someone will volunteer to “taste-test for safety.” Sure, buddy.
To be real, my first cheesesteak slider attempt years ago was… not this. I overloaded the buns, skipped the mayo barrier (rookie mistake), and pulled a soggy situation out of the oven. Oops. These days I do it differently: a smart layer of mayo to protect the buns, steak sliced thin and seared hot, peppers and onions softened until sweet, and a buttery, garlicky brush that makes the tops glisten. It’s a mini sandwich that tastes like a big night out but works for Tuesday.
What I love most is how these sliders fit every kind of night. Game day? They’re gone in ten minutes. Birthday party? They’re the first thing guests ask about. Chill weekend movie night? Pull-apart perfection with napkins and a rom-com. They’re proof that budget-friendly recipes don’t have to be boring. They’re warm, melty, and slightly messy in a good way—like the kitchen version of a hug you can eat.
Why You’ll Love This Recipe
- Built for sharing: a full tray makes 12 sliders—perfect for tailgates, potlucks, and ready meals for 2 that magically stretch to feed more.
- Quick assembly with big payoff: the filling cooks in one skillet, then a fast bake melts everything together for that gooey, pull-apart moment.
- Seriously satisfying: tender steak, sweet onions and peppers, and provolone create a classic flavor profile that feels like healthy comfort food without being heavy.
- Make-ahead friendly: assemble earlier in the day and bake when guests arrive; your oven does the heavy lifting while you look effortlessly put together.
- Flexible for every appetite: swap cheeses, add mushrooms or jalapeños, or use deli roast beef when time is tight—great for best meal prep plans that don’t feel “prepped.”
- Leftover magic: they reheat well in the oven for desk lunches that beat premade lunch meals every time.
What Makes This Recipe Special?
Three things. First, the mayo barrier. A thin swipe on the rolls is the unsung hero here—it shields the bread from moisture so you get soft, fluffy buns that don’t collapse. Second, the steak treatment. Thin slices, quick sear, and a simple seasoning of salt, pepper, and a whisper of Worcestershire create a deeply savory, steakhouse vibe without simmering all day. Third, the butter brush. Melted butter whisked with garlic powder and a splash of Worcestershire turns the tops into golden, fragrant caps that make the kitchen smell like a sandwich shop at lunch rush.
There’s also the balance: onions and peppers bring sweetness and color while provolone gives that stretchy, mellow melt. Each bite is soft, saucy, and just a little toasty. And because they bake in one dish, you get that “baked together” magic—edgy corners to nibble, cheesy strands pulling from slider to slider, and a tray that travels straight to the table like a gift.
Ingredients
- Ribeye or sirloin, thinly sliced (2 lb): Ribeye is classic—beefy and tender. Sirloin works when you want a leaner bite. If time’s tight, thinly sliced deli roast beef is a solid shortcut for good meal prep plans.
- Olive oil (1 tablespoon): Helps the steak brown and adds a fruity note.
- Kosher salt and black pepper: Season generously; steak loves salt.
- Yellow onion, thinly sliced (½ large): Brings sweetness and that true cheesesteak aroma.
- Red bell pepper and green bell pepper, thinly sliced (½ each): A colorful, classic combo; red is sweet, green stays grassy and bright.
- Slider rolls (12, Hawaiian or brioche): Soft, pull-apart buns soak up flavor without falling apart. Potato rolls are great, too.
- Mayonnaise (½ cup): The moisture shield and secret flavor booster—think tangy, creamy insurance for non-soggy buns.
- Provolone cheese (12 slices): Clean melt, gentle tang, perfect stretch. Mozzarella or American work if you prefer a different cheesy vibe.
- Unsalted butter, melted (3 tablespoons): The glossy topper that makes the rolls irresistible.
- Garlic powder (1 teaspoon): Deep garlic flavor without the risk of burning.
- Worcestershire sauce (1 teaspoon): Adds savory depth. If you don’t have it, a tiny splash of soy sauce plus a pinch of brown sugar comes close.
- Chopped fresh parsley (optional): A green confetti finish.
Brand tips and swaps: If slicing steak at home, pop it into the freezer for 20–30 minutes to firm up—it makes whisper-thin slices easier. For cheese, choose sandwich-width slices; they cover better than shredded. If onions make you weepy, use a sweet onion or buy pre-sliced.
Don’t do this: Don’t skip drying the steak before searing—it needs a dry surface for browning. Don’t pile soaking-wet peppers onto the rolls; let any extra moisture cook off in the pan. Don’t overstuff the sliders; too much filling makes them slide apart in the oven. And please don’t bake uncovered the entire time or the tops will brown before the centers melt.
How to Make It Step-by-Step
- Preheat and set the scene.
Heat the oven to 350°F (175°C). Lightly butter or spray a 9×13-inch baking dish. The kitchen will warm up, and you’ll feel that cozy, dinner-is-happening energy. - Sear the steak.
Heat a large skillet over medium-high until it’s hot enough that a drop of water sizzles on contact. Add the olive oil, then the thinly sliced steak in an even layer. You’ll hear that satisfying sizzle—music to anyone hungry. Season with salt and pepper. Cook, flipping with tongs, until just browned and no longer pink, 3–5 minutes depending on thickness. Transfer to a plate and tent with foil. Don’t overcook; the oven will finish the job. - Soften the veggies.
In the same skillet, add a touch more oil if the pan looks dry. Toss in the sliced onions and peppers with a big pinch of salt. Stir occasionally until the onions turn translucent and the peppers relax, 7–8 minutes. If you like a little color, let them sit undisturbed for a minute here and there to pick up light caramelization. The pan will smell like a sandwich shop—sweet, savory, and a little smoky. - Make the buttery topper.
Melt the butter in a small bowl and whisk in the garlic powder and Worcestershire. It should smell like garlic bread met steak night. Set aside. - Prep the rolls.
Without separating them, slice the slider rolls horizontally. Nestle the bottom slab into the baking dish. Spread a thin layer of mayonnaise over both cut sides. This is your anti-soggy insurance and flavor boost. - Layer like a pro.
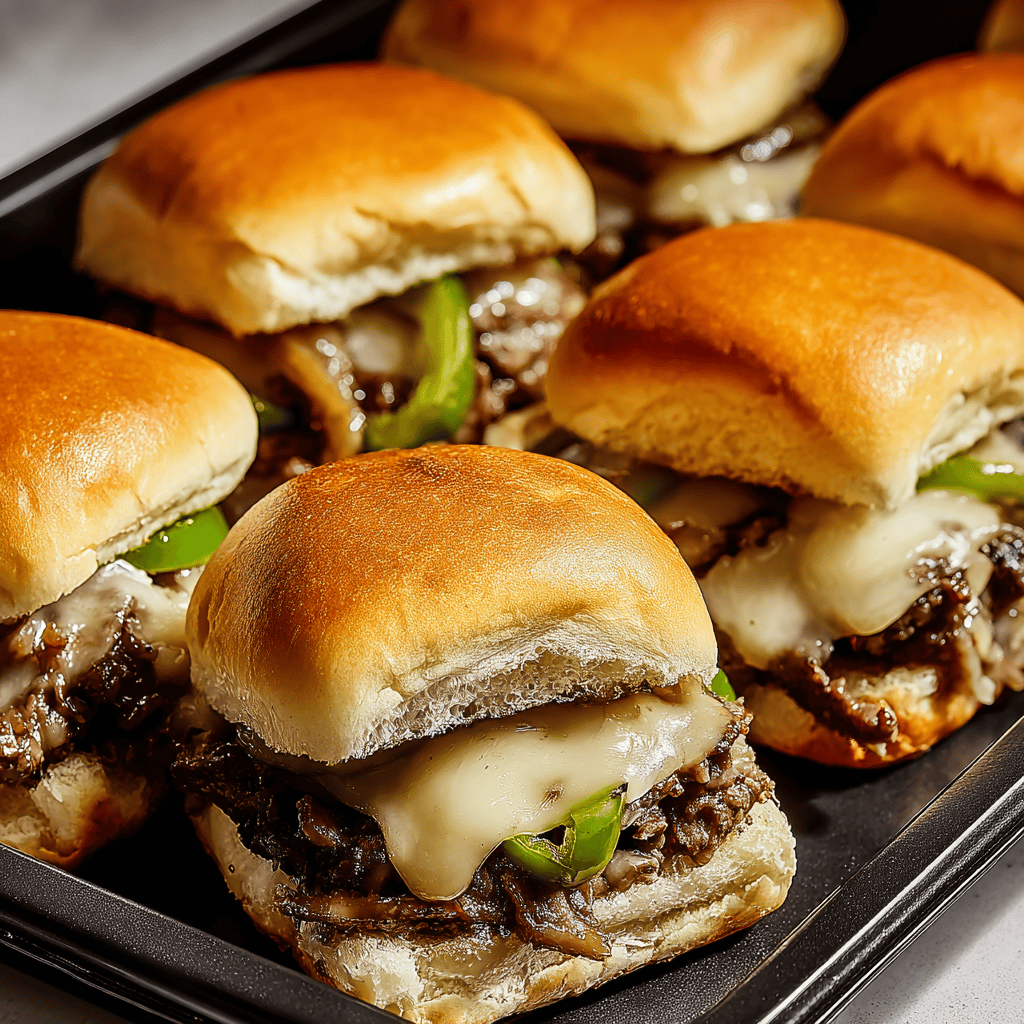
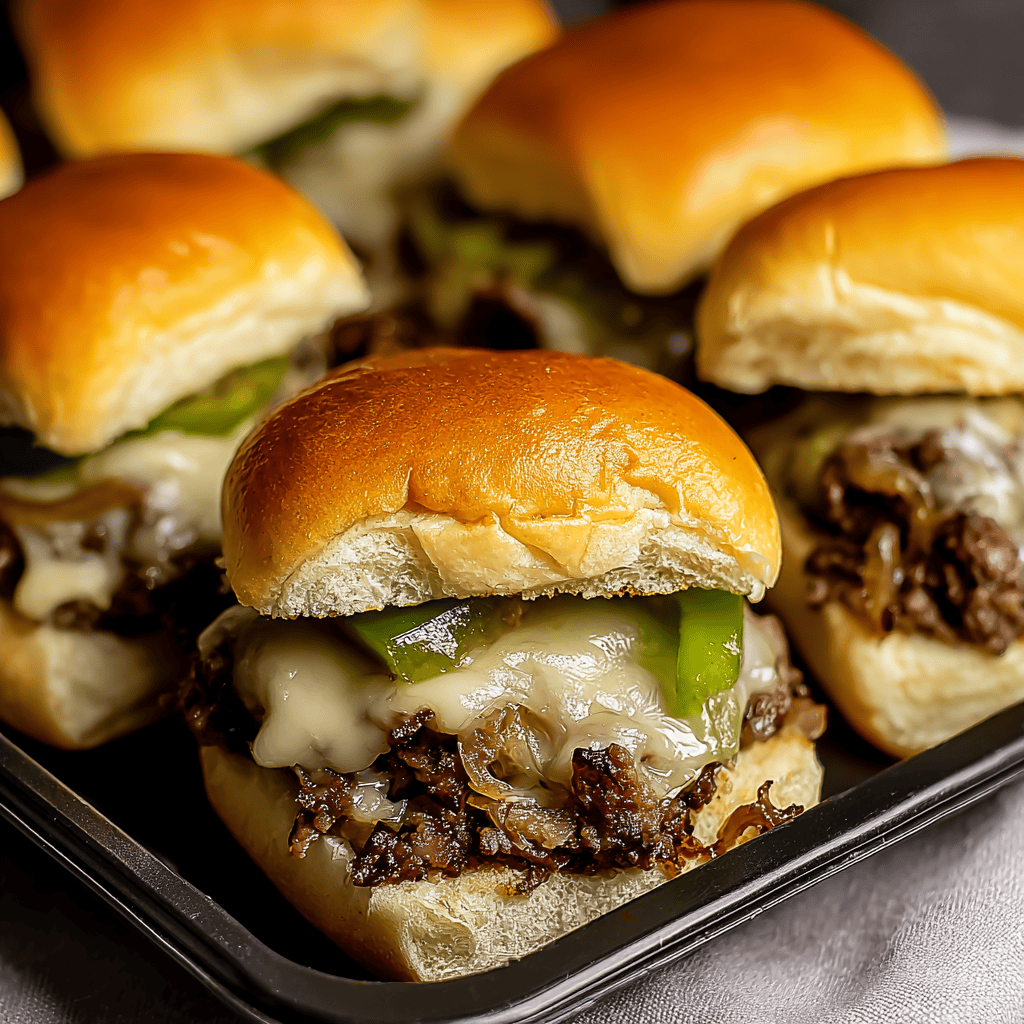
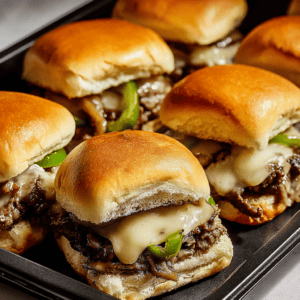
Lay half the provolone over the bottom buns, edges overlapping like shingles. Add the steak in an even layer, then the pepper-onion mixture. Finish with the remaining provolone. Cap with the top buns and press gently so everything snuggles together. - Brush and bake.
Brush the buttery garlic mixture over the tops, getting into the seams. Cover the dish tightly with foil and bake for 15 minutes. Remove the foil and bake 5–10 minutes more, until the tops are golden and the cheese is melted into happy strings. - Rest and slice.
Let the sliders cool for 3–5 minutes to set the cheese (this keeps the filling from escaping). Sprinkle with parsley. Use a serrated knife to cut along the seams into 12 squares. Pull apart and listen to the soft tear of the rolls and the cheesy “shhh” as they separate. - Serve.
Put them on a platter and watch them disappear. The first bite should be soft, buttery, and intensely savory, with just enough pepper sweetness to keep things bright. Add a squeeze of mustard or a pickle chip if you’re feeling sassy.
A couple of oops moments and fixes: If the bottoms ever threaten sogginess, reduce the mayo slightly next time and be sure your peppers aren’t watery. If the tops brown too quickly, tent with foil for the last few minutes. And if you accidentally use pre-shredded cheese that won’t melt smoothly (it happens), a few extra minutes covered usually does the trick.
Tips for Best Results
- Slice steak paper-thin. A 20-minute freezer chill firms it just enough for clean, thin cuts that cook quickly and stay tender.
- Dry the steak before searing. Moisture blocks browning and flavor.
- Don’t skip the mayo layer. It acts like a moisture barrier and keeps buns plush.
- Bake covered, then uncover. This two-stage bake ensures melty centers and golden tops.
- Let them rest. Three minutes off-heat helps the cheese set so the sliders slice neatly—ideal when you’re plating for best dinner prep meals or large gatherings.
- Double up for a crowd. Two trays bake perfectly on the center racks; rotate halfway through for even browning.
Ingredient Substitutions & Variations
- Cheese swap: Mozzarella for maximum stretch, Swiss for nutty depth, or yes—Cheez Whiz—for a throwback vibe.
- Spicy kick: Add sliced jalapeños, a drizzle of hot sauce on the steak, or pepper jack cheese.
- Mushroom edition: Sauté 8 ounces of sliced mushrooms with the onions for extra umami—great for high macro meals.
- Deli shortcut: Use thinly sliced deli roast beef; warm briefly with onions and peppers before assembling.
- Lighter lean: Use sirloin and less butter for a nod toward low fat meal delivery style eating at home.
- Gluten-free path: Choose gluten-free slider rolls; the bake and brush method stays the same.
- Vegetarian swap: Pile sautéed portobello slices and onions with provolone for meaty texture minus the beef—handy for best meals to prep when you’ve got mixed eaters at the table.
Serving Suggestions
Set the tray in the center of the table and let everyone pull their own. For healthy meal plans for two, pair three sliders with a big green salad and roasted veggies. Feeding teens after practice? Fries or sweet potato wedges on the side never miss. If you’re building out a spread for game day, add a crunchy slaw and a simple pickle plate—salty, tangy bites that cut the richness and keep you coming back.
For movie night, I love these with carrot sticks and a creamy yogurt ranch. If you’re channeling meals for 2 delivered energy at home, serve the sliders with air-fried tater tots and sparkling water with lime. Simple. Satisfying. Cozy.
Pairing Ideas (Drinks, Sides, etc.)
- Drinks: Iced tea with lemon, ginger-lime spritzers, or a tall glass of chilled seltzer.
- Sides: Oven fries, sweet potato wedges, Caesar salad, or roasted broccoli with lemon.
- Condiments: Dijon mustard, hot sauce, or a quick garlic aioli.
- Something sweet: Chocolate chip cookies or a fruit salad for a fresh finish.
How to Store and Reheat Leftovers
Cool leftovers and store them in an airtight container for up to 3 days. To reheat, place sliders in a 350°F oven for 10–15 minutes until the cheese melts again and the tops perk up. If you’re sprinting between meetings and need meal prep microwave lunches, microwave in short bursts, then pop into a toaster oven for a minute to revive the tops. Avoid storing with wet sides or dips on the same plate—they’ll soften the buns.
Make-Ahead and Freezer Tips
Assemble the sliders up to 24 hours ahead. Cover tightly with foil and refrigerate. Bake straight from the fridge, adding a few extra minutes to melt the cheese. I don’t recommend freezing fully assembled sliders; the bread can go soft. If you must plan far ahead, prep the steak and veggies, chill separately, and assemble the day you serve. This workflow is clutch for best meal prep healthy habits without sacrificing melty magic.
Common Mistakes to Avoid
- Overcooking the steak: It turns chewy. Brown it quickly; the oven will finish.
- Skipping the moisture barrier: No mayo means soggy buns. Even a thin layer makes a big difference.
- Overfilling: More isn’t better. Keep fillings even to prevent sliding and sogginess.
- Baking uncovered the whole time: You’ll get toasted lids and cold middles. Start covered.
- Cutting immediately: Give the sliders a short rest so the cheese can set.
Frequently Asked Questions (FAQ)
Can I make these sliders ahead of time?
Yes. Assemble, cover, and refrigerate up to 24 hours in advance. Bake just before serving for the best texture.
What cut of beef is best?
Thinly sliced ribeye or sirloin offers the right combo of tenderness and flavor. For a shortcut, thin deli roast beef works well.
Do I have to use provolone?
No. Mozzarella, Swiss, or American are great swaps. Use what melts the way you like.
How do I keep the sliders from getting soggy?
Dry the steak mixture, spread a thin mayo layer, and bake covered first to warm, then uncovered to crisp the tops.
Can I double the recipe?
Absolutely. Use two baking dishes or one large sheet pan with sides. Rotate pans halfway for even browning.
Can I add mushrooms?
Yes—sauté them with the onions and peppers until their moisture cooks off so the sliders stay tidy.
Are these good for a crowd?
These are built for crowds. The pull-apart presentation and melty center make them the star of prepared meals for two nights that scale for parties.
Cooking Tools You’ll Need
- Large skillet or griddle for steak and veggies
- Cutting board and sharp knife (a serrated bread knife for slicing rolls)
- 9×13-inch baking dish or similar
- Mixing bowl for butter glaze
- Silicone brush for brushing tops
- Foil for covering during the first bake
- Tongs and a spatula for easy handling
Final Thoughts
There’s a particular joy in meals that feel like an event but fit weeknight life. These Easy Philly Cheesesteak Sliders are exactly that—soft, cheesy, savory, and just messy enough to be fun. They’re the kind of food that makes people linger at the table and reach for seconds even when they swore they were “just having one.” On nights when you want dinner to feel effortless and celebratory, a tray of these checks every box for easy weeknight dinners, quick family meals, and even spontaneous gatherings that could have been ready made protein meals but turned into something better.
I hope they find a spot in your rotation the way they did in mine. Maybe they’ll become your Friday-night signature, or the dish your friends start texting you about before the game. Either way, I can’t wait to hear how you make them your own—more peppers, extra cheese, mushrooms, a spicy twist. Share your version, and tell me what you served on the side.
If you enjoyed this recipe, don’t forget to save it on Pinterest or share it with a friend!
Easy Philly Cheesesteak Sliders
Ingredients
- 2 lb thinly sliced ribeye steak (or sirloin, or deli roast beef)
- 1 tablespoon olive oil
- 1/2 large yellow onion, thinly sliced
- 1/2 red bell pepper, thinly sliced
- 1/2 green bell pepper, thinly sliced
- 12 slider rolls (e.g., Hawaiian rolls)
- 1/2 cup mayonnaise
- 12 slices provolone cheese
- 3 tablespoons unsalted butter, melted
- 1 teaspoon garlic powder
- 1 teaspoon Worcestershire sauce
- salt and black pepper, to taste
- fresh parsley, chopped (optional)
Instructions
- Preheat oven to 350°F (175°C). Lightly grease a 9×13-inch baking dish.
- Heat olive oil in a large skillet over medium-high heat. Add thinly sliced steak, season with salt and black pepper, and cook until browned and just cooked through. Transfer to a plate.
- In the same skillet, sauté the onion and bell peppers until softened and lightly caramelized, 7–8 minutes.
- Without separating the rolls, slice the slider buns horizontally. Place the bottom half in the baking dish and spread a thin layer of mayonnaise on the cut sides.
- Layer half of the provolone over the bottom buns. Add the cooked steak, then the sautéed onions and peppers. Top with remaining provolone and cap with the top buns.
- Stir melted butter with garlic powder and Worcestershire sauce. Brush the mixture over the tops of the rolls.
- Cover the dish tightly with foil and bake for 15 minutes. Remove foil and bake 5–10 minutes more, until the tops are golden and the cheese is melted.
- Let cool slightly, sprinkle with chopped parsley if using, then slice along the seams into 12 sliders and serve warm.


