Introduction
The first time I made these rolls, I was staring at a jar of sleepy starter on the counter, debating whether to toss it. The kitchen was warm, the afternoon light was coming in all golden and dramatic, and the house smelled like coffee and a little bit of flour dust. I thought, “What if I turn that ‘waste’ into a tray of soft, steamy rolls for tonight’s easy weeknight dinners?” Ten minutes later I had dough on my hands, a goofy grin, and the oven preheating like it meant business.
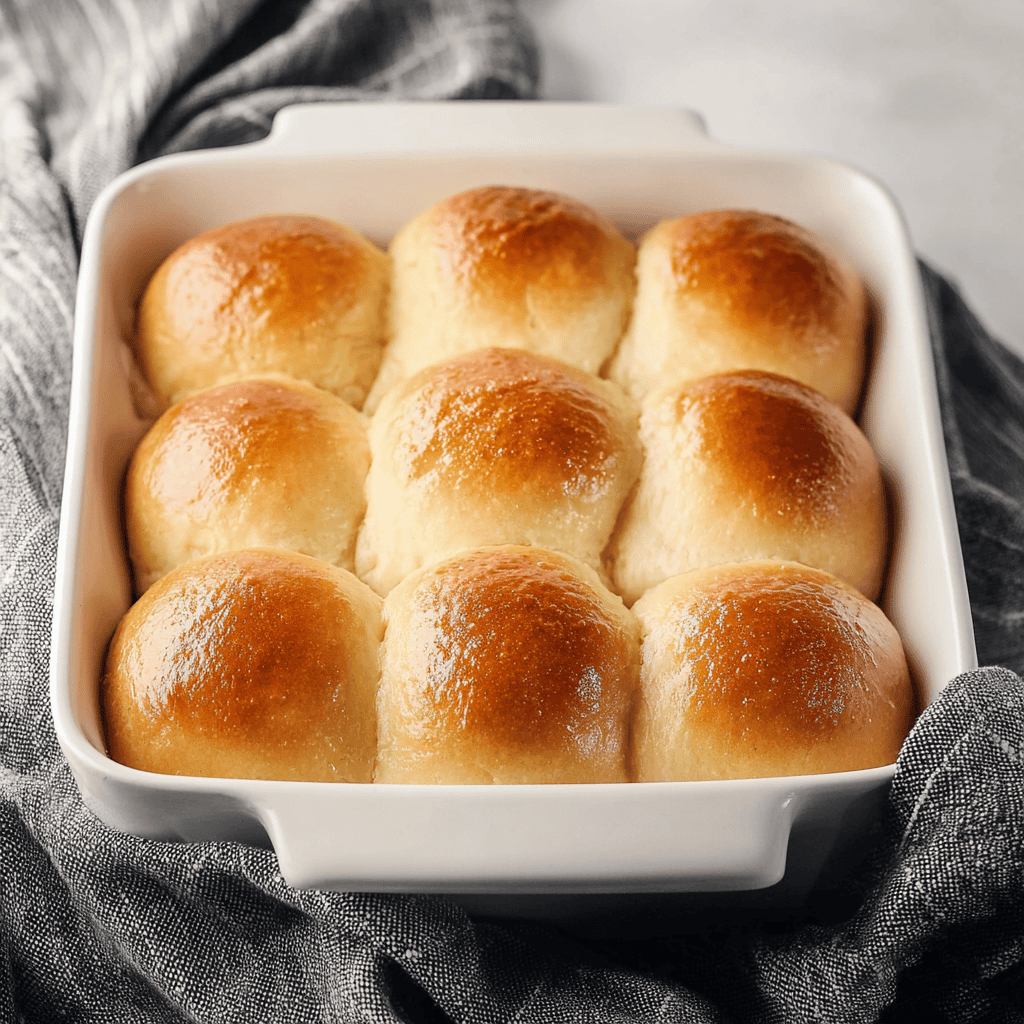
This is what I love about Sourdough Discard Rolls. They feel like healthy comfort food for the soul—simple ingredients, big payoff, and a soft crumb that tears like a cozy sweater. They save money (hello, budget-friendly recipes) and turn a byproduct into something you’ll proudly drop on the table with a bowl of soup, a skillet of roasted chicken, or a salad that’s trying its best. They’re tender, lightly tangy, and just right for quick family meals when everyone wants something warm to rip apart and swipe through butter.
To be real, I’ve had my fair share of “oops” moments along the way. I’ve forgotten the salt (do not recommend), proofed in a chilly kitchen and wondered why the dough looked personally offended, and once baked the pan on the wrong rack so the bottoms bronzed like they’d been sunbathing. But even then, the house smelled like a bakery and the rolls vanished. They’re forgiving, they’re friendly, and they’re endlessly customizable. Sprinkle in rosemary. Tuck in shredded cheese. Brush on garlic butter at the end and watch people hover.
If you’re mapping a protein meal plan or playing with high macro meals, these rolls make great sidekicks to grilled chicken or a bean-heavy chili. Bake a pan on Sunday and you’ve got miniature buns for sliders, breakfast sandwiches, and no prep healthy lunches. They freeze like a dream, reheat quickly, and absolutely belong in your rotation of best dinner prep meals and healthy meal plans for two. Warm, fragrant, and a little tangy—these are the rolls that make Tuesday feel like a celebration.
Why You’ll Love This Recipe
- It turns “discard” into treasure. No more starter guilt—just soft, golden rolls that feel like a bakery win.
- The dough is approachable and beginner-friendly, yet reliable for seasoned bakers too.
- The flavor is lightly tangy, never sour, which means picky eaters happily grab seconds.
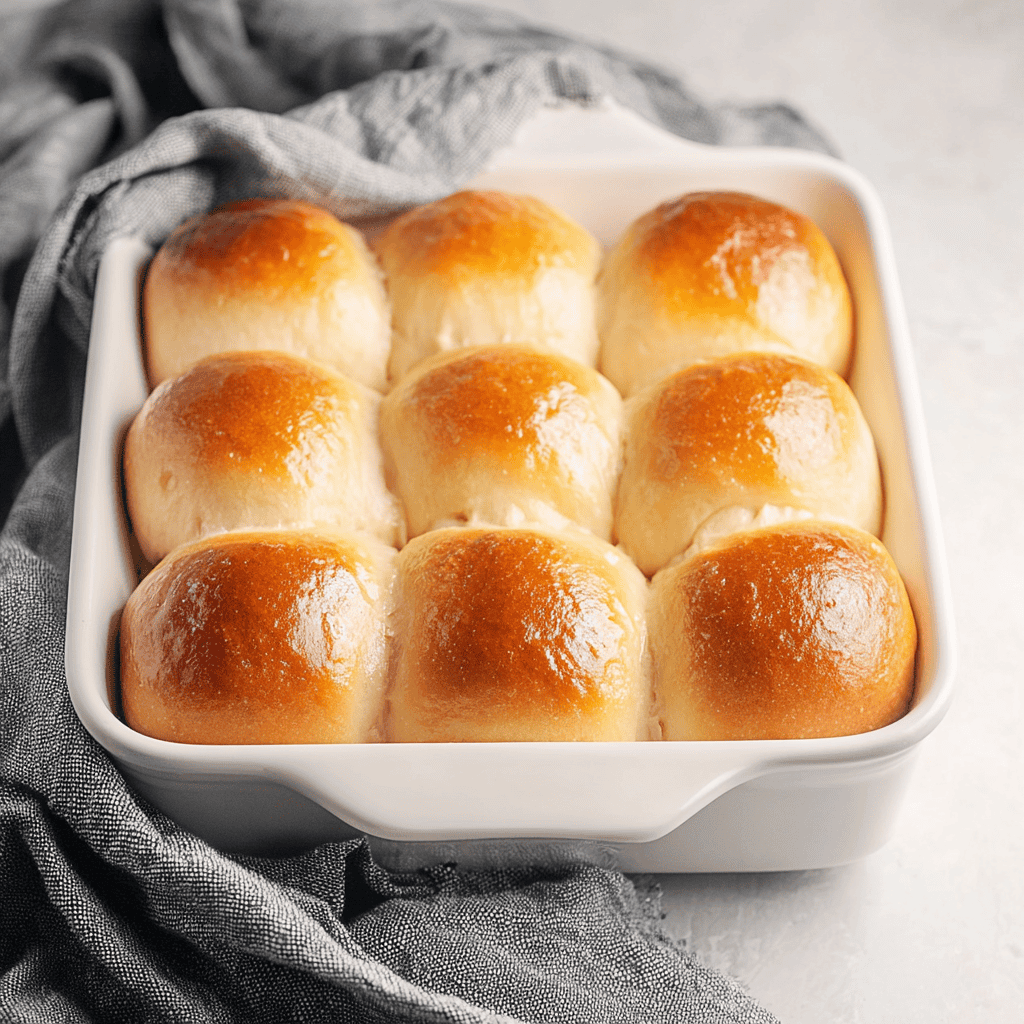
- The texture is dreamy: pillowy inside, gently bronzed outside, perfect for butter, honey, or sliders.
- It slides into your routine, from ready meals for 2 nights to weekend gatherings.
- It’s flexible for meal prep—bake and freeze for grab-and-go sides that work with low calorie high nutrition meals.
What Makes This Recipe Special?
The sourdough discard adds flavor without demanding a slow, all-day rise. You still get a whisper of complexity—the kind you taste more in the finish than the first bite—while instant or active dry yeast takes care of the lift. Melted butter brings tenderness. A simple egg wash gives that shiny golden top that makes you feel like you did something fancy. Because the formula is balanced, the dough is soft but not sticky, springy but not tough. It’s everything you want in a roll you’ll eat warm with dinner, cool and slice for mini sandwiches, or pack for premade lunch meals when the day gets chaotic.
Bonus: Discard rolls are incredibly forgiving. If your kitchen runs cool, they’ll just take a little longer. If your starter is a bit tangier this week, the sugar rounds it out. You can even shape them, refrigerate overnight, and bake fresh for brunch—very best meals to prep energy for people who like waking up to the smell of bread.
Ingredients
All-Purpose Flour: The everyday hero. It builds enough structure for a soft-but-sturdy roll. If you prefer extra chew, swap in a bit of bread flour, but all-purpose keeps things tender and versatile.
Active Dry Yeast: Your fast lift. The yeast handles the bulk of the rise so you’re not waiting all day. Make sure it foams when proofed—no foam, no party.
Warm Water or Milk: Warm liquid wakes the yeast and hydrates the dough. Water keeps the flavor clean; milk adds a touch more tenderness and richness. I use milk when I want ultra-soft dinner rolls and water when I want a slightly lighter bite.
Sourdough Discard: The secret sauce. Even unfed, it lends tang, aroma, and color. Use discard that’s recently removed from the jar—not weeks-old and overly acidic. If it smells sharp, a teaspoon more sugar balances it.
Granulated Sugar: Just enough to keep the yeast lively and the flavor round. It doesn’t make the rolls sweet; it makes them balanced.
Unsalted Butter: Melted butter softens the crumb and enriches the flavor. You can sub olive oil for a different vibe and to fit low fat meal delivery style goals—use a little less for a leaner roll.
Salt: Essential for flavor. Bread without salt tastes flat; don’t skip it.
Egg for Wash: The glossy top is optional but irresistible. For an egg-free finish, brush with milk or a little melted butter right after baking.
Personal Tips and Brands: I grab a good-quality all-purpose flour (King Arthur or your store’s unbleached brand). For yeast, check the expiration date—old yeast equals dense rolls. A digital scale makes measuring easy, but cups work fine.
Don’t Do This: Don’t scorch the liquid; very hot water or milk can kill yeast. Don’t add all the flour at once—doughs vary with humidity. Don’t rush the rise in a too-hot oven (we’ve all tried the “warm oven proof” trick and cooked the bottoms). Be patient; dough rewards you for it.
How to Make It Step-by-Step
- Proof the yeast. Warm the water or milk until just warm to the touch—about 105–110°F. In a large bowl, stir in the sugar and sprinkle the yeast over. Wait 5–10 minutes until it turns creamy and foamy. If nothing happens, start over with fresh yeast. Trust me, baking with sleepy yeast is heartbreak in a bowl.
- Build the base. Whisk in the sourdough discard until the mixture looks like a pale, bubbly batter. Stir in the melted butter and salt. The bowl will smell faintly tangy and a little buttery—already cozy.
- Add the flour. Mix in the flour gradually, a cup at a time, until a shaggy dough forms. You’re aiming for soft and slightly tacky, not a dry lump. If the dough looks too sticky to handle, dust in a tablespoon of flour at a time. If it’s stiff, add a splash of warm liquid.
- Knead to smooth. Turn the dough onto a lightly floured counter and knead for 8–10 minutes. Push, fold, turn—repeat. It should transform from shaggy to satiny and spring back when poked. You’ll feel the dough tighten and relax, like it’s finding its rhythm. This part is strangely therapeutic and the dough is forgiving if you’re still learning.
- First rise. Place the dough in a greased bowl, turning once to coat so it won’t dry out. Cover with a towel and let rise in a warm, draft-free spot until doubled, about 60–90 minutes. Ideal dough weather feels like a summer day, not a sauna. I like the microwave trick: heat a cup of water until steamy, then set the covered bowl inside (microwave off) to create a warm “proofing box.”
- Divide and shape. Punch down gently to deflate. Turn the dough out and divide into 8–12 pieces, depending on how large you like your rolls. For super even sizes, weigh the dough and divide by your target number. Tuck edges under to make tight little balls—cupping your hand and rolling against the counter works wonders.
- Pan and second rise. Arrange the balls in a greased 9×13-inch pan for pull-apart rolls, or space them on a parchment-lined sheet for separated rolls. Cover and let rise again until puffy, 30–45 minutes. If you press a finger gently into a roll, the dent should slowly spring back. That’s your “bake me” signal.
- Preheat and finish. Preheat the oven to 375°F (190°C). Brush the tops with beaten egg for shine, or with milk for a soft matte look. Sprinkle with sesame or poppy seeds if you’re going fancy. The kitchen will smell like a bakery already—dangerously good.
- Bake to golden. Bake 20–25 minutes, rotating the pan once for even color. The tops should be deep golden, and the internal temp should read around 195°F if you’re checking. When you tap a roll, it should sound a little hollow. That sound is joy.
- Brush and cool. If you love a soft, enriched finish, brush the hot rolls with a little melted butter. Let them cool just enough that you don’t burn your fingers. Then tear one open. Steam should curl up and the crumb will look like fine lace. Taste test is required—chef’s rights.
Lessons I Learned: Once I tried to speed the second rise in a warm oven and partially baked the bottoms. Another time I added too much flour because the dough felt sticky—later the rolls were tight. Now I stop when the dough is soft and barely tacky, and I trust the rises. Patience makes the fluff.
Encouraging Improvisation: Want dinner buns? Shape bigger and bake a touch longer. Want slider rolls for healthy boxed meals? Make them smaller. Mix in herbs with the flour. Stuff a few with a tiny cube of mozzarella for oozy surprise rolls. Have fun.
Tips for Best Results
Keep the dough soft. Soft dough makes soft rolls. If it sticks lightly to your fingers, you’re on the right track.
Mind the temperature. Warm, not hot, liquid and a cozy rise spot make the yeast happy.
Use the windowpane test. Stretch a small piece of dough; if it gets thin and translucent without tearing, you’ve kneaded enough.
Don’t skip the second rise. That last puff is where the tenderness blooms.
Bake on the middle rack for even color. If tops brown too fast, tent with foil for the final minutes.
For best meal prep healthy routines, bake and freeze in pairs so you can reheat just enough for healthy eating for two nights.
Ingredient Substitutions & Variations
Olive Oil Instead of Butter: A slightly different flavor and a hint more chew—great with soup-and-salad dinners.
Half Whole Wheat: Swap in 1½ cups whole wheat flour and 1½ cups all-purpose for a heartier roll. Add 1–2 teaspoons extra water if the dough feels stiff.
Herb Garden Rolls: Stir 1–2 teaspoons dried rosemary, thyme, or Italian seasoning into the flour. The aroma is next-level.
Cheesy Center: Press a small cube of mozzarella or cheddar into each ball of dough and seal. Bake as directed for melty, irresistible centers.
Garlic Butter Finish: Brush hot rolls with melted butter mixed with a pinch of garlic powder and chopped parsley.
Seeded Tops: Sesame, poppy, or everything seasoning add crunch. Perfect if you’re assembling slider sandwiches to pair with high protein meals like grilled chicken or turkey meatballs.
Dairy-Free: Use olive oil and brush with oat milk. You still get lovely color and a tender crumb.
Serving Suggestions
Serve warm with salted butter and honey for a simple treat that tastes like weekend mornings.
Split and stack with turkey slices, avocado, and tomato for mini sandwiches that fit meal prep microwave lunches.
Make breakfast sliders with soft-scrambled eggs and cheddar for a cozy nod to full english breakfast vibes without the heavy lift.
Pair with roasted chicken and a big salad when you’re balancing high protein high carb low fat meals.
Build a soup night plate: tomato basil or chicken noodle plus two warm rolls for cheap meal plans for 2 that still feel special.
Pairing Ideas (Drinks, Sides, etc.)
Drinks: Iced tea with lemon, sparkling water with citrus, or a cinnamon-spiked hot cocoa on chilly nights. The light sweetness of the rolls loves something crisp or cozy.
Sides: Tossed green salad, roasted carrots, sheet-pan broccoli, or garlicky sautéed mushrooms. For meal planning chicken nights, brush rolls with garlic butter to match.
Proteins: Grilled chicken breasts, turkey meatballs, or skillet beans with herbs. If you lean into high protein pre made meals, warm a roll alongside to round out the plate.
How to Store and Reheat Leftovers
Cool completely on a wire rack so moisture doesn’t make the bottoms soggy. Store at room temperature in an airtight container for up to 3 days. For up to 5 days, refrigerate, then warm before serving.
To reheat, bake at 350°F for 5–8 minutes until the crust is lively and the centers are steamy. A quick 15–20 seconds in the microwave softens them, but the oven brings back that just-baked magic. For ready made protein meals nights, slice rolls and toast lightly so they hold up to saucy fillings.
Make-Ahead and Freezer Tips
Prep to the second rise, cover the shaped rolls, and refrigerate overnight. Bring to room temp and let them finish puffing before baking in the morning. This is peak weekend brunch energy and makes the house smell like a bakery.
For longer storage, bake, cool, and freeze in freezer-safe bags for up to 3 months. Reheat in a 325°F oven for 10–12 minutes. If you’re juggling a busy week of best meal prep plans, freeze in packs of two so it’s easy to pull exactly what you need for meals for 2 delivered vibes at home.
Common Mistakes to Avoid
Adding too much flour. Sticky isn’t always wrong; soft dough bakes into soft rolls.
Rushing the rise. If the dough hasn’t doubled, it hasn’t finished its workout. Give it time.
Overheating the liquid. Hot liquid can sabotage the yeast before you even start.
Skipping salt. It’s there for flavor and structure—bread needs it.
Crowding the pan. If the rolls are crammed, the sides can steam instead of brown. Space them or use a bigger pan for crisper edges.
Frequently Asked Questions (FAQ)
What is sourdough discard, and can I use any kind?
Discard is the portion of starter removed before feeding. Use unfed, recently discarded starter that smells pleasantly tangy, not harsh. If it’s very acidic or runny, feed your starter and try again tomorrow.
Can I make these without commercial yeast?
For this quick style, yeast is key. The discard brings flavor, while the yeast guarantees a reliable rise. If you want to bake with starter alone, plan for a longer fermentation and different ratios.
Can I refrigerate the dough overnight?
Yes. Shape into rolls after the first rise, cover well, and refrigerate. Let them come to room temp and finish puffing before baking for fresh morning rolls.
Why are my rolls dense?
Possibilities: yeast wasn’t active, the dough was too dry, or the rises were too short. Aim for soft dough, a warm proof, and patience.
Can I use whole wheat flour?
Absolutely. Replace up to half the flour with whole wheat. Add a splash more liquid if the dough feels tight.
How do I get shinier tops?
Use an egg wash before baking. For a soft matte finish, brush with milk. For a buttery sheen, brush with melted butter right after baking.
Cooking Tools You’ll Need
- Large mixing bowl and sturdy spatula or dough whisk
- Measuring cups and spoons (or a digital scale if you like precision)
- Stand mixer with dough hook (optional, but lovely for hands-free kneading)
- Bench scraper for tidy dividing
- 9×13-inch baking pan or parchment-lined sheet pan
- Clean kitchen towel or plastic wrap for proofing
- Pastry brush for egg or butter wash
- Wire rack for cooling
Final Thoughts
There’s something deeply satisfying about rescuing a jar of sourdough discard and turning it into trays of golden rolls. It feels thrifty and generous at the same time—like you’re feeding your household and your inner baker. These Sourdough Discard Rolls have become my quiet celebration recipe: after long days, on cozy Sundays, and any time a pot of soup needs company. They fold into healthy eating for two nights, support a protein eating plan when you pair them with chicken or beans, and bring that bakery smell to your kitchen without a day-long project.
If a warm roll and a pat of butter can fix a mood—and I truly believe they can—this is the recipe to keep on repeat. It’s flexible, forgiving, and endlessly customizable. And when you tear one open and watch the steam curl into the room, you’ll know exactly why I keep a jar of starter on the counter.
If you enjoyed this recipe, don’t forget to save it on Pinterest or share it with a friend!
Sourdough Discard Rolls
Ingredients
- 1 cup sourdough discard (unfed)
- 3 cups all-purpose flour
- 1/2 cup warm milk
- 2 tablespoons granulated sugar
- 1 teaspoon salt
- 2 1/4 teaspoons active dry yeast (1 packet)
- 1/4 cup unsalted butter, softened
- 1 large egg (for egg wash or dough as desired)
- melted butter, for brushing (optional)
Instructions
- In a small bowl, dissolve sugar in warm milk (105–110°F). Sprinkle yeast over the top and let stand 5–10 minutes until foamy.
- In a large mixing bowl, whisk together flour and salt.
- Add the yeast mixture, sourdough discard, softened butter, and egg (if adding to dough). Mix until a shaggy dough forms.
- Knead on a lightly floured surface (or with a dough hook) for 8–10 minutes until smooth, elastic, and slightly tacky.
- Place dough in a greased bowl, turn to coat, cover, and let rise in a warm spot until doubled, 60–90 minutes.
- Punch down, divide into 12 equal pieces, and shape each into a tight ball.
- Arrange in a greased 9×13-inch pan (for pull-apart rolls) or on a parchment-lined sheet pan. Cover and let rise until puffy, 30–45 minutes.
- Preheat oven to 375°F (190°C). Brush tops with beaten egg for shine (or milk for a softer finish).
- Bake 20–25 minutes, rotating once, until golden brown and the centers register about 195°F.
- Brush hot rolls with melted butter if desired. Cool slightly on a wire rack and serve warm.


