Introduction
I learned this casserole on a Tuesday that started heroic and ended hungry. The soccer practice went long, the dishwasher blinked a rude error code, and my pantry looked like it had been pillaged by tiny raccoons in sneakers. I needed something that felt like a hug, used what I had, and didn’t ask for a culinary diploma. Enter Cheesy Green Chile Rice Casserole, the skillet-to-oven wonder that has saved more than a few easy weeknight dinners around here and fits right into those quick family meals we all crave when the day has been A Lot.
The first time I made it, I had leftover rice, a can of mild green chiles, and two open bags of cheese that were definitely giving “use me or lose me” energy. I whisked in some sour cream, cracked a couple of eggs, and — oops — dropped a spoon on the floor mid-stir. The dog was thrilled. I wasn’t. But even with my kitchen chaos, the oven delivered a golden, bubbly pan that smelled like a taco shop and a cozy diner had a baby. Creamy. Peppery. Cheesy. Exactly the healthy comfort food I needed, friendly to my budget-friendly recipes goals, and perfect for best meals to prep when I want leftovers for tomorrow’s meal prep microwave lunches.
What I love most is how this casserole flexes. Keep it vegetarian and scoop it beside fajitas. Fold in shredded halal rotisserie chicken for a boost that plays nicely with a protein meal plan or even those nights you’re trying to build high macro meals without cooking a full main. Swap in cauliflower rice for a lighter twist that nods to a keto meal plan or even no prep keto meals if you’ve got riced cauliflower in the freezer. It’s endlessly customizable, totally forgiving, and the kind of dish that wins silent applause when it hits the table.
To be real, it’s also a pantry magician. The ingredients are simple, the method is quick, and the payoff tastes like you planned. And yes, it reheats like a champ, so you can tuck it into lunch boxes as your own version of ready made protein meals minus the price tag. Comfort, convenience, and a little kick — that’s my kind of Tuesday night triumph.
Why You’ll Love This Recipe
- Creamy, cheesy, and just a little zippy from green chiles — it truly feels like a hug in a pan.
- Uses pantry staples, which keeps it squarely in budget-friendly recipes territory.
- Flexible enough to be a side or the main event; add beans or chicken to support high protein meals.
- A reliable make-ahead star for best dinner prep meals and stress-free hosting.
- Family-friendly with mild chiles, yet easy to dial up the heat for spice lovers.
- Slices cleanly, reheats beautifully, and packs well for no prep healthy lunches.
What Makes This Recipe Special?
This casserole is the definition of low drama, high reward. The eggs and milk bind the rice into sliceable, custardy layers, while sour cream makes everything plush without becoming heavy. Two cheeses tag-team the texture — Monterey Jack gives that melty pull, cheddar brings sharpness so it never tastes flat. Canned green chiles are the unsung heroes: mild, aromatic, and a touch smoky. You’ll smell that warm chile perfume the moment you crack the can, and it deepens as the casserole bakes.
Another little magic trick is salt distribution. Rice can be a bit of a sponge. Seasoning both the base and the topping ensures every bite is flavorful, not just the cheesy surface. And because there’s no alcohol and no pork, it fits easily into a halal-friendly table. If you’re aiming at a hello fresh low calorie menu vibe, you can lighten the dairy and add extra veggies, and it still lands like comfort.
I didn’t expect it to be this forgiving, but it is. Overcooked rice? This casserole breathes it back to life. Shy fridge? It loves leftover corn, black beans, or a handful of spinach. Want to mimic those high protein ready made meals without the plastic tray? Add shredded chicken or turkey and suddenly you’ve got a cozy, complete plate ready for your protein eating plan.
Ingredients
Cooked white rice
Use what you have — day-old rice is perfection because it’s a little drier and holds texture. Long-grain stays fluffy; medium-grain gets slightly creamier. If you’re aiming for high carb high protein low fat meals, measure your portions and add lean protein on the side.
Canned diced green chiles
Choose mild for family-friendly flavor or hot if you like a kick. They bring gentle heat and that roasted-chile aroma without overpowering the dish. Drain lightly so the casserole doesn’t get watery.
Sour cream
This is your plush factor. It adds tang and a velvety texture that keeps the rice from feeling stiff. Greek yogurt works if you want a lighter touch or more protein to support high protein pre made meals energy at home.
Monterey Jack or mozzarella
Melty, stretchy, and neutral — a great base cheese. Pepper Jack adds a whisper of heat if your crew can handle it.
Cheddar cheese
For sharpness and depth. I love a medium or sharp cheddar so the casserole tastes cheesy, not just creamy. Freshly shredded melts better, but pre-shredded saves time on busy quick family meals nights.
Eggs
They set the casserole so you get lovely squares, not a scoop of chaos. If you skip them, the texture will be looser but still tasty.
Milk
Thins the base just enough so it bakes into a custard rather than a brick. Any dairy from whole to 2% works; plant-based milks can step in if unsweetened and full-fat.
Salt and pepper
Season generously. Rice is humble and appreciates attention.
Garlic powder and onion powder (optional)
A quick way to layer flavor when you don’t want to chop. If you do add onions, go for finely diced or sautéed until sweet.
Optional add-ins
Scallions for brightness, corn for sweetness and texture, black beans for protein, or diced bell pepper for color. For a halal protein lift, stir in shredded chicken or turkey — excellent for low calorie chicken meal prep.
Tiny don’t-do-this warnings from my own oops collection:
Don’t add watery veggies raw (like zucchini) without sautéing off moisture. Don’t go too heavy with milk or you’ll get a soggy center. And don’t forget to let it rest — five minutes makes clean slices and saves your tongue.
How to Make It Step-by-Step
- Preheat your oven to 350°F (175°C). Grease an 8×8 or 9×9 baking dish. I use a touch of butter or oil spray — just enough so the corners don’t cling.
- In a large mixing bowl, break up the rice with your fingers so there aren’t any clumps. This helps the custard base sneak into every nook. Cool rice helps here; warm rice can scramble the eggs early.
- Add the green chiles. The scent right away is soft and roasted, like a mild salsa without the tang. If you like more color, fold in a handful of corn or finely diced red bell pepper.
- Whisk together sour cream, milk, and eggs in a separate bowl until smooth and glossy. Sprinkle in salt, pepper, and those optional garlic and onion powders. The mixture should taste lightly seasoned — remember it’s flavoring a lot of rice.
- Stir in half of the cheeses to the wet mixture. That’s the secret to getting cheesy flavor all the way through, not just on top. The bowl will look luxurious and a little stretchy.
- Pour the wet mixture over the rice and chiles. Fold gently with a spatula until everything is completely coated. You’ll hear that soft, sticky sound as the rice drinks in the custard. If it looks dry, trickle in a tablespoon or two more milk.
- Transfer to the prepared baking dish and smooth the top. Scatter the remaining cheese over the surface like confetti — edge to edge for full coverage and maximum golden-bubbly joy.
- Bake uncovered for 30–35 minutes. Halfway through, the house will smell like a Tex-Mex diner, buttery and savory, with that irresistible toasted-cheese note. The edges will brown first, the center will puff slightly, and you’ll see gentle bubbles around the perimeter.
- Check doneness by giving the pan a light shake. The center should be set and barely jiggly. If your oven runs cool, add a few more minutes. If the top is browning too quickly, tent with foil for the last stretch.
- Rest 5–10 minutes. This is when the custard finishes setting and the slices behave. I know, it’s tough. Distract yourself by chopping cilantro or scallions.
- Garnish and serve. A sprinkle of cilantro or green onion adds color and freshness. The first scoop should be creamy but sliceable, with stretchy cheese and flecks of chile in every bite. If you’re turning it into a main, top with shredded halal chicken and a spoon of salsa for an at-home version of high protein microwave meals that’s way more delicious.
Lessons learned the messy way:
One time I forgot to break up the rice, and a scoop looked like a cheese-draped rice mountain. Still good, not pretty. Another time I added way too much milk. The flavor was there, but the middle was loose. Measure, but trust your eyes — the mixture should be creamy, not soupy. And once, I put it under the broiler “for just a sec.” Burned cheese happens fast. Watch it like a hawk if you broil.
Tips for Best Results
- Use day-old rice for the best texture; it won’t clump or go mushy.
- Salt the custard mixture generously so the whole pan tastes seasoned.
- Mix some cheese into the base and reserve the rest for the top. Layers of flavor, layers of melt.
- Add moisture-balancing veggies (corn, beans) rather than watery ones unless you sauté first.
- Rest the bake before serving; it goes from tasty to perfect in those five minutes.
- For best meal prep healthy, swap half the sour cream for Greek yogurt and use reduced-fat cheese while keeping a little full-fat for melt.
- If you’re building high protein high carb low fat meals, pair a square with grilled chicken and a big salad.
Ingredient Substitutions & Variations
- Lighter dairy: Half Greek yogurt, half sour cream keeps richness with added protein for your protein eating plan.
- Different cheeses: Pepper Jack, mozzarella, or a smoked cheddar change the personality in fun ways.
- Brown rice: Earthier flavor and a bit more chew; fully cook it first.
- Cauliflower rice: For a low-carb twist that plays into a high protein keto meal plan; drain excess moisture before mixing.
- Beans: Black beans or pinto beans make it hearty and push it toward ready made protein meals vibes (but homemade).
- Veggie boost: Corn, diced bell peppers, chopped spinach, or sautéed mushrooms add color and fiber, perfect for low calorie high nutrition meals.
- Spicy version: Choose hot green chiles or add minced jalapeño.
- Dairy-free: Use plant-based sour cream, milk, and cheese. Choose full-fat varieties for the best melt.
Serving Suggestions
Spoon this beside grilled chicken or steak fajitas and a crisp salad for a plate that’s both cozy and balanced. Add a dollop of salsa or a drizzle of crema for brightness. For brunch, cut warm squares and top with soft-scrambled eggs — a playful nod to a lighter full english breakfast moment without going heavy.
For healthy meal plans for two, portion into small ramekins and bake as individual sides — cute, practical, and perfect for date-night at home. And when you’re staring down a long week, tuck squares into containers with shredded chicken and roasted veggies to create your own best meal prep plans.
Pairing Ideas (Drinks, Sides, etc.)
- Drinks: Lime sparkling water, iced tea with a splash of pineapple juice, or a citrusy mocktail.
- Sides: Chili-lime corn, cumin-roasted carrots, or a tomato–avocado salad.
- Sauces: Salsa verde, pico de gallo, or a yogurt-lime drizzle.
- Proteins: Halal rotisserie chicken, grilled turkey cutlets, or black bean patties for vegetarian nights.
How to Store and Reheat Leftovers
Cool completely, then cover and refrigerate for up to 4 days. For premade lunch meals, cut into squares and store individually. Reheat in the microwave in 60–90 second bursts or bake covered at 350°F until warmed through. If the edges seem dry, add a spoonful of milk before reheating to revive creaminess.
For the crisp-cheese lovers, give reheated pieces a quick minute under the broiler — but watch closely. If you’re packing lunch for work, this dish is clutch for no prep healthy lunches that feel like real food, not a compromise.
Make-Ahead and Freezer Tips
Assemble up to a day in advance, cover tightly, and refrigerate. Bake straight from the fridge, adding 5–10 minutes. You can also bake it, cool, and store for a few days — the slices get even tidier.
To freeze, wrap tightly and freeze up to 2 months. Thaw overnight in the fridge, then reheat covered at 350°F until hot. It’s a nice backup for nights you’re tempted by low fat meal delivery but want something homey and more affordable.
Common Mistakes to Avoid
- Soupy center: Too much milk or watery veggies will loosen the custard. Measure and sauté high-water add-ins.
- Bland bites: Under-seasoning the base leaves the casserole flat. Taste the custard.
- Clumpy rice: Break it up before mixing so the sauce coats every grain.
- Burned top: If the cheese browns too fast, tent with foil for the last stretch.
- Skipping rest time: That quick cooldown makes cleaner slices and better texture.
Frequently Asked Questions (FAQ)
Can I make this ahead?
Yes. Assemble and chill up to 24 hours, then bake. Or bake, cool, and reheat later — the texture holds.
Is it spicy?
Not with mild chiles. For more heat, add hot chiles or minced jalapeño. You control the kick.
Can I use brown rice?
Absolutely. Make sure it’s fully cooked and a little dry for best texture.
How can I add protein?
Stir in shredded halal chicken or turkey, or fold in black beans. That turns it into a cozy main that rivals best high protein frozen meals — but fresh.
Can I make it dairy-free?
Use plant-based sour cream, milk, and cheese. Choose full-fat versions so it still melts and sets.
Do I need the eggs?
Eggs help bind. Without them, the casserole is looser and more scoopable but still delicious.
Will it work with cauliflower rice?
Yes. Sauté or microwave to drive off moisture first. It’s a friendly option for a no prep keto meals approach if you keep dairy moderate and add a protein.
Cooking Tools You’ll Need
- Mixing bowls
- 8×8 or 9×9 baking dish
- Whisk and spatula
- Measuring cups and spoons
- Can opener
- Knife and cutting board for optional veggies
- Oven mitts for that glorious bubbly exit
Final Thoughts
Cheesy Green Chile Rice Casserole is the dish I reach for when I want comfort now and ease later. It’s the rare recipe that forgives my “oops” moments, welcomes my substitutions, and still comes out golden and steady every single time. It slides into weeknights, potlucks, and quiet Sundays without demanding much, then delivers flavor that tastes like you planned it days in advance.
If you’re steering toward best meal prep healthy or just trying to keep dinner sane, this pan is a gift. Add chicken for those easy high protein high calorie meals after a long workout, or load it with beans and veggies for a meatless plate that’s still satisfying. Pack it up, reheat it, share it. It’s humble, happy-making food — and honestly, that’s everything I want on a Tuesday.
If you enjoyed this recipe, don’t forget to save it on Pinterest or share it with a friend!

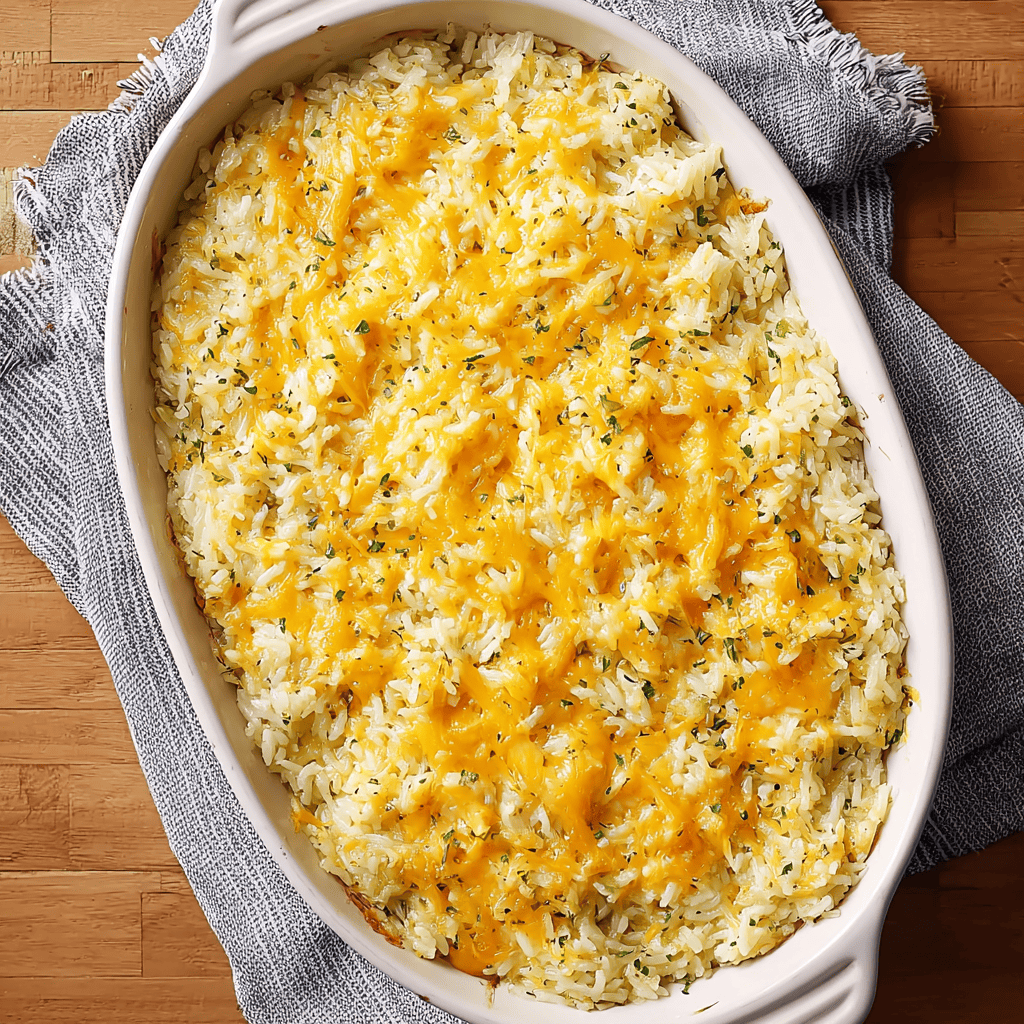
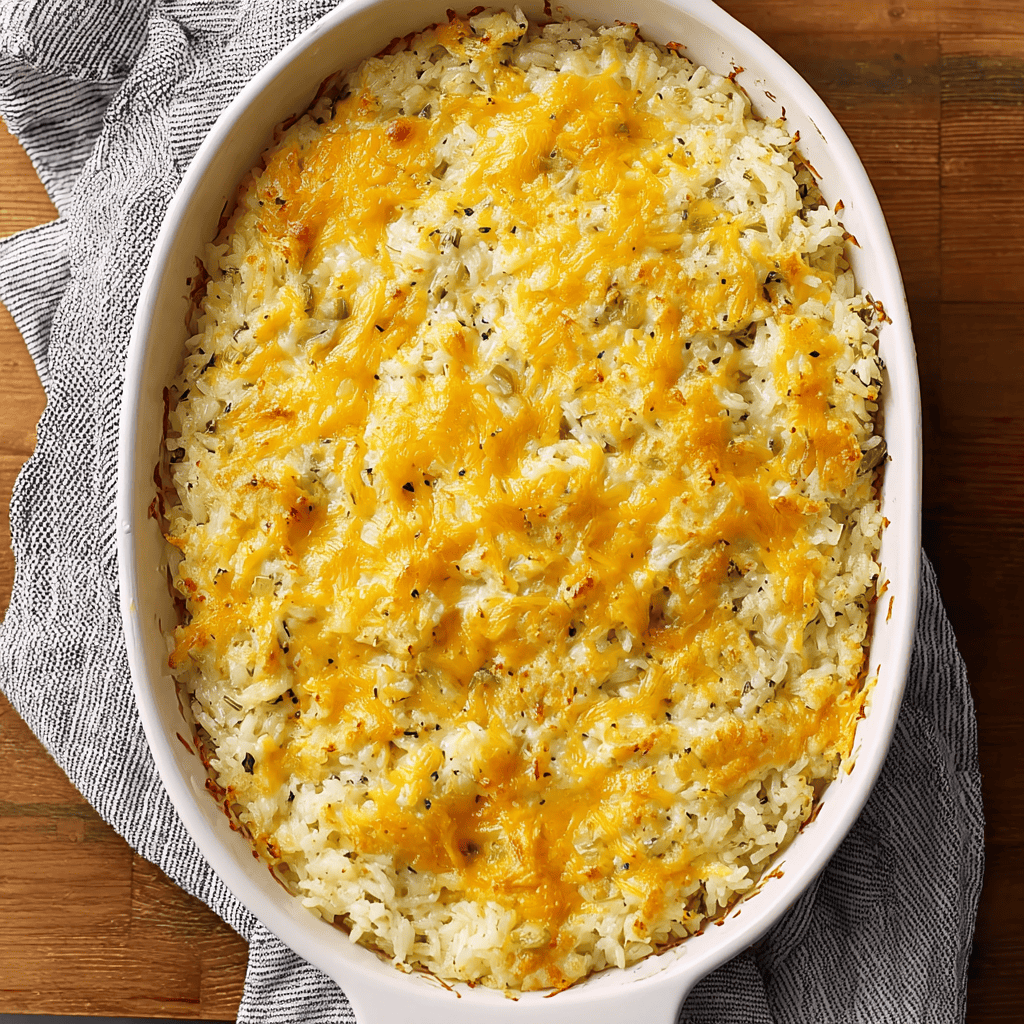
Cheesy Green Chile Rice Casserole
Ingredients
- 2 cups cooked white rice (day-old preferred)
- 1 (4 oz) can diced green chiles, drained
- 1 cup sour cream
- 1 cup shredded Monterey Jack cheese, divided
- 1 cup shredded cheddar cheese, divided
- 1/2 tsp garlic powder
- 1/2 tsp onion powder
- salt and black pepper, to taste
- 2 tbsp chopped fresh cilantro, for garnish (optional)
Instructions
- Preheat oven to 350°F (175°C). Grease an 8×8- or 9×9-inch baking dish.
- In a large bowl, break up the cooked rice so there are no clumps. Add green chiles, sour cream, garlic powder, onion powder, half of the Monterey Jack and half of the cheddar, plus salt and pepper. Stir until fully combined and creamy.
- Spread the mixture evenly in the prepared baking dish. Top with the remaining Monterey Jack and cheddar cheeses.
- Bake uncovered for 25–30 minutes, until the casserole is set and the top is melted and bubbly with light golden spots.
- Let rest 5 minutes for cleaner slices. Garnish with chopped cilantro if desired and serve warm.


