Introduction
The very first time I baked crescent rolls from scratch, the sun had already tucked itself behind the neighboring houses, and my kitchen smelled like warm milk and hope. I’d promised bread to go with a chicken soup that was supposed to qualify as healthy comfort food and also be fast enough for easy weeknight dinners. To be real, I didn’t plan well. The dough rested while I cleared homework off the table, the butter softened next to the stove, and my timer beeped exactly when the dog started begging for a walk. Chaos? Absolutely. Worth it? Every flaky, buttery bite.
Crescent rolls are that rare unicorn that fits so many moods. They can absolutely be part of quick family meals with roast chicken, slide into best dinner prep meals when you’re planning ahead, and even hold their own for a brunch spread that nods to a lighter full english breakfast vibe without being heavy. When I’m working within a protein meal plan, I use them as the “gentle carb” beside grilled chicken or turkey chili—hello, high protein high carb low fat meals. When the budget’s tight, these rolls feel like a tiny luxury that still fits into budget-friendly recipes because the pantry does most of the work.
The magic is in their personality. The outside turns golden and whisper-crisp, while the inside pulls apart into steamy layers that melt a pat of butter in a second. You get the soft sigh of yeast waking up, the barely-sweet finish that makes jam sing, and that warm, bakery smell that will make your neighbors “stop by” at suspiciously perfect timing. And yes, I’ve had a few “oops” moments—once I forgot the salt (bland clouds), and once I proofed the dough on top of an oven that was a touch too hot (RIP, yeasty hopes). But those little disasters turned into better habits and better rolls.
If you’ve been searching for a recipe that makes dinner feel special without demanding your whole day, these Homemade Crescent Rolls are it. They’re friendly to meal planning chicken nights, perfect to serve alongside low calorie high nutrition meals, and versatile enough to transform leftovers into tiny sandwiches for no prep healthy lunches. Ready to bake something that feels like a hug?
Why You’ll Love This Recipe
- Big bakery payoff with simple steps. You’ll use everyday ingredients to get plush, buttery rolls that look like you stopped at a fancy bread shop.
- Flexible for real life. Make the dough ahead, shape and chill, or freeze unbaked for your own “best high protein frozen meals” bread side when the week goes sideways.
- Crowd-pleasing comfort. These rolls charm picky eaters and bread snobs alike, making them perfect for quick family meals or ready made protein meals you build at home.
- Play-well-with-others energy. They’re delicious with soups, roasts, salads, and breakfast spreads—ideal for healthy meal plans for two or a full table.
- Budget-friendly elegance. Flour, milk, butter, yeast—basic pantry heroes that still deliver restaurant-level results.
- Soft, layered texture. The dough is enriched but not heavy, so it pairs beautifully with high macro meals where you want balance.
What Makes This Recipe Special?
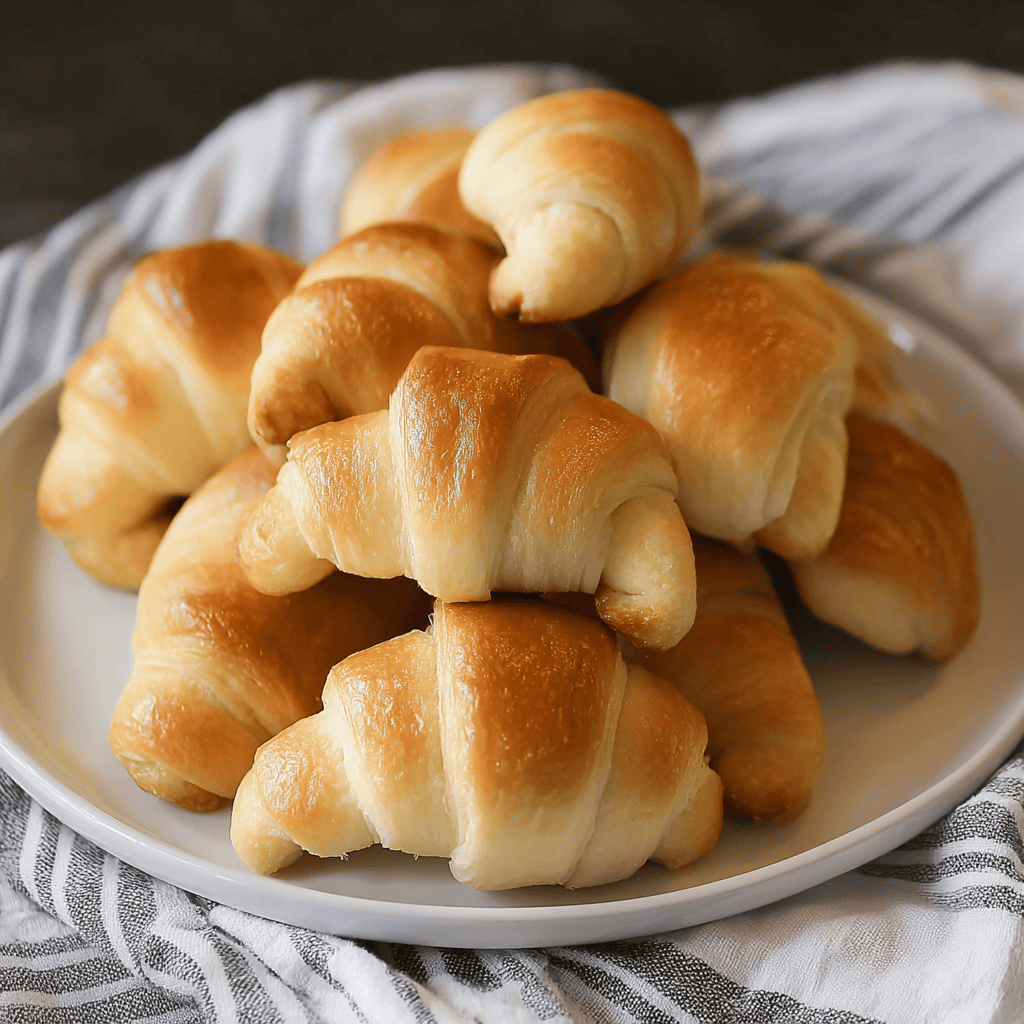
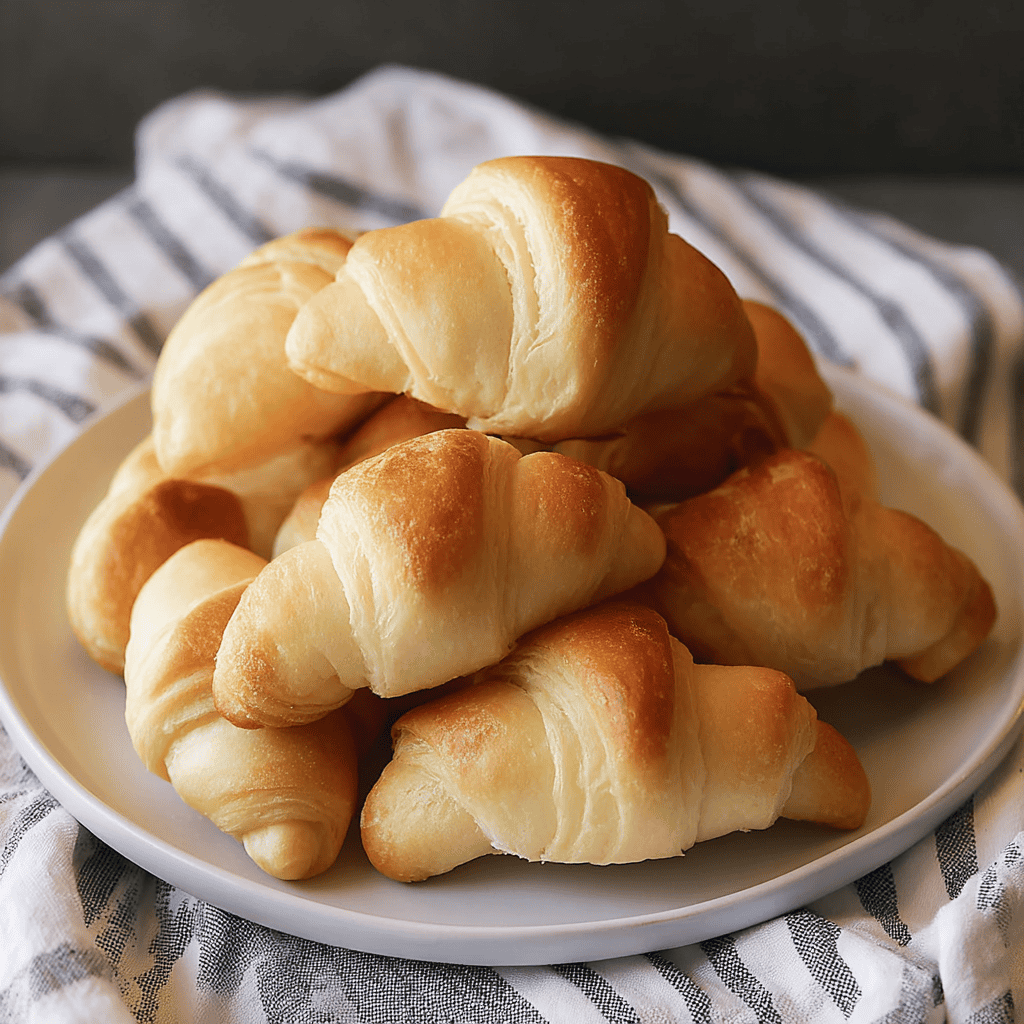
There are crescent rolls, and then there are crescents that feel like little clouds you can tear open with two fingers. This recipe leans on a few small moves that change everything. Warm milk wakes up the yeast gently, a touch of sugar feeds it just enough, and softened butter beats into the dough early so it carries through every layer. A double rise develops flavor and tenderness without complicated laminating techniques. Rolling the dough into circles and cutting wedges means each roll gets a natural taper for that signature shape and a beautiful swirl of layers.
I also bake them at 375°F—hot enough to puff and brown, but not so hot that the bottoms darken before the centers are done. And because we keep a halal kitchen, I use real butter and avoid any pork-derived shortenings or flavorings. Butter is classic here, and it makes the rolls taste like the ones your favorite aunt brings to Thanksgiving. You’ll find tips below for making them work with different goals, whether you’re keeping things lighter for a hello fresh low calorie menu vibe or planning hearty spreads that complement high protein meals.
Ingredients
- Whole milk, warmed to 100–110°F
Gently warmed milk is the yeast’s happy place. It starts fermentation quickly and adds richness that water simply can’t. I use a thermometer because “warm” can be sneaky; too hot and you’ll shock the yeast, too cool and you’ll wait forever. - Active dry yeast
Classic and reliable. One packet equals 2¼ teaspoons. If you prefer instant yeast, it works too—see tips for adjusting rise time. - Granulated sugar
A little sweetness to feed the yeast and round the flavor. You’ll taste it as a soft, pleasant finish, not a dessert-level sweetness. - Large egg
Adds tenderness and color. Whisk it well so it integrates smoothly into the dough. - All-purpose flour
AP flour keeps these rolls soft and fluffy. If you want a slightly chewier finish, you can swap a portion for bread flour. Keep a little extra for rolling. - Salt
Do not skip. Salt reins in yeast activity, deepens flavor, and makes the rolls taste like something you dreamed about during a long meeting. - Unsalted butter, softened, plus melted butter for brushing
Softened butter kneads into the dough and turns each roll rich without greasiness. Brushing melted butter before and after baking delivers that bakery sheen. If you’re pursuing low fat meal delivery vibes at home, you can reduce the finishing butter a touch—but honestly, the brush of butter is what makes them irresistible.
Tips and tiny warnings:
- Don’t overheat the milk. Anything above 115°F risks hurting the yeast.
- Don’t pack the flour. Spoon and level or weigh it for consistent, pillowy dough.
- Don’t rush the rise. If your kitchen is cool, give the dough more time. Think of it as your bread’s little spa day.
- Want a slightly lighter roll for low calorie chicken meal prep nights? Brush with less butter and keep each portion modest—flavor remains, calories drop.
How to Make It Step-by-Step
- Wake the yeast
Warm the milk to 100–110°F. In a large bowl or the bowl of your stand mixer, combine warm milk, yeast, and sugar. Stir and let it sit until foamy, 5–10 minutes. The top should look like a latte gone wild. If nothing happens, your yeast may be old or the milk too hot or cold—start over. I’ve ignored the signs and baked sad rolls. Learn from me. - Start the dough
Add the egg, salt, softened butter, and about half the flour. Mix until a shaggy dough forms. It will look messy and optimistic. Keep adding flour a little at a time until a soft, slightly sticky dough gathers around the hook or your spoon. It should clear the sides of the bowl but still be soft to the touch. If it’s stiff, add a teaspoon of milk to loosen. - Knead to smooth
Turn the dough onto a lightly floured surface and knead for 8–10 minutes, or knead in a stand mixer with a dough hook for 5–7 minutes on medium. The dough will transform from sticky to silky, springing back when poked. You’re building gluten that traps steam and makes lofty layers. This step is oddly soothing—just you, the dough, and the promise of butter. - First rise
Place the dough into a greased bowl, turning once to coat the top so it doesn’t dry out. Cover with a clean towel or plastic wrap and let it rise in a warm, draft-free place until doubled, about 1 hour. I once tried to “speed it up” on top of a too-warm oven and the butter in the dough melted before it rose—oops. Warm, not hot, is the sweet spot. - Divide and roll
Punch the dough down to release extra gas. Divide in half. Roll each portion into a 12-inch circle on a lightly floured surface. Brush lightly with melted butter if you want ultra-buttery spirals. Using a pizza wheel, cut each circle into 8 wedges, like a pizza. The points should be clean so they tuck beautifully. - Shape the crescents
Starting at the wide edge, roll each wedge tightly toward the point. Give it a gentle curve as you place it, point-side down, on a parchment-lined sheet. This little curve is how crescents get their signature smile. If a point pops up while rising, tuck it back under before baking. - Second rise
Cover loosely and let the rolls rise 30–45 minutes, until puffy. They don’t need to double; you want them lively and airy. If they rise too long, they may over-proof and collapse in the oven. I set a timer because I’ve definitely wandered off and come back to giant marshmallows. - Bake to golden
Preheat the oven to 375°F (190°C). Brush the rolls with melted butter and bake 12–15 minutes, until the tops are golden and the bottoms lightly browned. Your kitchen will smell like a bakery and your heart will do a small cartwheel. If the tops brown too quickly, tent loosely with foil in the last couple minutes. - Finish and serve
Brush the hot rolls with a final sweep of melted butter for shine and flavor. Let them cool for a few minutes so the steam settles. Tear one open. Listen to that gentle sigh and watch butter disappear into the layers. Try not to burn your tongue. I frequently fail at this step.
Encouragement to freestyle:
- Add a sprinkle of flaky salt or everything bagel seasoning before baking.
- For best meals to prep, bake, cool, and freeze in zip-top bags; reheat straight from frozen.
- Turn leftovers into tiny sandwiches with roast turkey for high protein pre made meals that feel special without delivery.
Tips for Best Results
- Weigh your flour for consistency. If you’re using cups, spoon and level. Too much flour means dense rolls.
- Mind the milk temperature. A quick thermometer check prevents the heartbreak of dead yeast.
- Keep the dough soft. Slightly sticky dough bakes into plush rolls, which suit healthy boxed meals you build at home.
- Proof with patience. Dough needs time to relax; your schedule will forgive you.
- Brush before and after baking. It’s the difference between “nice” and “I made these?” levels of delicious.
- Bake on the center rack. Even heat equals even color.
Ingredient Substitutions & Variations
- Whole wheat swirl: Replace 1–1½ cups of AP flour with white whole wheat flour. This adds fiber and a gentle nuttiness that pairs well with honey at the table.
- Dairy adjustments: Use lactose-free milk and a plant-based butter that’s suitable for baking if needed. Halal-friendly as always.
- Herb-garlic glow-up: Stir 1 teaspoon garlic powder and 1–2 teaspoons chopped herbs into the dough, or whisk into the finishing butter. These turn ordinary dinners into best dinner prep meals instantly.
- Cheesy crescents: Sprinkle finely shredded cheddar or Parmesan over each wedge before rolling. They’re incredible with tomato soup and great for meal prep microwave lunches.
- Sweet breakfast version: Brush the circles with butter and cinnamon sugar before rolling, then drizzle with a quick glaze. Brunch dreams that nod to full english breakfast comfort without the heaviness.
- Mini-sandwich makers: Shape tighter, smaller crescents for sliders. Fill with roasted chicken or tuna salad to complement high protein ready made meals.
Serving Suggestions
These rolls are versatile little miracles. Serve warm with butter and honey next to roasted chicken or a pot of chili for quick family meals. Add them to a bowl of veggie-packed soup for low calorie high nutrition meals. Split and stuff with deli turkey and crisp lettuce for downsized sandwiches that slide into no prep healthy lunches. For a cozy night, I love them with a simple salad and a bowl of tomato-basil soup—honestly, it feels like a gentle hug on a plate.
Pairing Ideas (Drinks, Sides, etc.)
- Drinks: Sparkling water with lemon, iced tea, or a light apple cider. The bubbles cut the richness and make the butter taste brighter.
- Sides: Sheet-pan roasted veggies, creamy mashed potatoes, or a crunch-forward chopped salad.
- Extras: Whipped herb butter, honey butter, or apricot jam for a sweet twist.
How to Store and Reheat Leftovers
Cool completely and store in an airtight container at room temperature for up to 3 days. To bring back that just-baked softness, reheat in a 300°F oven for 5–7 minutes. You can microwave for 15–20 seconds if you’re racing the clock, especially for no prep healthy lunches, but the oven gives a better texture. If your rolls feel slightly dry on day two, brush with a whisper of melted butter before warming.
Make-Ahead and Freezer Tips
Make the dough through shaping, then refrigerate the unbaked crescents on a sheet pan (covered) for up to 24 hours. Bring to room temp and let them get puffy, 30–45 minutes, then bake. For long-term convenience, freeze the shaped, unbaked rolls on a tray until firm, then transfer to a freezer bag for up to 1 month. Bake straight from frozen at 350–360°F, adding 3–6 minutes; they rise a bit less but still come out tender and golden—great for stocking your own “best meal prep plans” bakery.
Common Mistakes to Avoid
- Overheating the milk. Anything too hot can silence yeast. Check temps.
- Compensating with flour. Sticky dough is normal; use lightly floured hands instead of dumping in extra flour.
- Skipping the second rise. It builds tenderness and height—don’t rush it.
- Baking too dark. Every oven runs differently; peek early at 12 minutes and rotate the pan if one side browns faster.
- Forgetting the salt. I’ve done it; the rolls look perfect but taste flat. Salt matters.
Frequently Asked Questions (FAQ)
Can I use instant yeast instead of active dry?
Yes. Mix instant yeast with the flour and keep the liquid and sugar the same. Rise times may be slightly shorter.
Why didn’t my dough rise?
Check yeast freshness and milk temperature. Yeast should foam in 5–10 minutes. If your kitchen is chilly, give the dough extra time or use your oven’s proof setting.
Can I make these ahead?
Absolutely. Shape and refrigerate overnight, then let rise at room temp before baking. This trick is great for holiday mornings when the oven is busy with ready made protein meals like roast turkey.
Can I add fillings?
Yes. Chocolate chips, jam, cheese, or pesto are all lovely. Keep fillings light so the rolls seal well.
How do I get perfectly golden tops?
Brush with butter before baking, rotate the pan halfway, and finish with a second butter brush right out of the oven.
Are these good for lighter menus?
They can be. Pair with lean proteins and vegetables for healthy eating for two, use smaller portions, and brush with a lighter hand of butter if needed.
Cooking Tools You’ll Need
- Large mixing bowl or stand mixer with dough hook
- Instant-read thermometer (super helpful for milk)
- Measuring cups and spoons
- Rolling pin and pizza wheel or sharp knife
- Two sheet pans lined with parchment
- Pastry brush for buttering and a clean towel for covering dough
Final Thoughts
There’s something quietly triumphant about pulling a tray of homemade crescent rolls from the oven on a Tuesday. The kitchen smells like a bakery, the table looks dressed up, and the first tear into a warm roll makes everyone a little more patient with life. These crescents promise big comfort without demanding perfection. They fit beside soups when you’re keeping things light, round out hearty dinners when you’re building high protein ready made meals, and turn leftovers into tiny, joy-filled sandwiches.
Bake them for holidays, bake them for best meal prep healthy weeks, bake them because butter on warm bread is still one of life’s great pleasures. And if your first batch isn’t picture-perfect? Same. You’ll still end up with soft, golden rolls that taste like home and make any meal feel complete.
If you enjoyed this recipe, don’t forget to save it on Pinterest or share it with a friend!

Homemade Crescent Rolls
Ingredients
- 1 cup whole milk, warmed to 100–110°F
- 2 1/4 teaspoons active dry yeast (1 packet)
- 1/4 cup granulated sugar
- 1 large egg
- 4 cups all-purpose flour (plus extra for rolling)
- 1 teaspoon salt
- 1/2 cup unsalted butter, softened
- 2 tablespoons unsalted butter, melted (for brushing)
Instructions
- In a large bowl, combine warm milk, active dry yeast, and granulated sugar. Stir and let stand 5–10 minutes until foamy.
- Add egg, salt, softened butter, and about 2 cups of flour. Mix to combine, then add remaining flour gradually until a soft, slightly sticky dough forms.
- Knead on a lightly floured surface 8–10 minutes (or 5–7 minutes in a stand mixer with a dough hook) until smooth and elastic.
- Place dough in a greased bowl, turn to coat, cover, and let rise in a warm spot about 1 hour, or until doubled in size.
- Punch down dough and divide in half. Roll each half into a 12-inch circle. Cut each circle into 8 wedges.
- Starting at the wide end, roll each wedge toward the point to form a crescent. Curve slightly and place point-side down on a parchment-lined baking sheet.
- Cover and let rise 30–45 minutes, until puffy.
- Preheat oven to 375°F (190°C). Brush rolls with melted butter and bake 12–15 minutes, until golden brown.
- Cool slightly, brush with more melted butter if desired, and serve warm.


